Have you ever wondered how to create an autoblog with WordPress that practically runs itself? If yes, then you’ve come to the right place.
Having a blog that auto-fills with fresh and relevant content is a dream come true. Well, autoblogging can this possible by automating the content aggregation and posting process.
But how to do it?
That’s where the autoblog plugin comes in handy. However, there are several plugins available in the market. And it’ll be a real hassle to pick the best one.
Don’t worry, here we’ve made a list of the best autoblog plugins for WordPress. Also, we’ll provide a detailed guide on how to create an autoblog with WordPress using one of the plugins.
So, let’s get started!
What’s an Autoblog? Benefits of Auto Blogging
Starting a blog is a good idea, but spending hours creating new posts every week takes a lot of work.
Now, imagine having a blog that automatically gathers and posts content without you having to write every single post yourself. That’s basically what an autoblog is.
An autoblog, short for “automatic blog,” automatically pulls content from other websites using plugins. These plugins fetch articles, videos, images, and other media from different sources, and then publish them on your blog.
The main idea is to keep your blog updated with fresh content without you having to spend hours creating it. It’s like having a team of writers working around the clock to keep your site fresh and updated.
Benefits of Auto Blogging
There are several benefits of auto blogging, let’s have a look at them.
- Time-Saving: With an autoblog, you save a lot of time because the plugins do most of the work for you. Useful if you run multiple blogs or have a busy schedule.
- Consistent Updates: An autoblog ensures your site is constantly updated with new content, keeping your audience engaged and coming back for more.
- Variety of Content: Autoblogging allows you to offer a wide range of content from different sources. Making your blog interesting and appealing to your audience.
- Monetization Opportunities: More content can lead to more traffic, which can increase your ad revenue or affiliate sales.
- Easy Management: Many plugins come with features that let you easily curate and control the content that gets posted, ensuring it aligns with your blog’s niche.
- Stay Current: By pulling in the latest news and updates, your blog remains relevant and informative, which is great for attracting and growing your audience.
Is autoblog right for you?
While autoblogging has many benefits, it’s not for everyone. It works best for those who want to keep their blogs active without investing too much time in content creation.
However, it’s essential to ensure that the content you’re pulling is legal to use and provides value to your readers. Overloading your blog with low-quality or irrelevant content can hurt your site’s reputation and SEO (Search Engine Optimization).
Best Auto Blogging Plugins for WordPress
So, you’ve decided to start autoblogging. Great choice!
To get started, you’ll need the right tools to help you automate the content-gathering and posting process. Luckily, there are several fantastic autoblogging plugins available for WordPress that can make this task a breeze.
These plugins vary in features and functionality, but all are designed to help you efficiently manage an autoblog.
Let’s take a closer look at some of the best autoblogging plugins for WordPress.
1. Feedzy
When it comes to autoblogging, Feedzy by Themeisle is one of the most popular and user-friendly plugins for WordPress. It’ll help you effortlessly import, curate, and display RSS feeds on your site.
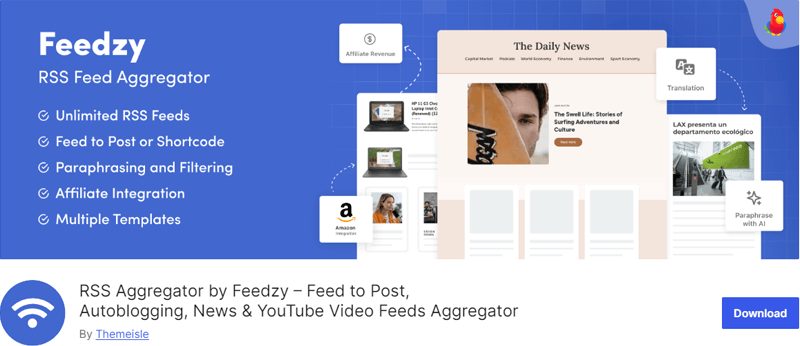
Moreover, you can easily filter and sort content to ensure only the most relevant articles appear on your blog. Plus, with its responsive design, the imported feeds look great on all devices, providing a smooth and engaging user experience.
Features of Feedzy:
- Comes with tons of customizable templates to match the blog with your site.
- Automatically import and aggregate unlimited RSS feeds from unlimited sources.
- Easy to display feeds anywhere on your site with shortcode.
- Also, bulk import and organize multiple feed sources of similar topics into Categories.
- Choose to translate the feed into various languages before import.
Pricing:
You can get this plugin for free from the official plugin directory of WordPress.org. Or install this plugin directly from your WordPress dashboard.
However, it also has a premium version that offers more robust features, which is available in different pricing plans.
- Personal: Costs $99 per year for 1 site.
- Developer: Costs $199 per year for 3 sites.
- Agency: Costs $399 per year for 50 sites.
2. RSS Aggregator
Another fantastic tool for autoblogging on WordPress is the RSS Aggregator. This plugin is one of the most popular solutions for importing, merging, and displaying RSS feeds on your website.
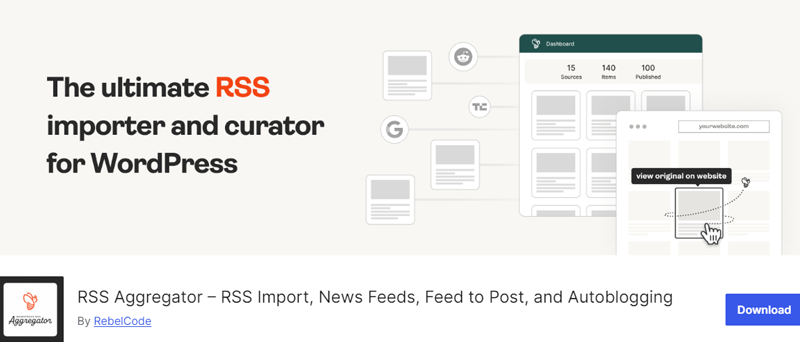
It offers a variety of display options, so you can present the imported content that best fits your site’s design and user experience. Additionally, it supports advanced filtering options. So refine the published content, ensuring it aligns perfectly with your blog’s theme.
Features of RSS Aggregator:
- You can import content from as many RSS feeds as you need.
- Convert RSS feed items into WordPress posts, pages, or custom post types.
- Ensure your site is always fresh with automatic updates from your selected feeds.
- Also, allows you to import full content from feeds instead of just excerpts.
- Easily integrate media-rich content from YouTube and other platforms.
Pricing:
This is a freemium autoblog WordPress plugin that’s available with both the free and premium versions. The free version is easy to download from the official plugin directory of WordPress.org.
The premium version is available to buy from its official website with 4 pricing plans.
- Basic: Costs $79 per year for a single site. It includes all template design, full customization, auto importing, etc.
- Plus: Costs $149 per year for a single site. It includes importing RSS feeds as posts, schedule publishing, adding custom content, etc.
- Pro: Costs $179 per year for a single site. It includes full-text import, import media, manual curation, etc.
- All Access: Costs $249 per year for a single site. It includes AI integration, title spinning, content spinning, and more.
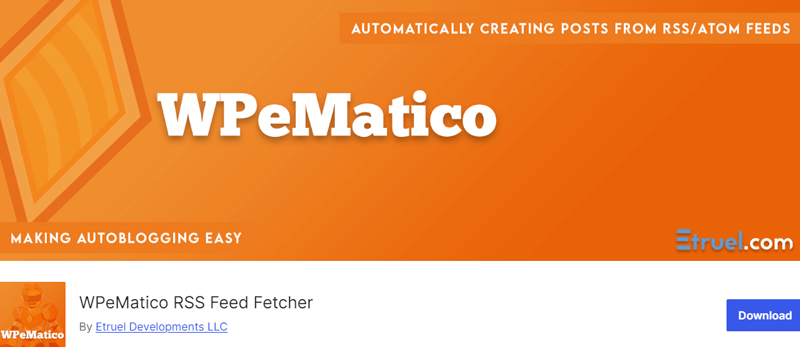
3. WPeMatico
If you’re looking for a reliable and feature-rich autoblogging plugin for WordPress, then WPeMatico is worth considering. This plugin simplifies the process of automatically creating posts from RSS/Atom feeds. Making it a powerful tool for keeping your blog updated.
Besides, you can schedule feed fetching at specific intervals. Ensuring your blog stays current without any manual effort. Additionally, it supports various content formats and media types, giving you the freedom to create a diverse range of posts.
Features of WPeMatico:
- You can assign imported posts to specific categories to keep your blog organized.
- Also, edit fetched posts manually before publishing, giving you control over the final content.
- Easily monitor feed fetching activity and troubleshoot issues with detailed logs.
- Allows you to define custom user agents to avoid being blocked by source sites.
- Lets you translate the posts obtained from remote feeds before inserting them in your WordPress blog.
Pricing:
Get the free version of WPeMatico from the official plugin repository of WordPress.org.
Or you can always upgrade to its premium version by purchasing its membership plans. Below is the starting price for all the membership plans.
- Essential: Costs $82 and comes with add-ons like professional, Full Content, Google News, and more.
- Plus: Costs $119 and comes with add-ons like Better Excerpts, categories 2 tags, etc.
- Premium: Costs $199 and comes with add-ons like Synchronizer, Facebook Fetcher, Polyglot, etc.
- Perfect: Cost $311 and comes with manual fetching, thumbnail snatcher, eBay campaign, etc.
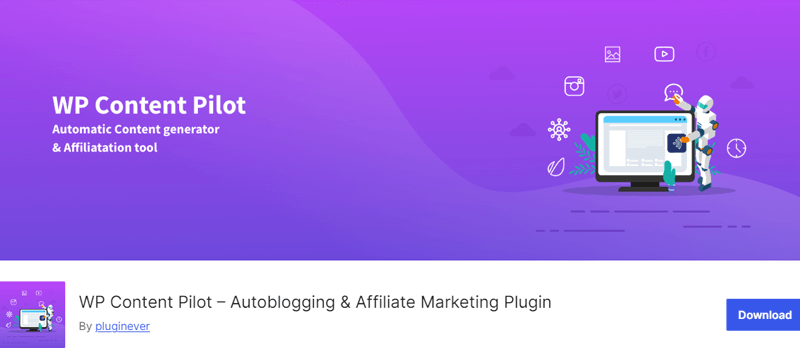
4. WP Content Pilot
WP Content Pilot is an excellent plugin if you’re looking to automate your WordPress blogs with minimal effort. This plugin allows you to fetch content from various sources like RSS feeds, article directories, and social media platforms. Isn’t it a versatile choice for any autoblog?
What makes this plugin stand out is its ability to import a wide range of content types. Which includes articles, videos, images, and even product details from Amazon. This means you can keep your blog updated with diverse and engaging content without any hassle.
Features of WP Content Pilot
- Allows you to set up campaigns based on specific keywords or categories.
- Enables you to schedule posts at regular intervals to keep your blog updated consistently.
- Integrates well with content-spinning services to ensure the uniqueness of the imported content.
- Allows you to use template tags to customize the imported content.
- It’ll automatically insert your affiliate code to boost your affiliate commissions.
Pricing:
It comes with both the free and premium version. The free version is available to download from the official plugin directory or WordPress.org.
Whereas the premium version is available to purchase from its official site with 3 pricing plans.
- 1 Site: Costs $99 per year and $299 for a lifetime.
- Up to 5 Sites: Costs $139 per year and $349 for a lifetime.
- Unlimited Sites: Costs $179 per year and $499 for a lifetime.
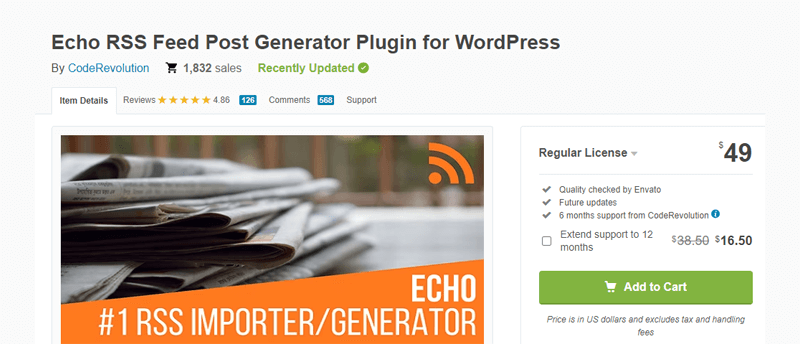
5. Echo RSS Feed Post Generator
The Echo RSS Feed Post Generator is another fantastic tool for creating an autoblog with WordPress. It’s perfect for aggregating news, articles, or any other type of content that keeps your audience engaged and coming back for more.
Besides, you can filter the content based on keywords, categories, or even specific authors. Additionally, the plugin allows you to control how the imported content is displayed. From post titles and featured images to the actual content and metadata.
This level of control means you can maintain a consistent look and feel for your site, which is crucial for brand identity.
Features of Echo RSS Feed Post Generator:
- You can block sites with spammy content, or invalid HTML, or allow webmasters to exclude their site from your blog.
- Configure individual feeds to update every time Echo RSS Post Generator runs or after every number of runs you set.
- Also, automatically creates text-only excerpts based on a number of words, sentences, or paragraphs.
- Assign each feed to one or more blog categories or subcategories or have the plugin automatically create and assign new categories to posts.
- Allows you to specify the author to use for new posts, assign a random author, or use the name of the original author.
Pricing:
This is the premium autoblog plugin for WordPress which is available from the CodeCanyon.net site at $49 with 6 months of support. You can also get the extended 12 months of support for an additional $16.50.
By choosing the right plugin or combination of plugins, you can effectively maintain a regularly updated, engaging blog that resonates with your audience.
Now, let’s dive into how to create an autoblog with WordPress, ensuring your content stays fresh and relevant effortlessly.
How to Create an Autoblog with WordPress?
Starting an autoblog begins with foundational steps, choosing a domain name, hosting provider, and WordPress theme.
Choosing a domain name that is memorable, relevant, and easy to spell is essential. To register your domain, you need a reliable domain name registrar. One popular and reputable option is Namecheap with competitive pricing and excellent customer service.
For a more detailed guide, check our article on how to choose a domain name.
Once you have a domain name, the next step is to choose a hosting provider. A highly recommended hosting provider is Bluehost. Known for its excellent performance, strong security features, and top-notch customer support.
For an autoblog, you’ll want a theme that is not only visually appealing but also optimized for performance and SEO. For this tutorial, we’ll use the Twenty-twenty Four WordPress FSE theme.
Step 1: Install and Activate Plugin
Ready to set up your autoblog and keep your site updated effortlessly?
Here we’ll demonstrate using the free version of one of the most popular and user-friendly plugins Feedzy.
Start by installing and activating the plugin. To do so, go to your WordPress dashboard then “Plugins>Add New Plugins.” Search for the Feedzy, and click the “Install Now” button once it appears.
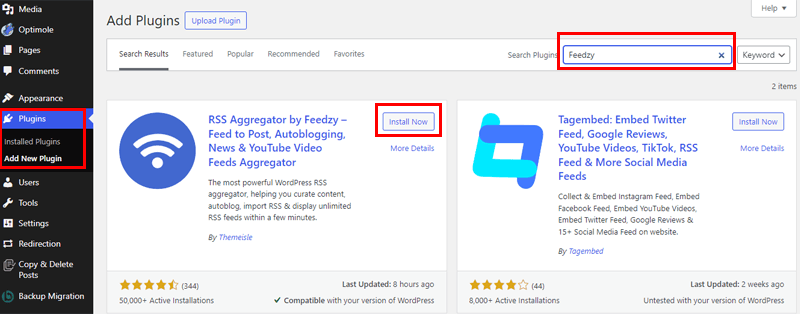
Do activate the plugin, once it’s installed.
And your Feedzy auto blog plugin is ready to use.
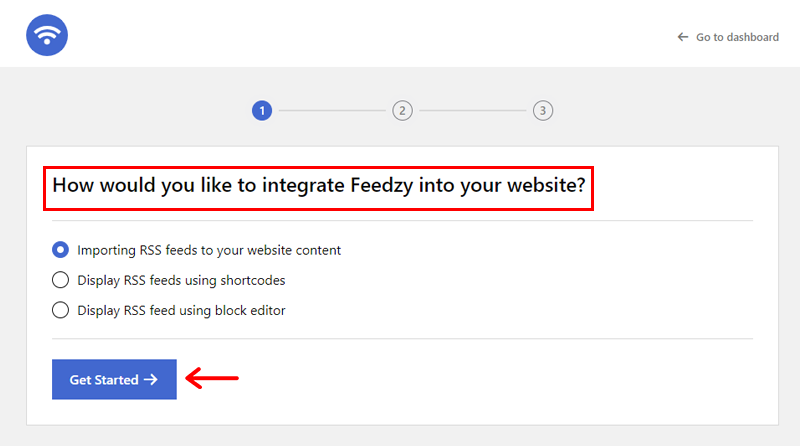
Step 2: Configure Import Setup Wizard
Right after you activate, a page opens where you need to start the setup wizard. So start by choosing how you want to integrate Feedzy into your website.
Here we’ll choose “Importing RSS feeds to your website content.” And then click the “Get Started” button.
Following that you’ll be asked to add an RSS feed URL to import the content to your website. Or if you don’t have an RSS URL right away, then you can simply hit the button “Click Here” on the right side and it’ll add the CodeinWP RSS URL for the demo.
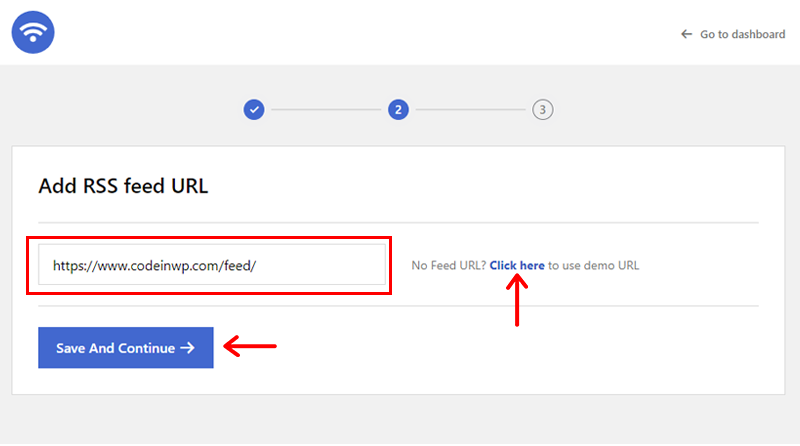
Once you’ve added the URL, click on the “Save and Continue” button.
Next, it’ll ask you how you want to import the RSS feed. You’ll have 2 options, either as Post or as Page. For this demo, we’ll import it as a post.
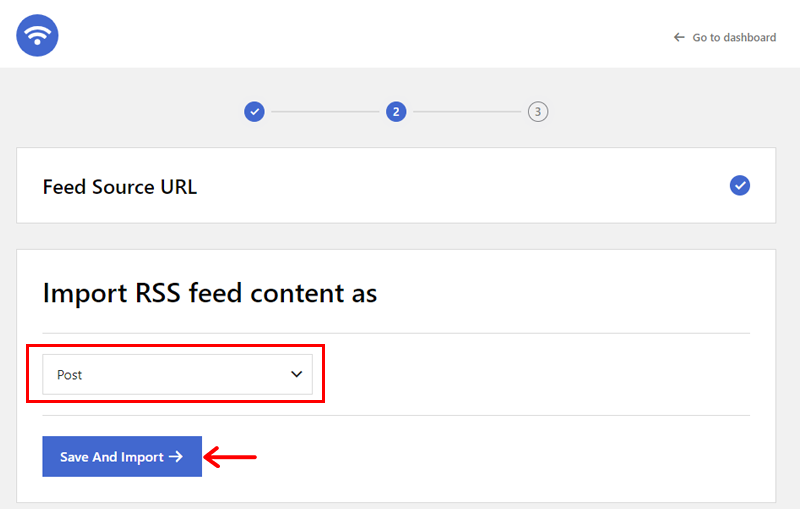
Once you’ve chosen, click on the “Save and Import” option.
Now the final step of the setup wizard will ask you to provide your email address. So that you’ll get product updates, helpful tutorials, exclusive offers, and more useful stuff.
This is the optional step, if you don’t want to, then simply click on the “Skip, Don’t Give Me Access” option.

Right after finishing the setup process, it’ll take you to your live site, where you can see the list of imported RSS feed content.

And you’re done!
Step 3: Feedzy settings
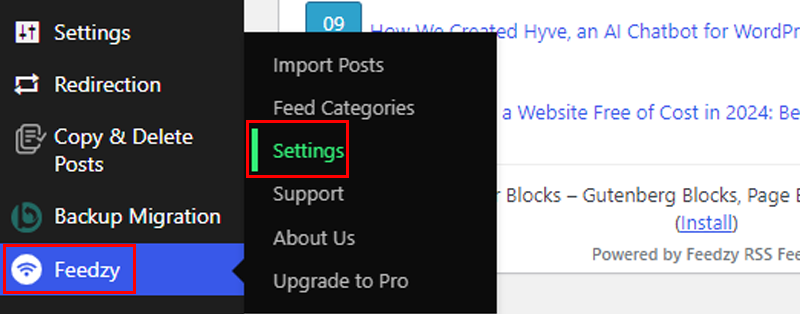
Now above is one way of importing an RSS feed from the setup wizard. Here, we’ll learn how to do it from the Feedzy setting.
So go to the Feedzy option on your dashboard menu and then click on the “Settings.”
There you’ll see tons of settings to work with. First, let’s start with the General settings.
Here you get to choose an image for your import RSS feed. This image will be used for the imported posts if an image is not available in the source XML Feed.

Also, there are other 2 options to toggle with:
- Disable Default Style: Enable this if you want to use the current theme style instead of the default style.
- Enable Telemetry: Enabling this will keep the data private and not shared with third-party entities. Only plugin data is collected without sensitive information.
Once done, hit the “Save Settings” button.
Moving on to the Header setting, this will let you add a user-agent string.
User-agent tells you about the browser and operating system being used by the particular device. So that the website can customize the content accordingly.
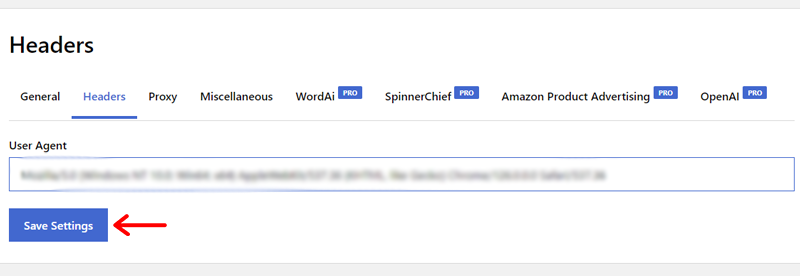
Once you’ve added your user-agent string, hit the “Save Settings” option.
If you want to know about your browser’s user agent, then use this analyzer.
You can find the list of the user agents here.
Further, you can configure some Miscellaneous settings. This setting lets you add canonical URLs from the RSS feeds to your imported post.
A canonical tag is an HTML element that helps webmasters prevent duplicate content by specifying the preferred version of a web page. Duplicate content can harm SEO by causing search engines to devalue your site.
Using canonical tags correctly ensures a robust site and effective SEO practices.
So, let’s enable the canonical tag setting.
Also, you can choose to enable the “Do Not add the featured images to the website’s RSS feed” option.
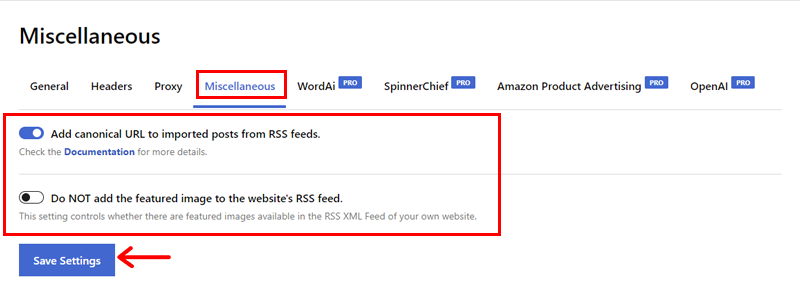
Once done, again click the “Save Settings” option.
Step 4: New Import
Although we’ve already added an RSS feed URL during the setup process. Here we’ll again add a new RSS feed URL and show you how it’s done from the Feedzy menu.
For this step, go to the “Feedzy>Import Post>New Import” option in the WordPress dashboard.
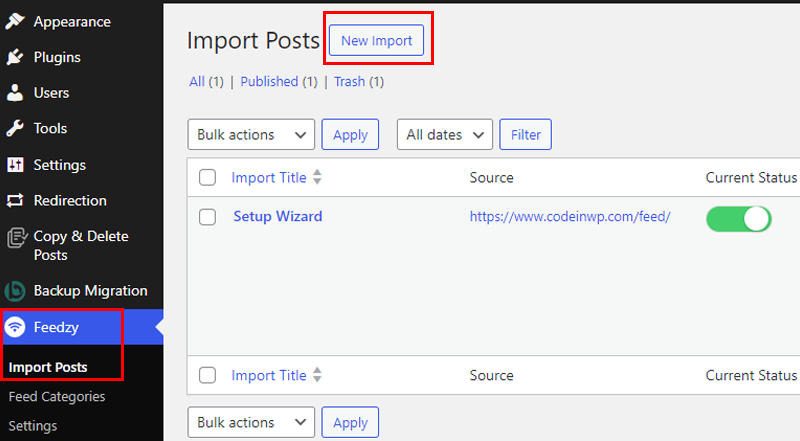
Now to start, first, give your new import a name. For example, we’ll name it “New Auto Blog.”
Here we’ll configure some of the settings for new imports.
I. Add RSS Feed URL
On the next page, you’ll need to add an RSS feed URL. So, for this tutorial, we’ll be using the RSS feed URL of our site “https://sitenerdy.com/feed/.” You can also choose a category for this feed.

II. Filters
Moving on, if you scroll down, you’ll see the “Filters” option. This is a premium feature, so to use it, you must have the premium version of the Feedzy plugin.
This option allows you to filter the feeds by the specific keywords you’ve added. Also, choose what term to exclude from importing the feed. As well as choosing the time range of the feed while importing.

III. Map Content
You can specify what parts of the source should form part of the imported post using magic tags.
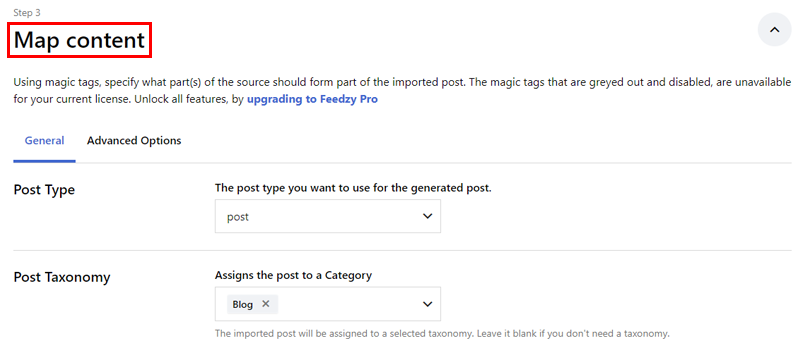
There are several settings you can configure:
- Post Type: The post type you want to use for the generated post.
- Post Taxonomy: Here you can assign the post to a category.
- Post Status: Choose Published if you want to publish your posts right away, or you can use Draft if you want to draft your posts and publish them after reviewing them manually.
- Post Title: You can add multiple items. Keep in mind that this field is mandatory, without it, a post will not be created.
- Post Date: Choose the date of the generated post. Or you can leave it blank if you’re not sure.
- Content: You can add more tags and other things that will be added in the Single Post layout. This field is mandatory.
- Featured Image: This will display the featured image for the generated post. Or you can leave it blank.
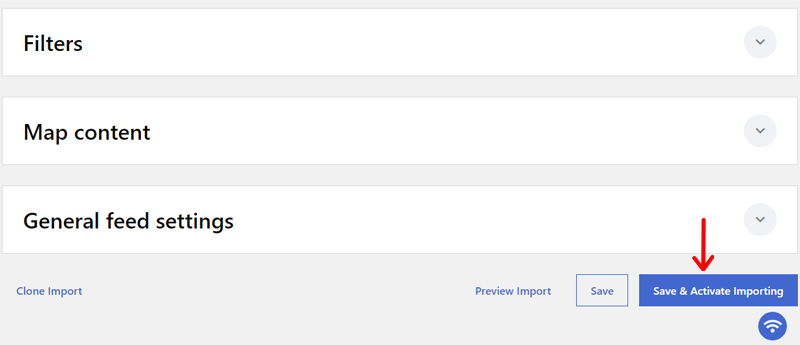
Besides these, there are some other settings. Once you’re done with it, click the “Save and Activate Importing” button at the bottom right corner.
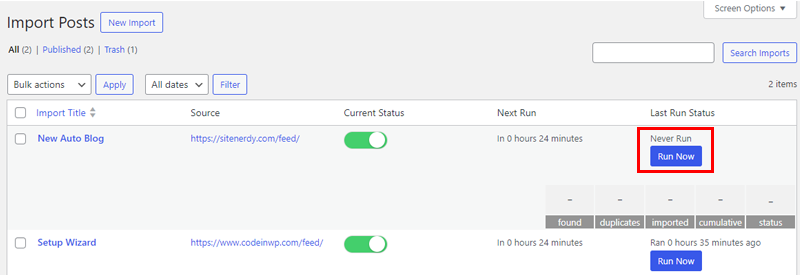
Run Imported RSS Feeds
Once the importing is done, it’ll take you to the list of your RSS feed. There you’ll see your new import. Now, click the “Run Now” option to import all the feeds as posts to your website.
When the importing is complete, go to the “Posts>All Posts” option on your WordPress dashboard. There you’ll see all the posts imported from your provided RSS feed URL.
Below is an example of how it will look on your live website.

And that’s it!
Now that you’ve successfully set up your autoblog, let’s dive into the key elements that will make it truly successful and engaging for your readers.
Key Elements for a Successful Auto Blogging
Creating an autoblog can be an exciting and efficient way to keep your website updated with fresh content. However, like any project, success depends on careful planning and execution.
Here are the key elements to ensure your autoblogging efforts are fruitful and engaging.
- Make sure the websites or feeds you aggregate from are reputable and consistently provide valuable content.
- Regularly review the imported content to ensure it aligns with your blog’s theme and provides value to your readers.
- While autoblogging brings in content from various sources, adding your commentary or insights can make your blog unique.
- Ensure that the imported content is optimized with relevant keywords, meta descriptions, and alt tags for images.
- Check the terms of use for the content sources you aggregate from to avoid legal issues.
- Track metrics such as page views, bounce rates, and user engagement to understand what content resonates with your audience.
- Respond to comments, encourage discussions, and be active on social media to build a community around your blog.
Besides, regularly test different content sources, posting schedules, and types of content to see what works best for your blog.
Autoblogging allows flexibility, so don’t be afraid to experiment and make adjustments based on what you learn.
Conclusion
And, that’s all for now!
In this article, we’ve learned how to create an autoblog with WordPress. We hope this article has helped you autoblogging easily.
Please feel free to comment below if you have any further queries regarding how to create an autoblog with WordPress. We’ll do our best to respond as soon as we can.
Also, let us know which plugin you are using to create an autoblog. You can share your tips and tricks in the comment section below.
Besides, you may also want to check our article on the best free blogging platforms and make money with blogging.
Follow us on Facebook and Twitter for more articles like these. Also, if you liked this article, then share it with your friends and colleagues.
YOU MIGHT ALSO LIKE...
We've picked you some best articles that you might be looking for. Check them now!