Brute-force attacks bombard your login page with thousands of password guesses in an attempt to break in.
They can slow down your site, making it difficult for legitimate users to access it. If successful, attackers may gain unauthorized access, steal your sensitive data, or inject malicious code.
Your WordPress site might even be under attack right now without you knowing it!
Brute force attacks are a common threat, so if you’re worried about hackers, you’re not alone.
In this guide, we’ll show you easy, proven ways to protect your WordPress before it’s too late. Let’s get started!
Understanding Brute Force Attacks
Did you know you could unknowingly make it easier for hackers to guess your website passwords?
That could be the case if you created your passwords based on easily obtainable information like names, birthdays, or simple patterns.
As per the record, 91% of people understand that reusing passwords is risky, but 66% still do it. And this makes hackers brute force your WordPress site.
So, what is a brute force attack?
A brute force attack is when someone tries to guess your site login credentials, i.e. username and password. They try many combinations until they find the right one.
Attackers often use automated tools to perform these attacks. And they make thousands of login attempts within minutes.
Many WordPress sites fall prey to brute force attacks as they use a very obvious username like “admin”.
Video – WordPress Brute Force Protection
Check the video for instant clarification:
Types of Brute Force Attacks
Sadly, there is not only one way attackers use brute force attacks! They come in several forms, each with its own approach.
Simple Brute Force Attacks
Hackers will try to guess your password by trying every possible combination. They might start with “1234,” then “abcd,” and keep going. Like we said before, hackers use tools to do this faster.
Have you ever noticed many failed login attempts? These are simple brute-force attacks designed to guess your login details.
Dictionary Attacks
This is like guessing passwords using a list of common words, like those found in a dictionary. Hackers try words like “apple,” “banana,” or “sunshine” as passwords.
Have you ever noticed attempts using passwords like “welcome” or “qwerty?” These are common words hackers try in dictionary attacks.
Credential Stuffing
Sometimes, hackers get hold of real usernames and passwords from other websites. They try these on different sites, hoping people use the same password everywhere.
If you use the same password on multiple sites, then a hacker could gain access. That’s why we always recommend using different passwords for each site.
Reverse Brute Force Attacks
Hackers start with a common password and try it on many usernames. They hope someone uses that common password. If a hacker tries “123456” on many accounts, they might find someone using it. So, don’t ever use common passwords.
Hybrid Attacks
This is a mix of dictionary and simple brute force attacks. Hackers try common words with numbers or symbols added, like “sunshine123” or “password!”.
What Happens When Your Site is Being Brute-Forced?
What do you think can happen when your site is brute-forced? Let’s see:
- These attacks can send many requests to your site quickly, which can slow down your website or even make it crash.
- If the attacker guesses the correct login details, they can access your site’s admin area.
- Once brute-forced, they might install malicious software, steal user information, or delete your content.
- Attackers can change the appearance of your website or add harmful code.
- Compromised websites are often used to send spam emails or launch phishing campaigns.
- Search engines and email providers can blacklist your site.
- If visitors find your site compromised, they may lose trust in your brand, which will decrease traffic and potentially lead to a loss of customers.
How to Protect WordPress from Brute Force Attacks?
It’s scary to learn about all the threats and dangers to your WordPress site, isn’t it? So, let’s learn how to protect your WordPress from brute-force attacks.
1. Install Firewall Plugin
The first step is to use the firewall plugin. These plugins act like a security guard for your website. They monitor who tries to visit your site and block any suspicious activity. This helps prevent brute-force attacks, where hackers try many different passwords to access your site.
You might also have experienced situations like your website slowing down due to numerous failed login attempts. So, installing a firewall plugin can help you block these attempts and keep your site running smoothly.
How to set up a firewall plugin?
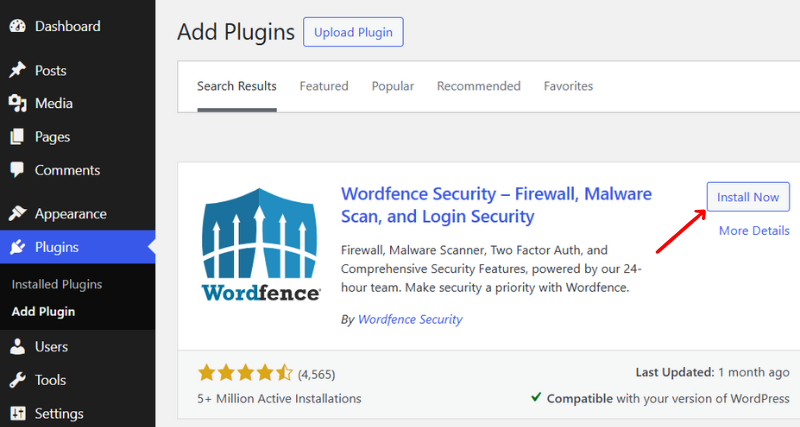
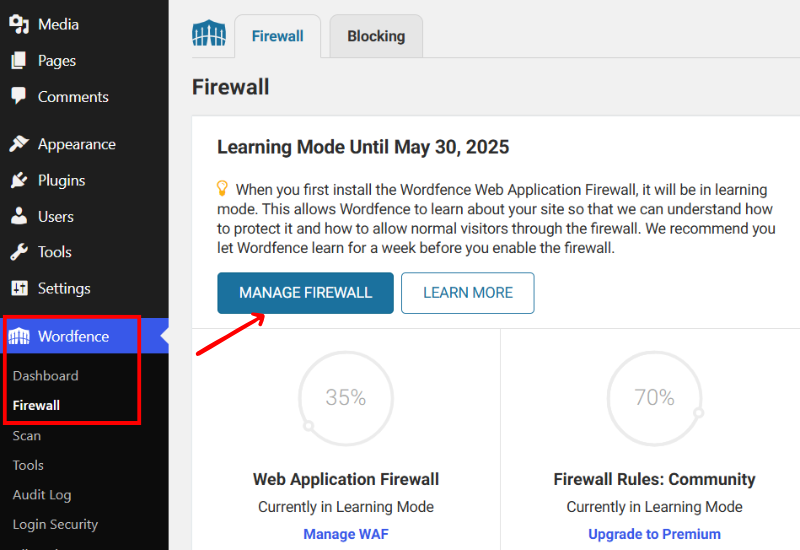
There are many firewall plugins in WordPress. Let’s see how to do it using the Wordfence Security plugin.
Go to your WordPress dashboard, click on “Plugins > Add New,” search for the plugin, click the “Install Now” button, and then “Activate” it.
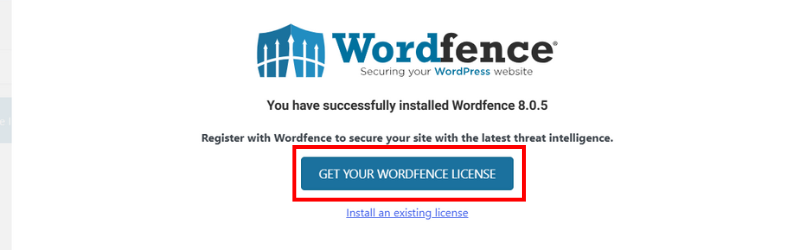
After activation, you’ll receive a pop-up to get your Wordfence license. So, click on the “Get Your Wordfence License” button.
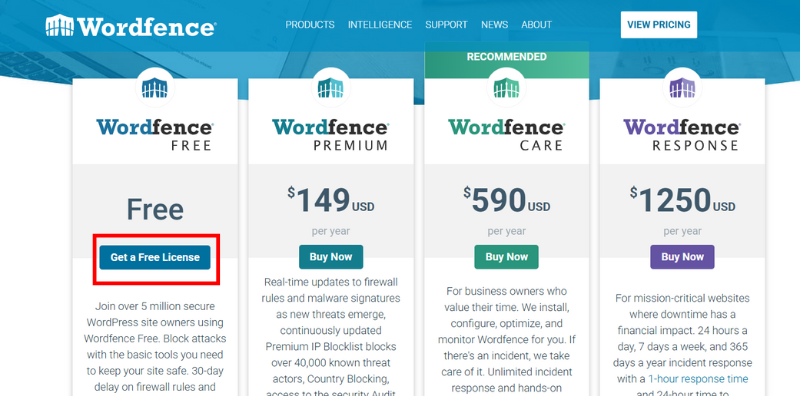
Then, it’ll take you to the official Wordfence pricing page, where we’ll choose the free version. Click on the “Get a Free License” button.
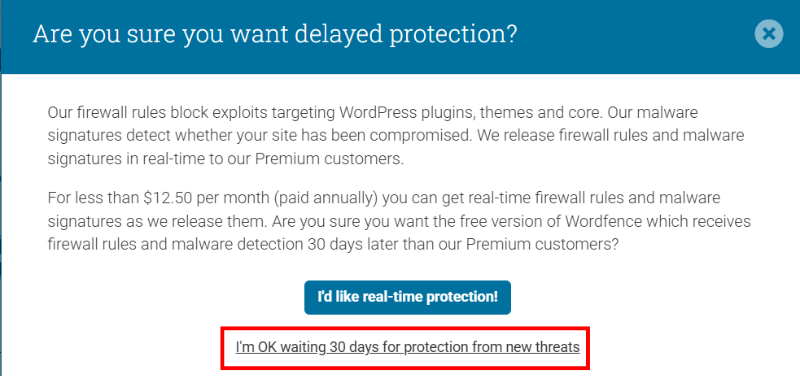
Now, click the ‘I’m ok with waiting 30 days protection for new threats” link.
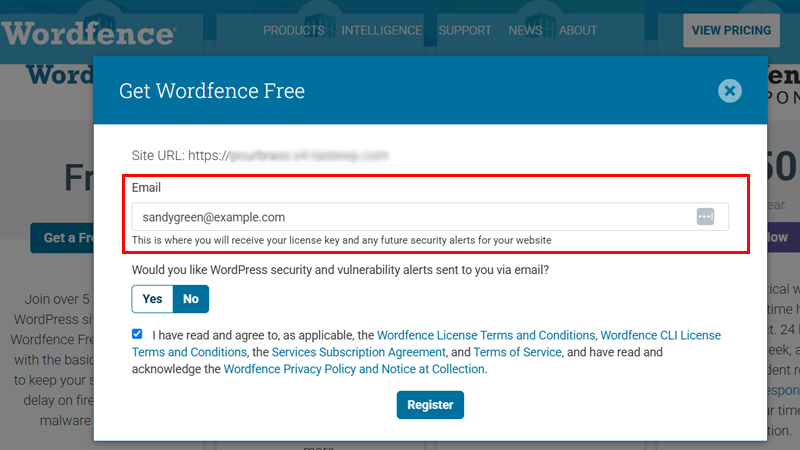
Following that, provide your email to get your activation license, check the I agree box, and then click on the “Register” button.
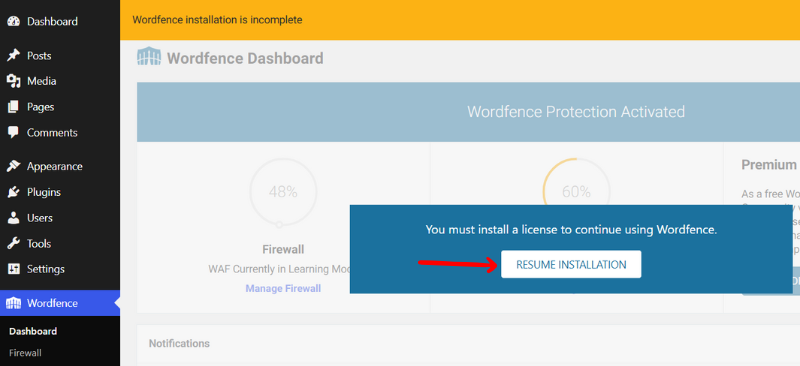
After that, check your mail and copy the activation license key you’ve received. Then, go back to the WordPress dashboard, click on “Wordfence > Dashboard,” and click on the “Resume Installation” button.
Following that, click on the “Install an Existing License” link.
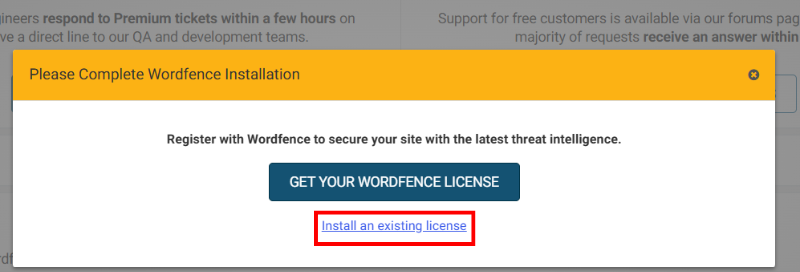
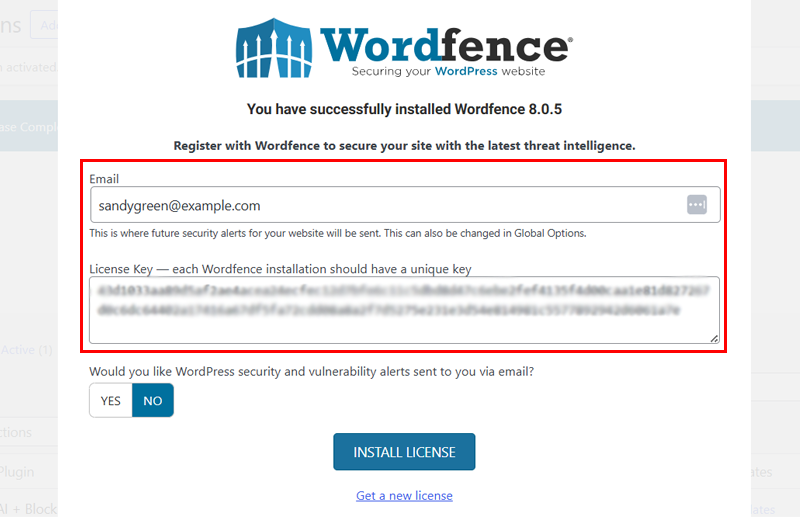
Then paste the license key in the license key box, add the email you used to get this license key in its respective place, and click the “Install License” button.
Your licence is active,
Once your licence is activated, you’ll see a message box at the top of your page that says “Click Here to Configure,” so click on it. To make your site as secure as possible, take a moment to optimize the Wordfence Web Application Firewall.

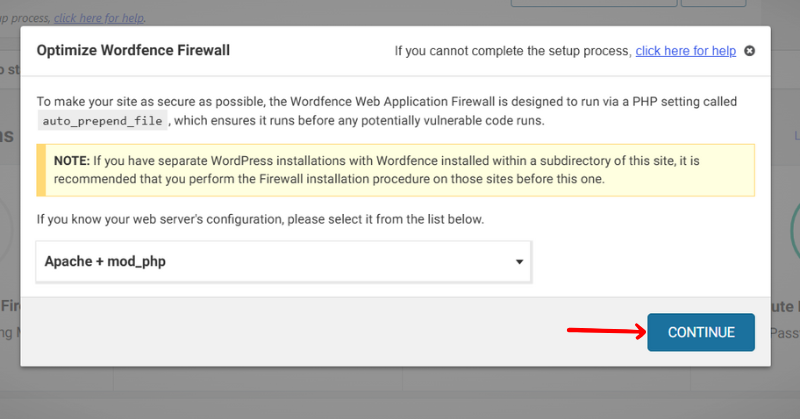
After that, you’ll be directed to the “Firewall Options” page, which will display the “Optimize Wordfence Firewall” dialogue.
The correct server configuration optimization will be automatically selected for you. You should not need to change this option. Then click on the “Continue” button.
Now, your setup is complete. On some hosts, you may need to wait up to 5 minutes for the change to take effect. And again, you’ll see a dialogue box with the downloadable .htaccess file to backup, before Wordfence makes the changes. So download it and click the “Continue” button.

This configuration will give you the highest level of protection, like:
- Blocks malicious traffic before it reaches your site.
- Prevents unauthorized login attempts.
- Keeps your website running efficiently.
This way, you’ll add an essential layer of security to your WordPress site to protect it from brute force attacks.
2. Add Two-Factor Authentication
Adding two-factor authentication (2FA) to your WordPress site is a smart way to protect it from brute force attacks. With 2FA, even if someone guesses your password, they still can’t get in without a second code.
It’s an additional security measure to protect your sites. It means two forms or factors of identification before accessing your account.
There are various methods for adding two-factor authentication to WordPress, such as using security plugins like Wordfence Security, WP 2FA, or Google Authenticator.
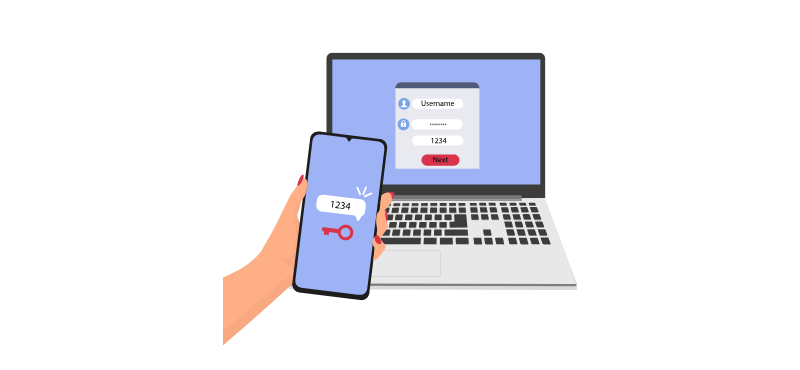
Let’s see a brief demo of how it’s done with Wordfence Security. Go to the “Wordfence > Login Security” option. Here you’ll see the two-factor authentication QR code and recovery codes for your website.
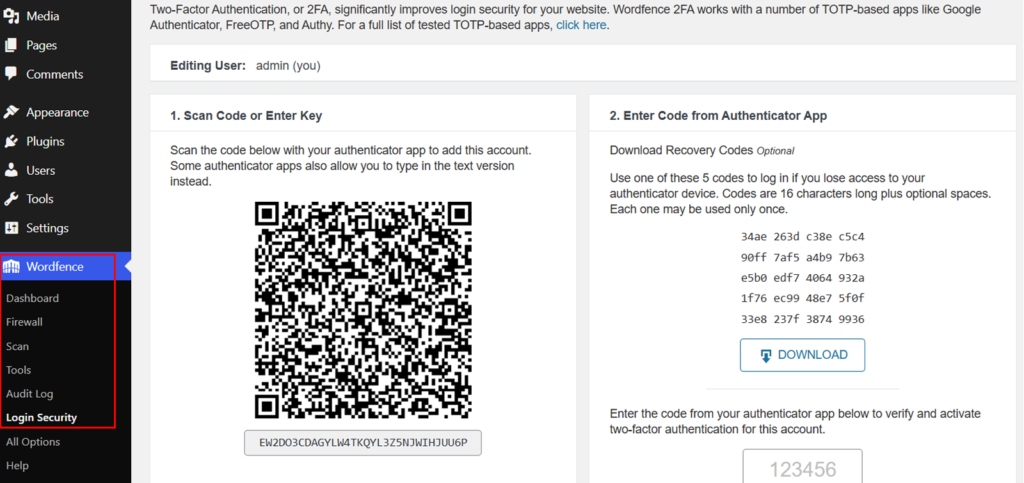
You can simply scan this QR code with the Authenticator app from your mobile phone. If you lose access to your authenticator device, you can use one of these five codes to log in.
However, codes are 16 characters long plus optional spaces, each to be used only once.
To learn how to enable 2FA in your WordPress website, check out our article.
3. Always Use Strong & Unique Passwords
Do you know that 49% of all data breaches involve compromised passwords? So, using strong and unique passwords is crucial to protect your WordPress site from brute force attacks.
We have said in this article before that hackers often use automated tools to guess passwords. So, if you are using weak or commonly used passwords, you make their job easier.
And as per the research,
- 81% of hacking is related to weak or reused passwords. (Source)
- 88% of passwords used in successful attacks were 12 characters or fewer. (Source)
Tips for creating strong passwords:
- Aim for passwords that are at least 12 characters long.
- Use a mix of uppercase and lowercase letters, numbers, and special characters.
- Avoid using the same password across multiple sites.
- Don’t use easily to guess information like your name, birthdate, or common words.
For example, instead of “admin123,” a stronger password would be “G7#kLp9!zQ2@”. This combination is more complex to guess and provides better security.
You’ll Need Password Managers!
Having a unique password is a must, but remembering complex passwords can be challenging. So, there comes password managers, which can store all your passwords. Also, you can manage them using one master password.
Some of the password manager tools are:
Additionally, it’ll help you generate complex passwords for your new accounts and store them on the cloud. Also, they have an auto-fill feature, so you never have to remember or enter passwords for your WordPress sites.
Moreover, these password managers use a master password to manage all your passwords. This master password is the key to all your online accounts. Most of them also use multi-factor authentication. Isn’t it an extra layer of protection?
So, even if someone knows your password, they’ll have a hard time accessing your other passwords without a special code sent to your phone or device.
4.Limit Login Attempts
Limiting login attempts is a simple yet effective way to prevent brute-force attacks on your WordPress site. By default, WordPress does not limit login attempts, making it easier for hackers using automated tools to guess your login credentials.
However, you can use a WordPress plugin, like:
Let’s see how it’s done using Wordfence Security. Even with its free version, you can easily limit login attempts.
As we have already activated the plugin and the license, we’ll go to the “Wordfence > Firewall > Manage Firewall” option.
Scroll down to brute force protection and turn it on. You’ll find an option to choose the number of login failures to lock out after. To lock out after how many forgot password attempts, select the time for count failures over what time period, and the amount of time a user is locked out.
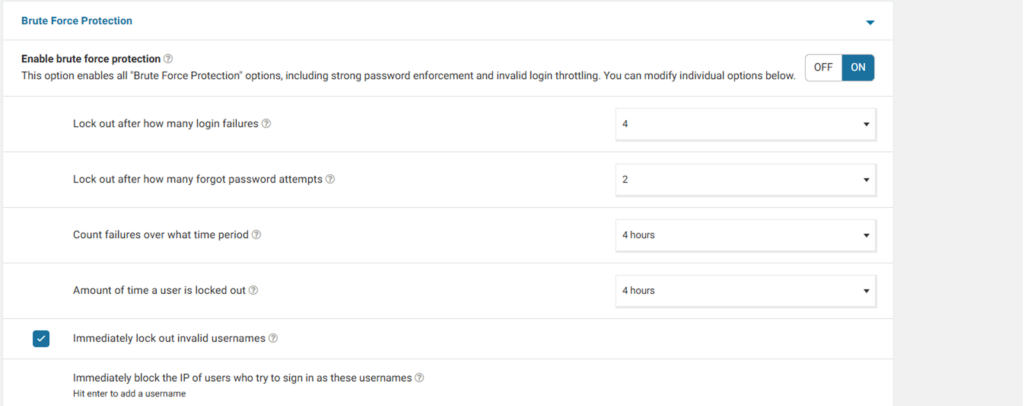
You can also choose to lock out invalid usernames immediately. Once you’ve done this, click on the “Save Changes” button at the top right corner of the page.
Now, go back to the login page of your WordPress site, and check if it works!
If it works, then you’re done!
5. Monitor and Audit User Activity
At SiteNerdy, we run a multi-author blog site, so we know it has its own challenges, such as stopping spam registrations and managing editorial workflow.
One day, someone might even accidentally make an error that breaks your WordPress website. So, monitoring what users are doing on your WordPress site is crucial. It helps you spot unusual behavior, like multiple failed login attempts.
There are many plugins you can use to monitor user behaviour, like:
All you have to do is activate and install one of these plugins. Let’s see how it looks using the “WP Activity Log” plugin.
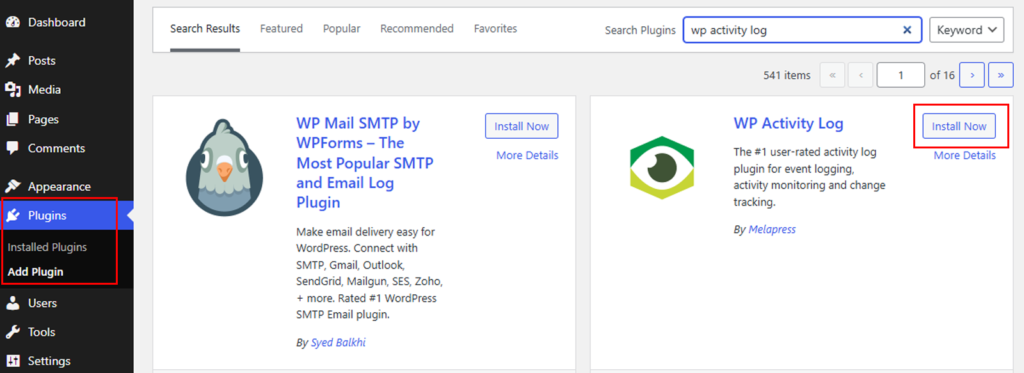
Once activated, this plugin will start logging activities. You can view these logs by navigating to your dashboard’s “WP Activity Log” menu. It will show you who logged in, what changes were made, and when.
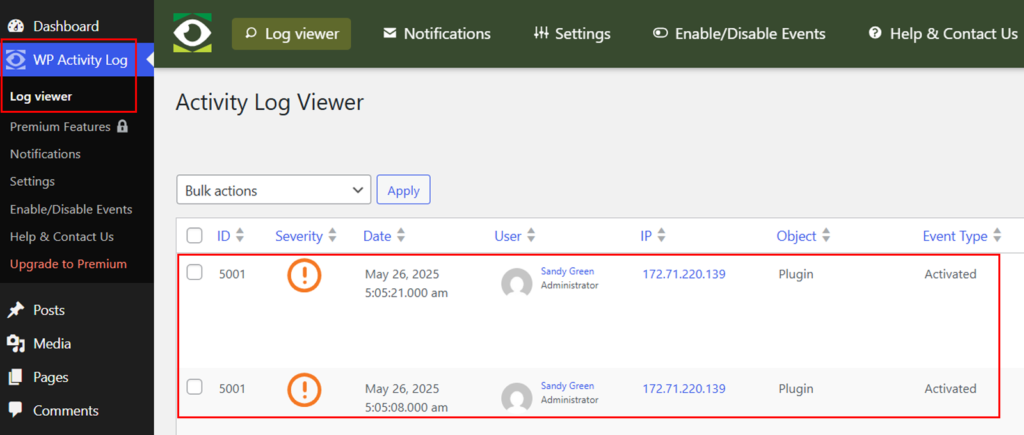
This will help you to:
- Identify suspicious login attempts.
- Track changes made to your site.
- Ensure that only authorized users are making updates.
6. Disable Directory Browsing
Disabling directory browsing is another step in securing your WordPress site against brute-force attacks.
Directory browsing lets anyone see the folders and files inside your website if there’s no index file. This can expose sensitive information and make it easier for hackers to exploit vulnerabilities.
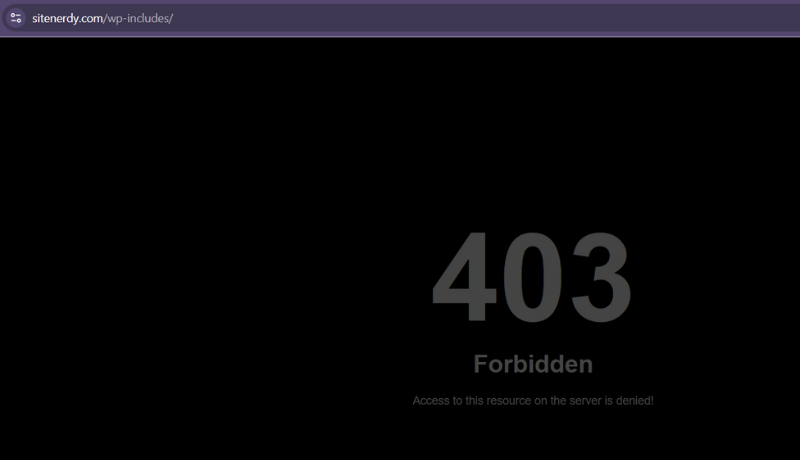
How to know if your directory browsing is enabled? You just need to add /wp-content/ ad the end of your site’s URL.
For example, if someone goes to “example.com/wp-includes/” and the directory browsing is turned on, they might see a complete list of files and plugins.
But if you check SiteNerdy, you’ll find a 403 error with no information, like in the image below. This means directory browsing is disabled.
So, how to do it?
You can disable directory browsing by adding one line of code to your .htaccess file. Use the FTP client or your hosting provider’s file manager.
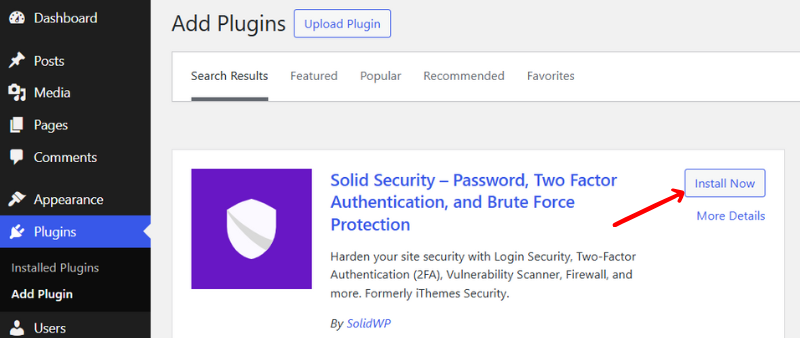
If you’re not comfortable editing the .htaccess file, then you can use a WordPress plugin like Solid Security.
So, install and activate this plugin in your WordPress dashboard.
Now go to the “Security > Settings > Advanced > System Tweaks” option.
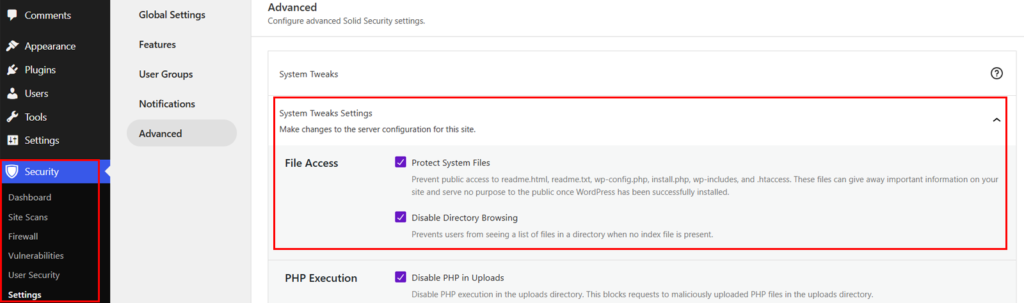
And in the File Access section, check both “Protect System Files” and “Disable Directory Browsing” options. And then scroll down and click “Save” in the bottom right corner.
Now, check if your directory browsing is disabled or not. And you’ll see the 403 error!
So, if someone tries to view a directory directly, it’ll be forbidden instead of seeing your files. This simple step adds an extra layer of protection against brute force and other attacks.
7. Avoid Using ‘Admin’ as a Username
While creating a new WordPress site, you must have seen “Admin” as a username. Do you keep it as it is or change it? Many hackers start brute force attacks on WordPress attempts by trying this common admin username first.
By changing your username to something unique, you remove half of the hacker’s guesswork, making it harder for them to break in. One of the easiest ways to do this is by creating a new WordPress user.
Go to your WordPress dashboard’s “User Role” menu, then click on the “Add User” option.
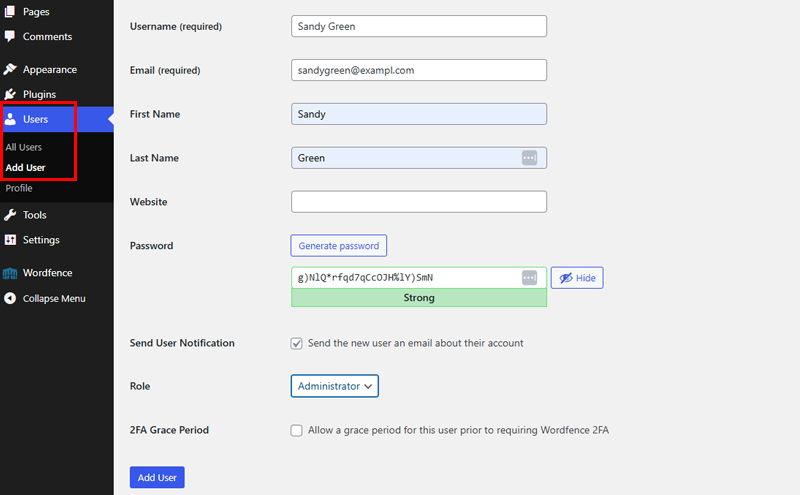
Pick a username that isn’t a common word or your real name. This time, you need to use an email address different from the one used for your current account. Then, set your new user as an Administrator.
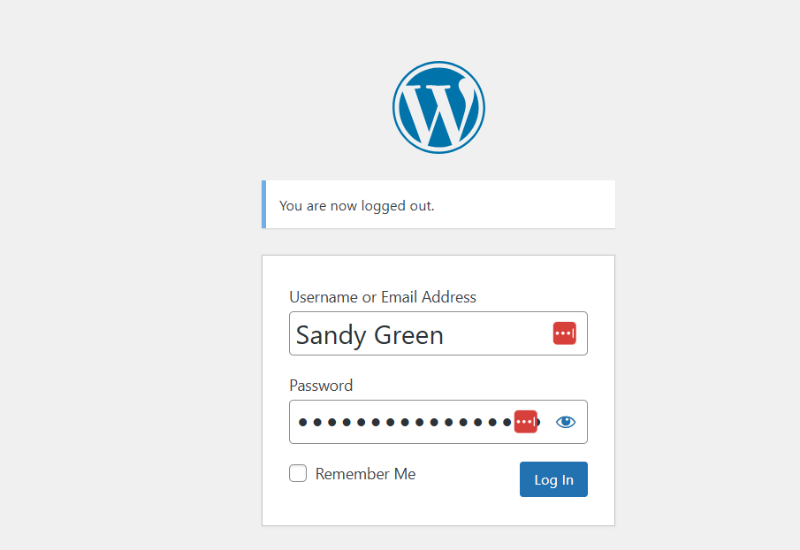
After creating a new account, log out of your current WordPress account and then log in with the new account.
Following that, go to “Users > All Users” in your WordPress dashboard and then click the “Delete” link under your old username to remove it.
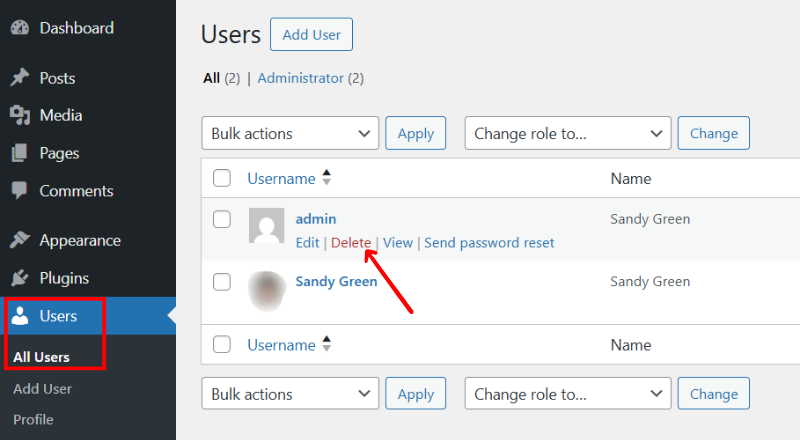
Now, WordPress will ask what you want to do with any content created by that user. Always click the “Attribute all content to” option and select the new user. Then click the “Confirm Deletion” button, and your old user account will be gone.
/image confirm delete old user
And that’s it!
8. Regularly Update WordPress Core, Themes, and Plugins
How often do you update your WordPress site? If you don’t, you’re in trouble. Keeping your WordPress site updated is one of the simplest yet most effective ways to enhance its security.
Updates often include patches for known vulnerabilities that hackers might exploit. By staying current, you reduce the risk of your site being compromised.
Moreover, outdated themes and plugins can serve as entry points for attackers. Regular updates ensure that they are compatible with the latest WordPress version.
What you can do is go to the “Dashboard > Updates” to check for available updates. This page will show all updates for your WordPress core, plugins, and themes
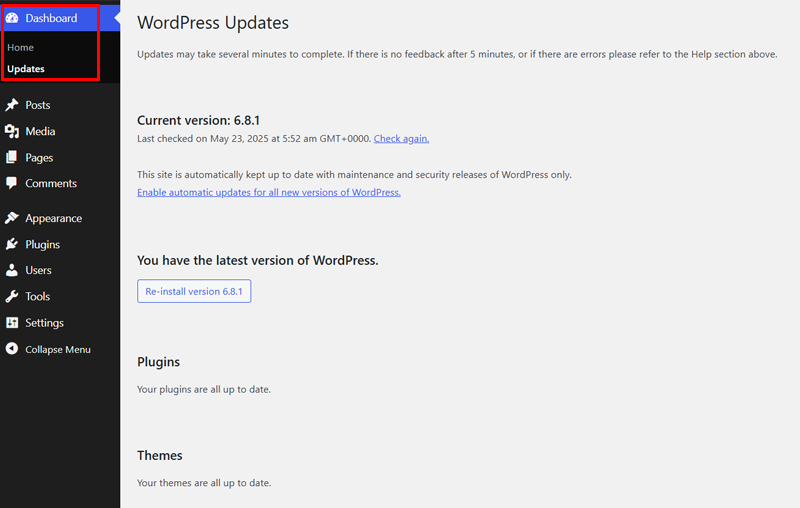
Also, updates can improve your site’s performance and introduce new features. It’ll not only protect your site, but also boost the overall user experience. But, neglecting updates might lead to compatibility issues, slower load times, or site crashes.
Check out our article on how to update a WordPress site to see how it is done correctly.
9. Consider Geoblocking
Geoblocking is a technique that restricts access to your WordPress site based on the visitor’s geographic location. If you notice that brute force attacks are originating from specific countries, you can use geoblocking to avoid such threats.
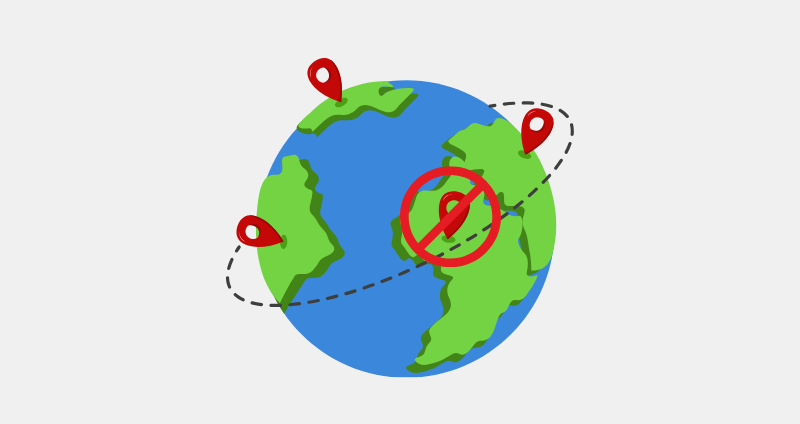
While brute force attacks can come from anywhere, certain countries may be more frequently associated with malicious activities.
There are several methods to set up geoblocking on your WordPress site:
- Use Security Plugins: Plugins like Wordfence and iQ Block Country offer built-in geoblocking features. These plugins allow you to block or allow traffic from specific countries.
- Configure .htaccess File: Advanced users can manually edit the .htaccess file to block IP ranges associated with certain countries. However, this method requires a good understanding of server configurations.
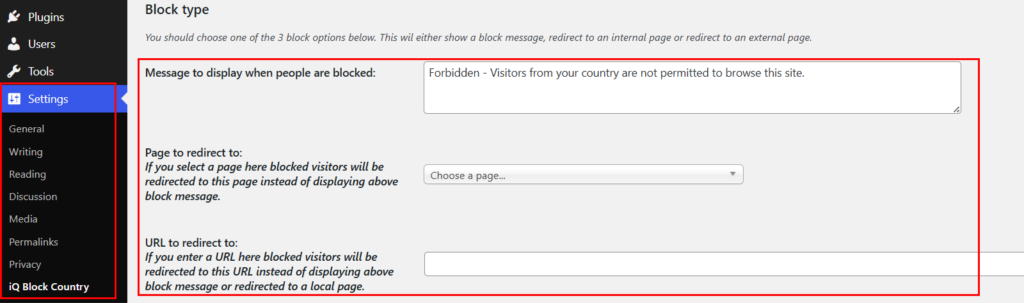
If you are not comfortable editing .htaccess, you can install and activate the plugin, let’s say the iQ Block Country plugin.
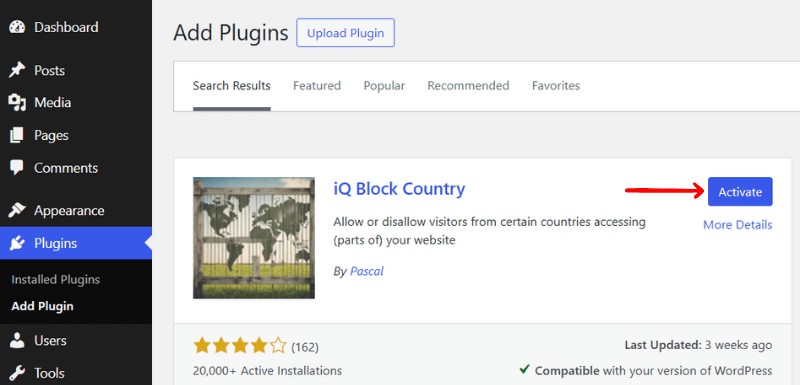
Then, go to “Settings > iQ Block Country” from the WordPress dashboard. Then you need to choose one of the 3 block options. It either shows a block message, redirects to an internal page, or redirects to an external page.
In the general setting below, you can configure some other settings. Like, number of rows do you want to display on each column on the logging tab. Number of days you want to keep the logging used for the logging tab.
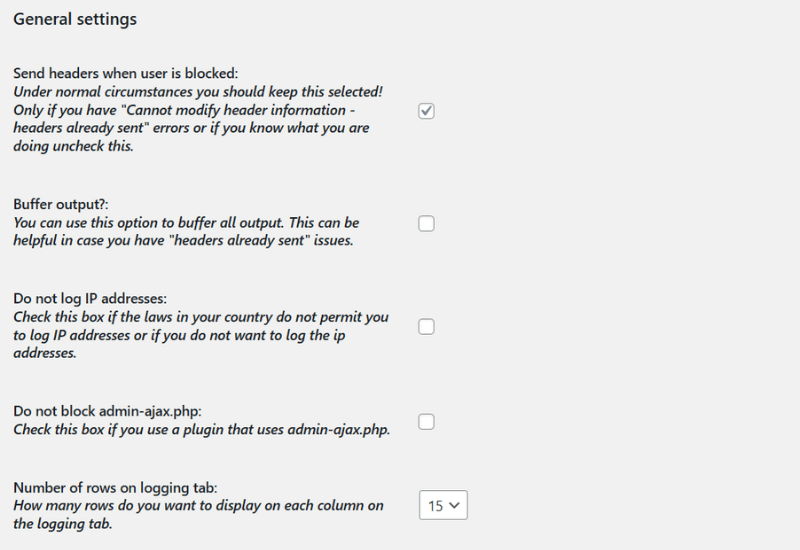
Also, check the log for all visits. Enabling this will log all visits, regardless of whether they are blocked or not. Once you’re done, click on the “Save Changes” option. And that’s it!
Considerations Before Implementing Geoblocking
- Ensure you’re not blocking access to legitimate users from the countries you’re restricting.
- Blocking entire countries can affect your site’s SEO if search engine bots are blocked.
- Use caution and consider allowing search engine bots from blocked countries.
- Tech-savvy attackers can use VPNs or proxies to bypass geoblocking measures. Therefore, geoblocking should be part of a multi-layered security strategy.
10. Use WordPress Backup Plugin
Even with all the security measures, things can still go wrong. Hackers might find a way in, or a plugin update could cause issues. That’s why it’s crucial to have a backup plan.
A WordPress backup plugin helps you create copies of your site. So if something goes wrong, you can restore it to a previous, working state. Without backups, you risk losing your content, settings, and customizations.
This can happen due to various reasons, such as:
- Even with protections against brute force attacks, hackers may still find vulnerabilities.
- Updates can sometimes cause conflicts or errors.
- Accidental deletions or changes can occur.
- Issues with your hosting provider can lead to data loss.
By having regular backups, you can quickly restore your site to its previous state, minimizing downtime and data loss.
There are several reliable WordPress backup plugins available:
- UpdraftPlus: A popular choice that allows you to schedule backups and store them in cloud services like Google Drive or Dropbox.
- Duplicator: Great for migrating sites and creating backups.
- BackWPup: Provides scheduled backups and supports multiple storage destinations.
- Everest Backup: Offers scheduled backups, one-click restore, and seamless migration with support for cloud storage like Google Drive.
Each of these plugins has its features and benefits. Consider your site’s needs and choose the one that best fits.
To ensure your backups are adequate:
- Set up daily, weekly, or monthly backups depending on how often your site changes.
- Use cloud storage services to keep backups safe and accessible.
- Once in a while, restore a backup to ensure it works correctly.
- Maintain several backup versions to protect against corrupted files.
For a more detailed guide, check out our article on how to backup WordPress. It’s pretty easy.
Frequently Asked Questions (FAQs)
1. Can brute force attacks affect my site’s performance even if unsuccessful?
Yes, they can. Even if attackers don’t gain access, the repeated login attempts can overload your server, slowing down your website or causing downtime.
2. How effective are CAPTCHA systems in preventing brute force attacks?
CAPTCHAs can deter automated bots by verifying human users. However, they are most effective when combined with other security measures like limiting login attempts and two-factor authentication.
3. Should I be concerned about brute force attacks if my site doesn’t handle sensitive information?
Absolutely. Even if your site doesn’t store sensitive data, attackers can exploit it to distribute malware, send spam, or redirect traffic, harming your site’s reputation.
4. Are there any risks associated with using security plugins for brute force protection?
Generally, security plugins are beneficial. However, some may conflict with other plugins or themes, potentially causing issues. It’s better to choose reputable plugins and test them thoroughly.
Conclusion
That’s the end of our article on how to protect WordPress from brute force attacks. We hope that it’ll help you protect your WordPress site.
If you have any further questions about protecting WordPress from brute-force attacks, please leave a comment below. We’ll try to respond as soon as possible.
Further, we want you to check our articles that may be helpful, like what SSD storage is in web hosting and the best ways to secure your eCommerce website.
If you like this article, please share it on your social media accounts and spread the word!
Lastly, don’t forget to follow us on Facebook and X for more updates.
YOU MIGHT ALSO LIKE...
We've picked you some best articles that you might be looking for. Check them now!