If you’re wondering how to add contact form in WordPress, then the process is simpler than you might think. Adding a contact form is the easiest way to make your WordPress site user-friendly.
Running a site, or do you have an online store? A contact form allows your visitors and customers to send messages and communicate with you. Nearly 50% of marketers consider online forms to be the most effective way to generate leads.
So why not add a contact form to your site?
In this article, we’ve prepared a step-by-step guide on how to add a contact form to WordPress websites. You’ll also learn how to customize the form, manage its settings, and add it to your contact pages.
So, let’s get started!
Importance of Contact Form on Your Site
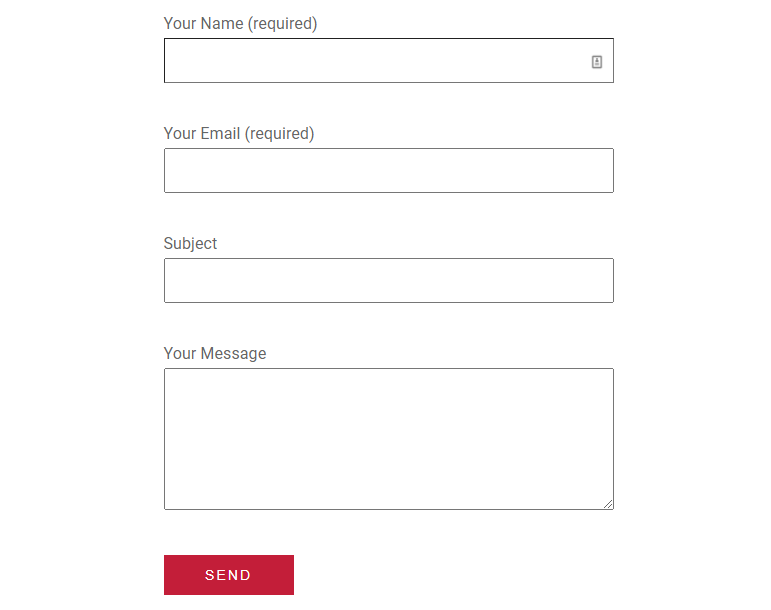
Having a contact form on your site has many benefits, both for site admins and customers. Here are some of them.
- Easy Communication: Your customers can send questions, feedback, comments, or any kind of message about products or services. Then, you can reply to them.
- Spam Protection: Contact forms don’t require you to display your email address, which protects your email from spam attacks.
- Reachability: Now we know that direct email is not an option. And not all people have social media. So, contact forms are the best way for customers to reach you.
- Credibility: Having a contact form shows that your business is open to customers’ opinions and queries, which promotes your customers’ relationships.
- Convenience: Contact forms make it easy for your visitors and customers to contact you. They just need to fill in some information, such as name, address, email address, and message.
- Acquire Visitors’ Details: Visitors provide personal information like name, address, and others along with the message, giving you the opportunity to get to know your customers even more.
- Email Leads: The contact form also serves as a lead-generation tool for email marketing. You can use the email they provide with the form for sending out email campaigns and newsletters.
How to Add Contact Form in WordPress
We’re now going to walk you through the steps for adding a contact form to WordPress websites.
Here, we’re using the WPForms Lite plugin to create the form because it is easy to do. Even beginners can follow the same steps we show here and create a nice-looking form.
Also, WPForms Lite is the free version of this form but has many form designing, building, and configuring options.
Here we go.
Step 1 – Installing the Plugin
First, log in to your WordPress website to go to your site’s admin area.
Then, you need to find and install the WPForms plugin. To do that, go to Plugins > Add New. There, search the plugin with the keyword ‘WPForms‘. Then, click on ‘Install Now‘.

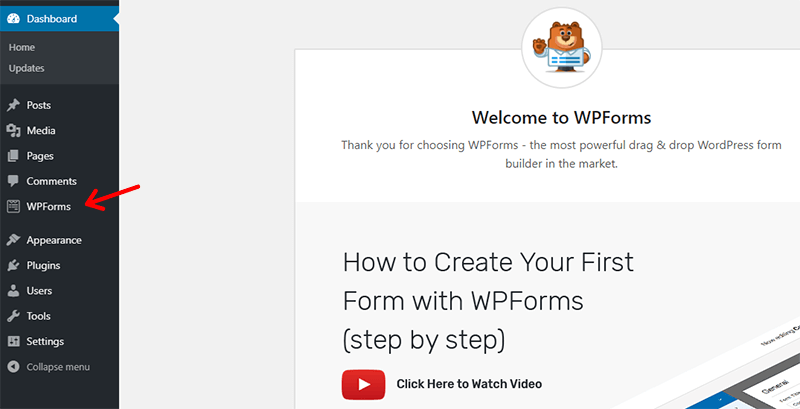
Make sure to activate the plugin once it’s installed. After activating, you’ll see a new menu item, WPForms, added to the WordPress dashboard.
Step 2 – Creating a Contact Form
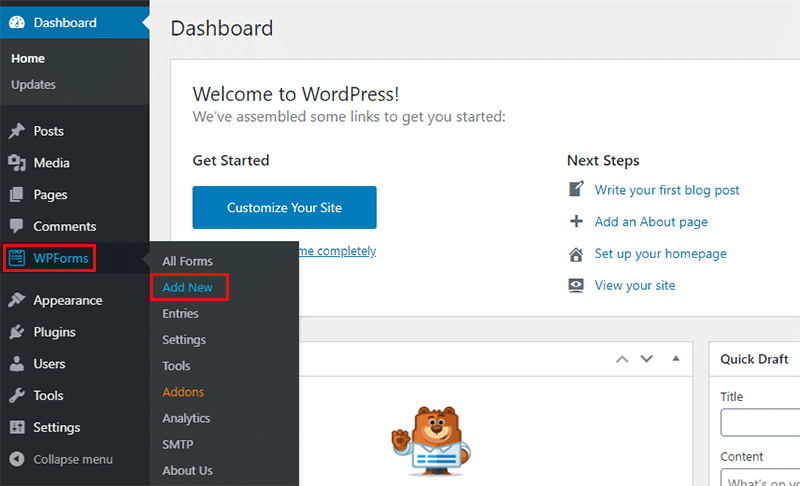
Now, you can start creating a form. From your WordPress admin area, Go to WPForms > Add New.
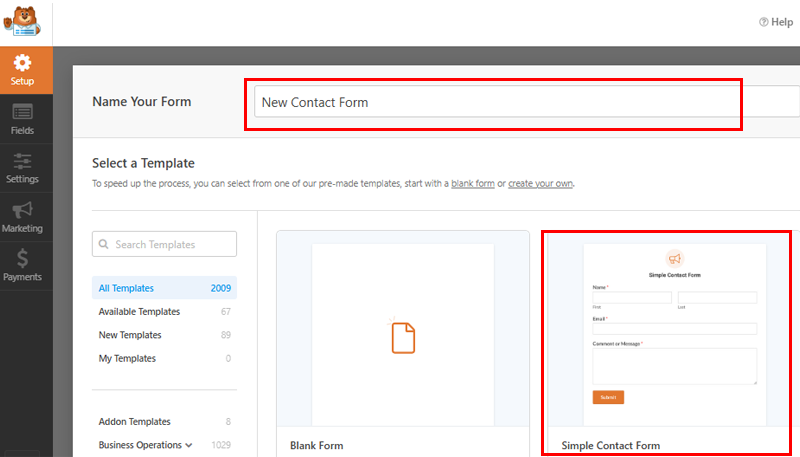
Then, you’ll see the form setup page. Start by writing the form name at the top of the page.
Then, select the contact form template and start modifying it. You can also select a blank template to design from scratch.
Let’s now choose a contact form template to make it easy.
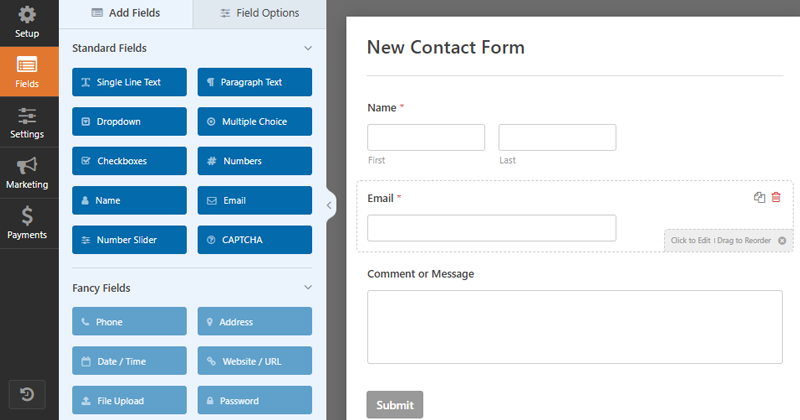
After that, you’ll come across the main form-building area. It’ll have a simple form with some fields and a button.
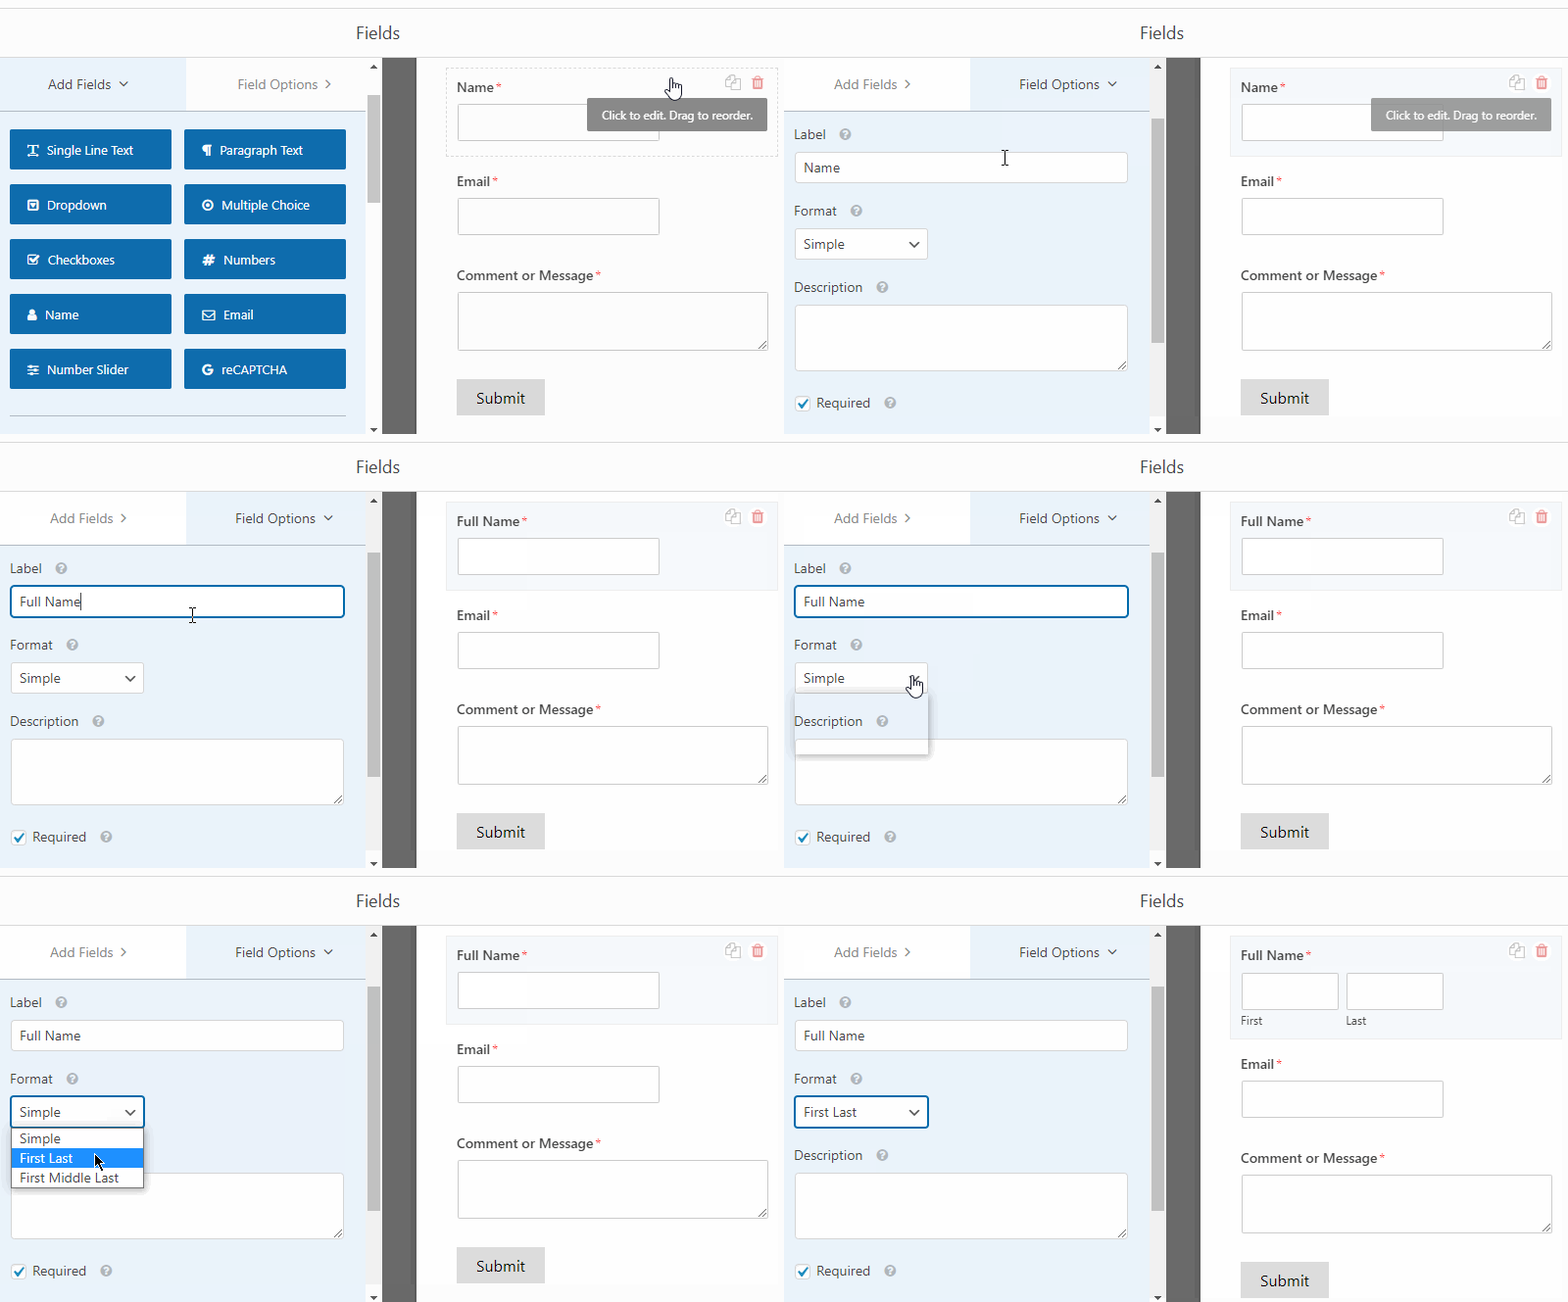
If you want to modify the same fields, then just click on it. You can change the display label, type, field size, etc. You can also change whether filling a specific field is required (compulsory).
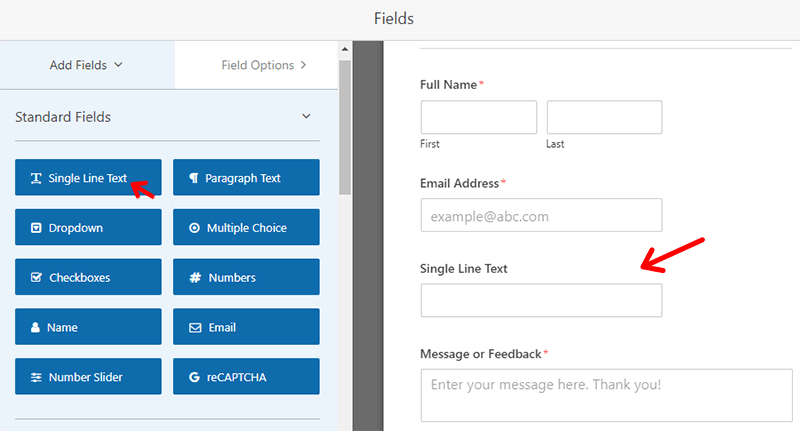
Also, there are a lot of different fields under ‘Standard Fields‘ that you can add to your form. Just click on the field name to add the field.
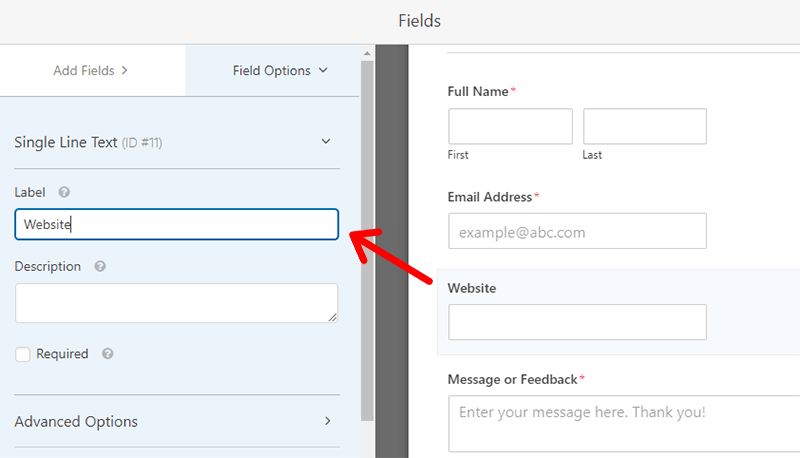
All the fields are editable to a good extent. To do so, click on the field you want to edit. Then, under the field options, you’ll see many things you can tweak.
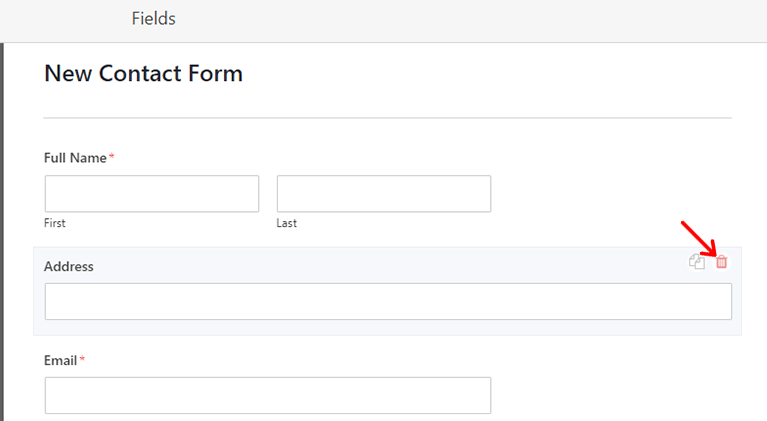
You can also delete the existing field. To do so, click the delete icon next to the field. And then click on ‘Ok‘ to confirm deletion.
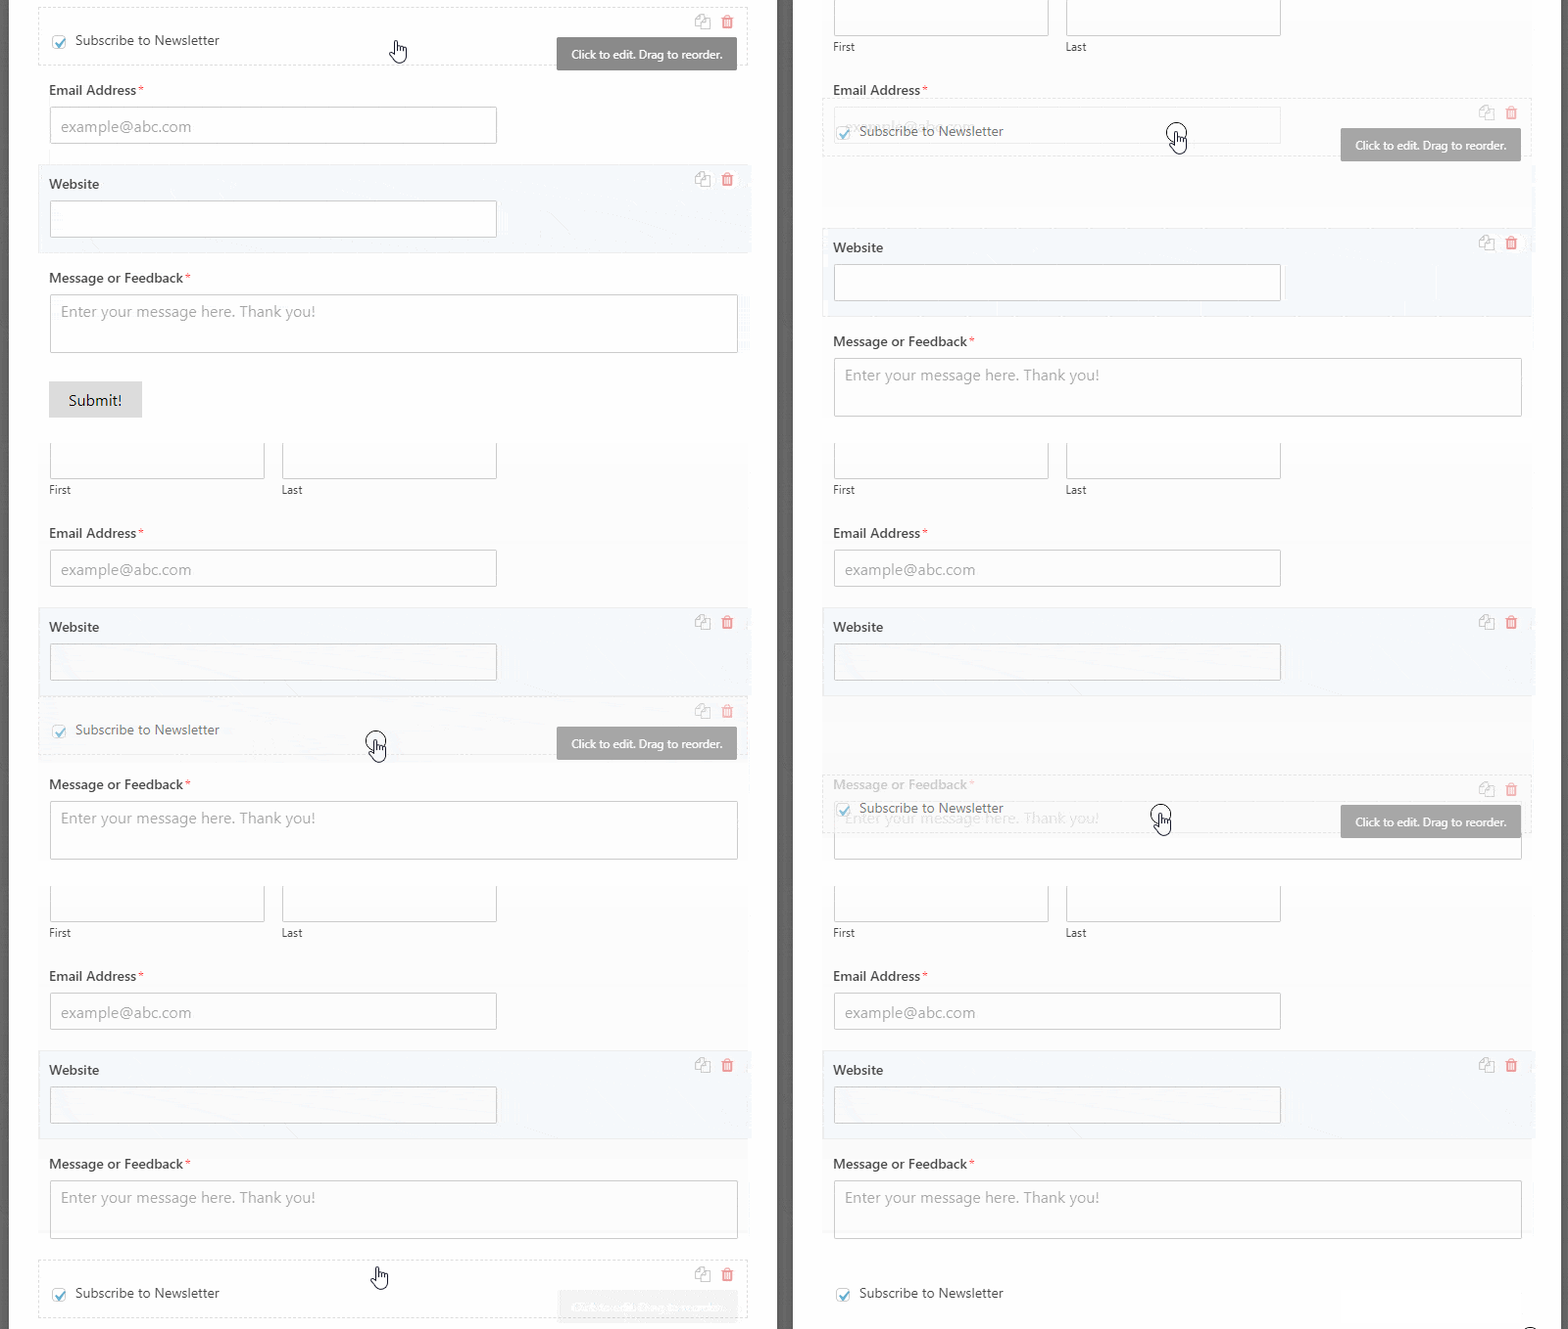
The best part is that the fields are completely drag-and-drop, so you can place them in any order you like.
After done, click Save at the top-right.
Step 3 – Configuring Form Settings
In the next step, you’ll have to manage the settings for your form.
To do so, go to Settings on your WPForms screen. There, you’ll see 3 options (General, Notification, and Configuration). Other options are disabled and will be unlocked once you purchase the premium version.
Configuring the WPForms settings is pretty simple. You’ll understand them once you see them. You can also leave them to default, as they’re standard for beginners.
Firstly, go to General from the settings. There, you’ll see options like name, description, button text, etc. These are just simple settings that you can tweak yourself if you like.

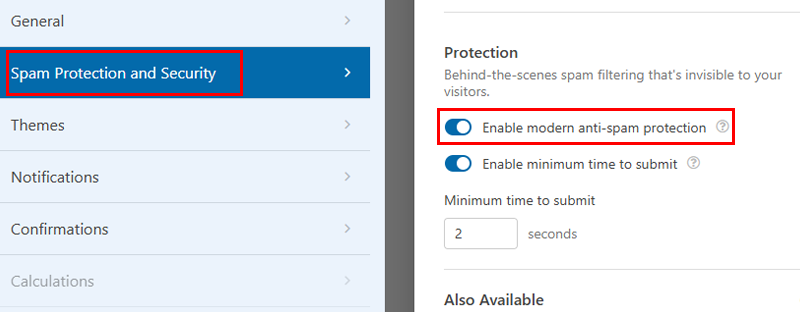
Most importantly, remember to tick the ‘Enable modern anti-spam protection‘ checkbox from the Spam Protection and Security option. This will prevent spammers from spamming your forms.
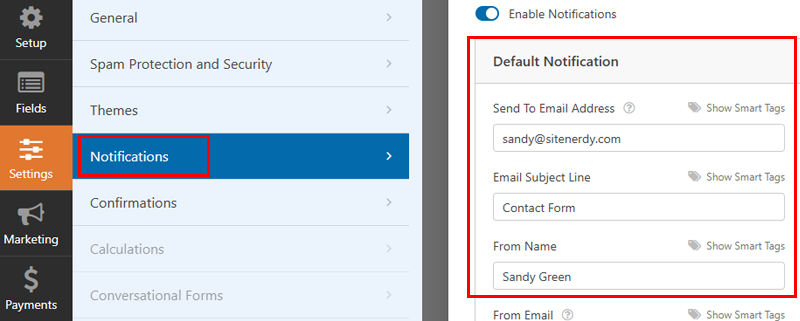
Next, the notification setting lets you configure how you want to receive emails for contact form messages on your site. Go to Notification to change admin emails, subject lines, etc.
You can enter a custom email address to receive contact form submissions. If you want to add multiple recipients, separate the email addresses by commas.
Under ‘Email Subject‘, you can customize the subject lines for the emails you receive with your contact form.
Similarly, you can edit other fields like senders’ names, emails, and fields you want to receive in your email message.
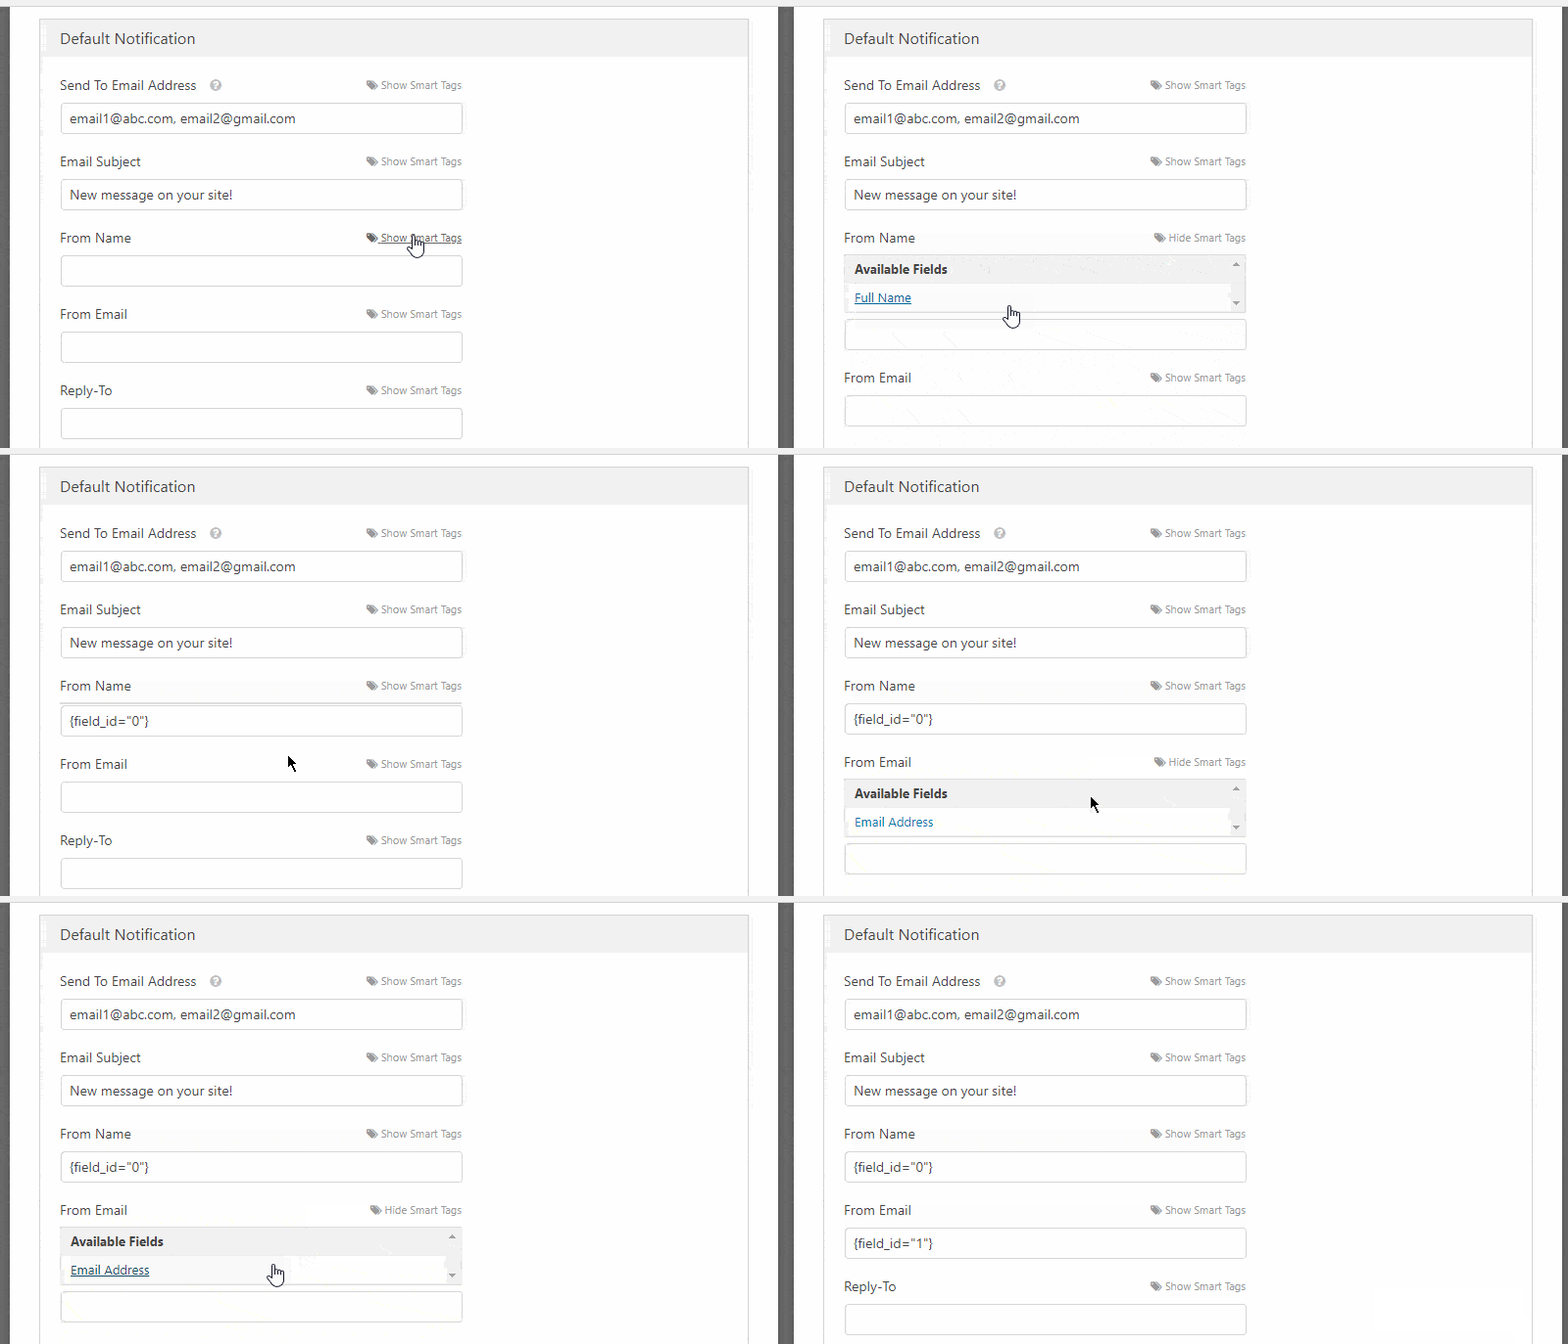
Now, you might notice ‘Show Smart Tags‘ next to each setting. These tags allow you to use form fields like name, email address, etc. for notification.
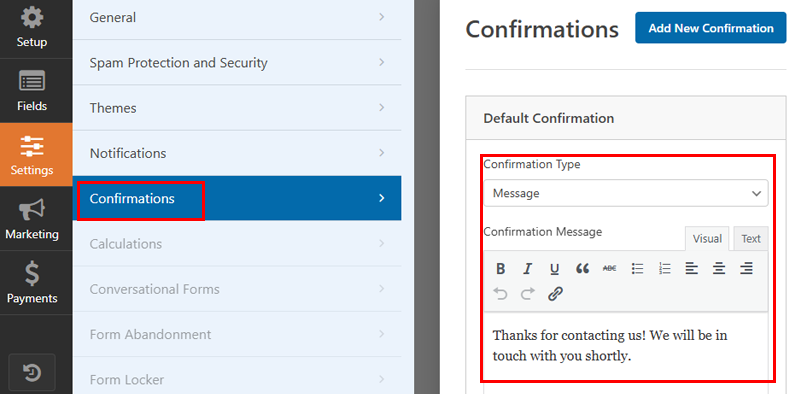
Lastly, the confirmation settings let you set up confirmation messages for users after they’ve submitted the form.
You’ll see a few options when you go to Confirmations under Settings. First, you can choose the confirmation type, e.g., Message, Page, or URL.
If you choose ‘page,’ you can direct users to one of your website’s pages.
Or, if you choose ‘URL (Redirect),’ you can redirect users to any other pages with a URL. This option lets you enter the URL of the page you want to take users to.
However, ‘Message‘ is the ideal choice. This will display a success message when the users submit the form. You can enter the success message that you want to display after choosing the Message option.
After that, click Save. Then, you can exit.
Step 4 – Adding the Form on a Page
After you’ve completed creating the form, it’s time to add it to your web page, which is supposedly a contact page.
Let’s see how to do it.
You can do it on a new page or an existing page.
If you want to add it to a new page, then create a new page first. For that, go to your Dashboard and then go to Pages > Add New.
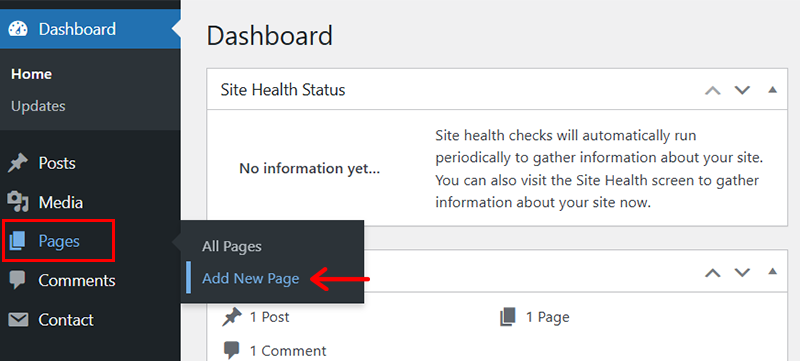
After that, it opens the Gutenberg block editor to create the page. You can add a title, write some description, or add images and text if you like.
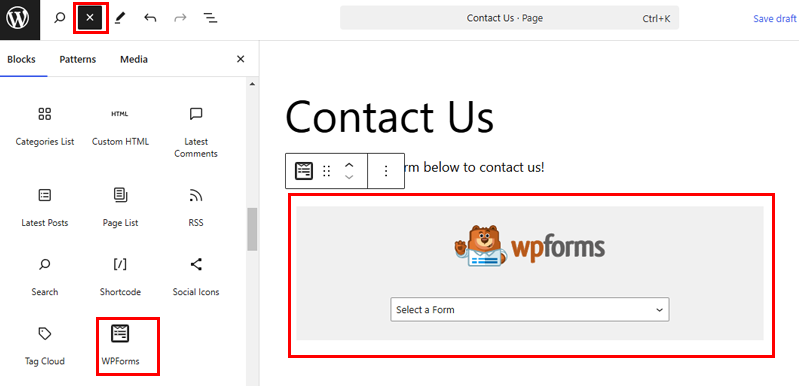
Now, to add the form, you need to add the WPForms block to the page. To do that, click on the block button (+ sign) at the right or top of the page.
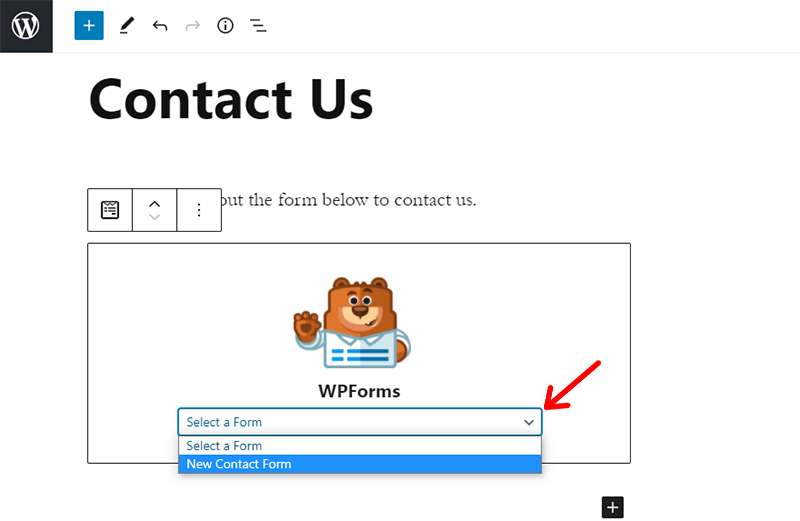
Then, select the form you’ve recently created. In this case, ‘New Contact Form.’
Then, publish the page.
Or, if you’ve installed the classic WordPress page editor instead of the Gutenberg editor, then adding the form is easy, too. Just click on the ‘Add Form’ button, select the form name, and then click on ‘Add Form.’
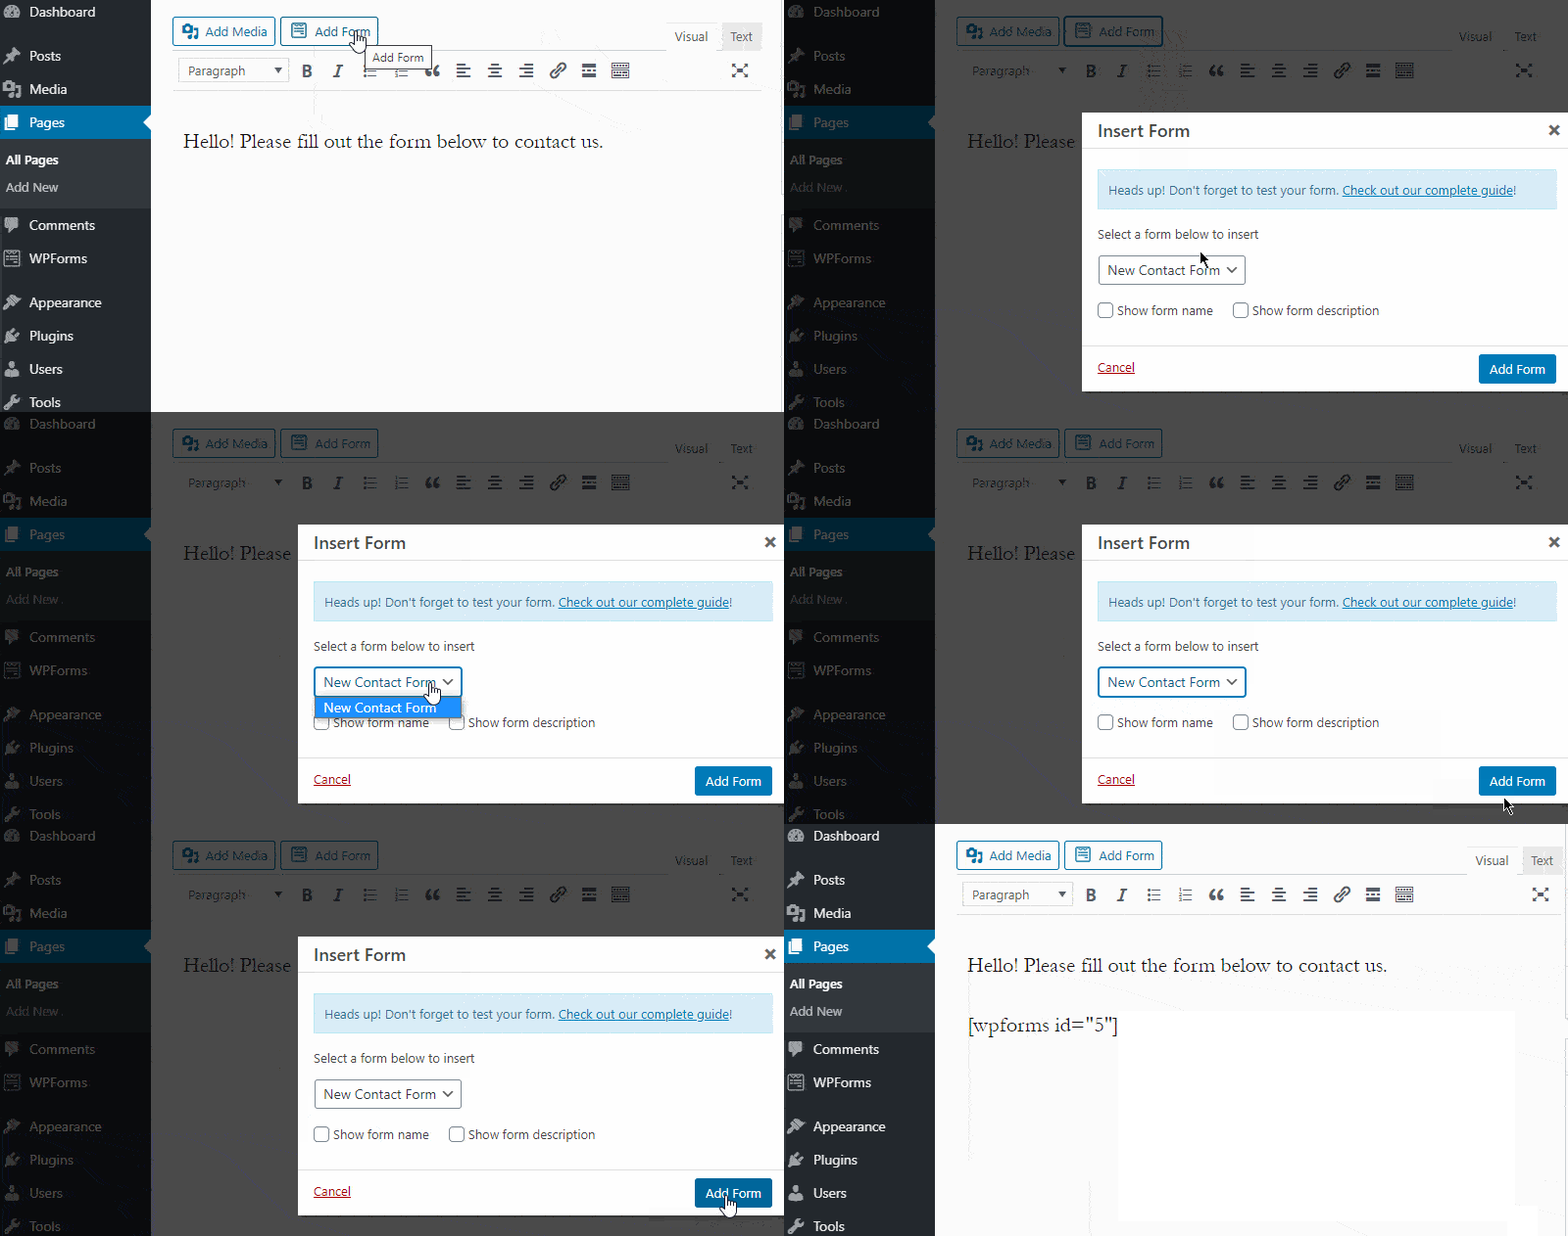
There you have it. You will have successfully added the contact form to your page by following these steps.
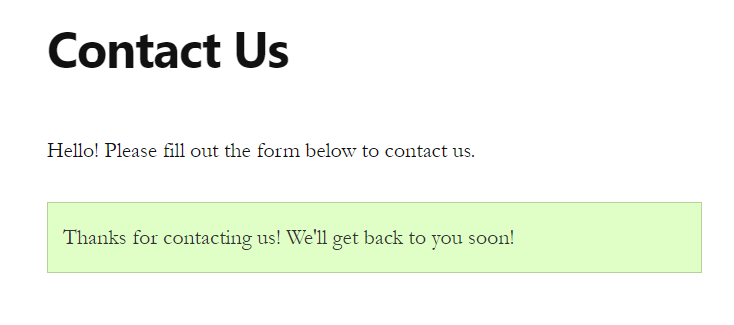
Let’s see how our form looks on a live site.
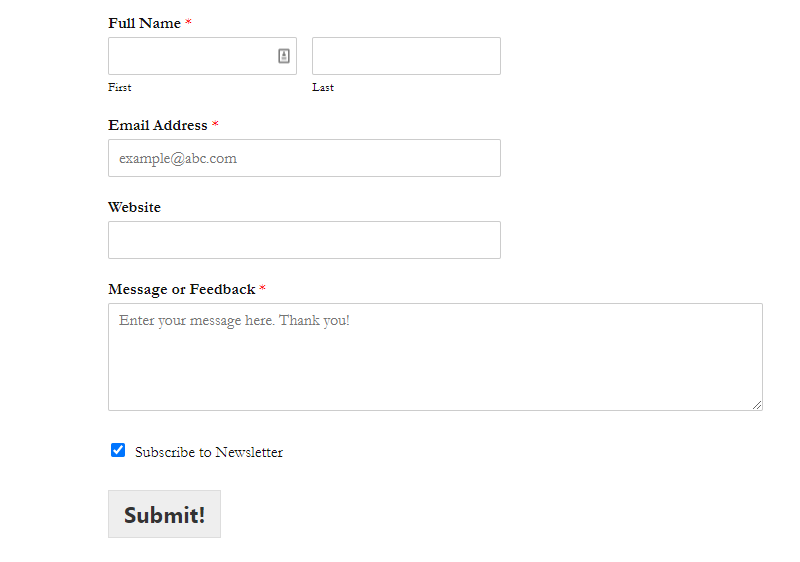
On filling out the form, we received the confirmation message that we’d configured in the settings.
Choosing the Best Contact Form Plugin
Choosing the Best Contact Form PluginCreating a contact form on your site could be difficult if you have to code. However, it’s easier to add a contact form in WordPress with the help of WordPress plugins.
So, here’re some of the things you’ll have to consider while choosing a contact form plugin.
- Ease of use: You should look for a beginner-friendly plugin that requires no coding. It should make it easy to create and add forms on any area, page, or post on your site.
- Features: The plugin should provide you with many features to improve your forms. You should have features like unique fields, responsiveness, confirmations, notification settings, integrations, etc.
- Add-ons: The plugin should support add-ons to add the extra features you need. Add-ons can achieve features like Google Analytics, payment integration, file uploader, pop-ups, reCaptcha, etc.
- Pricing: The form plugin shouldn’t cost you a lot and should come under your budget.
Now, let’s look at some of the popular WordPress forms that generate plugins.
Top Contact Form Plugins
Below are some of the popular contact form plugins available in the market.
1. WPForms
WPForms is probably one of the most popular form builder plugins, with over 6 million active installations. It has 2,000+ pre-built online form templates to save time and improve your workflow.
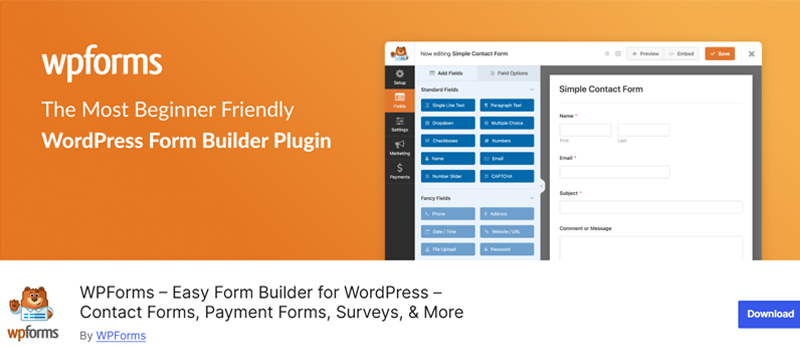
It also has WPForms AI, which will instantly create comprehensive lists for Dropdown, Checkbox, and Multiple-Choice fields or generate entire forms. You can personalize your forms based on the user’s input and easily show or hide fields with smart conditional logic.
2. Fluent Forms
With Fluent Forms, you can create custom advanced forms to collect customer data and payments. This plugin comes with 60+ ready-to-use customizable input fields. It also lets you view submitted entries in various charts to better understand the data.
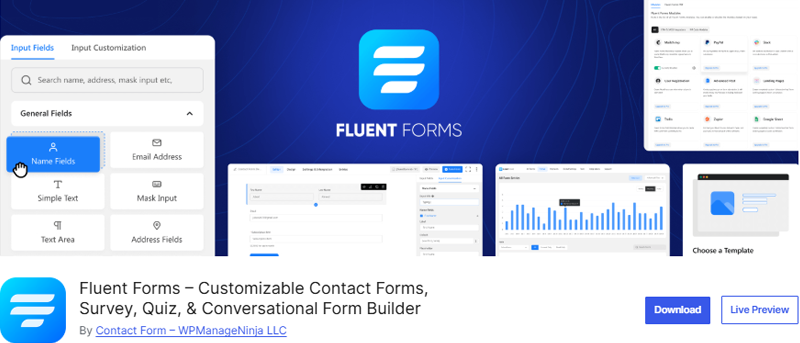
Moreover, you can create interactive forms that mimic natural conversations. You can make interactions feel like conversations with one input field at a time. Also, greet your users in style with a customizable welcome screen.
3. Contact Form 7
Contact Form 7 is the most popular free WordPress plugin, with over 10 million active installations. It lets you build and manage several forms on a single site simultaneously.

It’s certainly a powerful and flexible solution for building contact forms supported by third-party add-ons. However, compared to other plugins, it’s not a very beginner-friendly option. It requires some knowledge of HTML coding.
Conclusion
And that’s a wrap!
We hope that this guide helped you learn how to add a contact form in WordPress. If you haven’t created one already, you can follow along step by step.
Also, in the comments below, tell us about your experience using a contact form or if you’ve added one to your site. If we missed anything important, please let us know.
You may also check out our article on the best WordPress contact form plugins and the best eCommerce platforms.
You can also get in touch with us on Facebook and Twitter for more amazing content.


