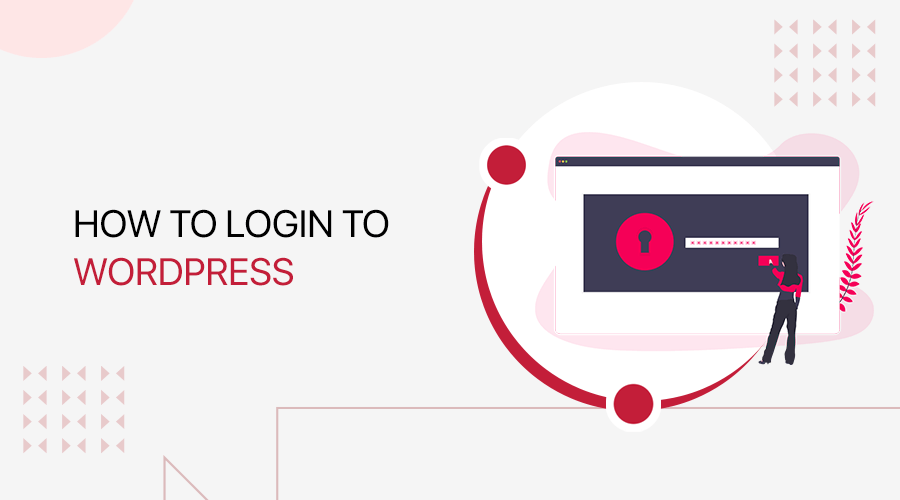
Do you want to know how to login to WordPress correctly? Or do you keep forgetting your account password? Then, this guide is for you.
Logging in to your WordPress site is important to go to your dashboard (admin area). The dashboard is what gives control over your website. From there, you can add content, manage settings, customize, and carry out the overall operations of your site.
But, beginners have a hard time logging in to their site’s admin area. They couldn’t find the login page or kept on forgetting usernames and passwords. Well, that’ll prevent you from going to the dashboard.
So, in this guide, we’ll be teaching you an easy way to WordPress login, saving the login URL, and WordPress password. So, you won’t have to memorize anything at all.
Here we go!
A. Basics of WordPress Login
Logging in to your WordPress site takes you to the WordPress dashboard. It is also called the WordPress admin area or admin panel. The admin area consists of options to configure your theme, posts, pages, media, settings, plugins, etc.
From there, you’ll be able to add posts, and pages, customize the site’s look, manage traffic, etc. In brief, the admin area gives the total control to manage your site.
To access the admin panel, you just need your user login credentials i.e. username and password. And then, enter them in the WordPress login page, the page to authenticate your username and password.
The WordPress login page consists of 2 fields for entering your WordPress username and password. Besides, it has a check-box labeled ‘Remember Me‘ for saving your login details. Lastly, it has a link from where you can recover your password in case it’s lost.
You might think how do you get your login credentials?
You usually get the login details when installing WordPress on your web host. After installing, you’ll get mail that contains a link to set your login credentials. From that link, you can easily set your username and password. You can also change them later if you want, from the Settings in your dashboard.
B. How to Login to WordPress?
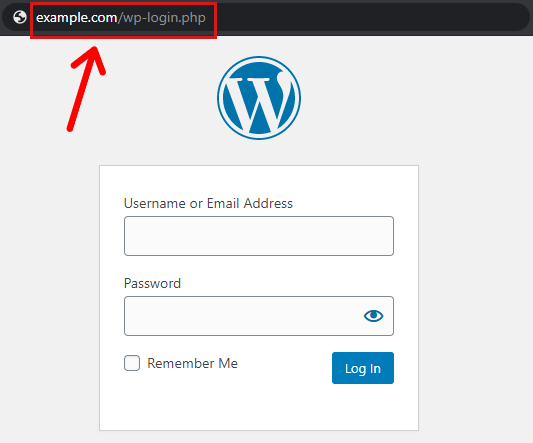
Generally, the login page comes up when you add ‘/wp-login.php’ or ‘/wp-admin/‘ at the end of your website domain.
Your typical WordPress login page URL looks like this:
www.example.com/wp-login.php
www.example.com/wp-admin/
Remember to replace ‘example.com’ with your own website’s domain.
Entering any of these URLs will take you to the login page where you can enter your username and password.
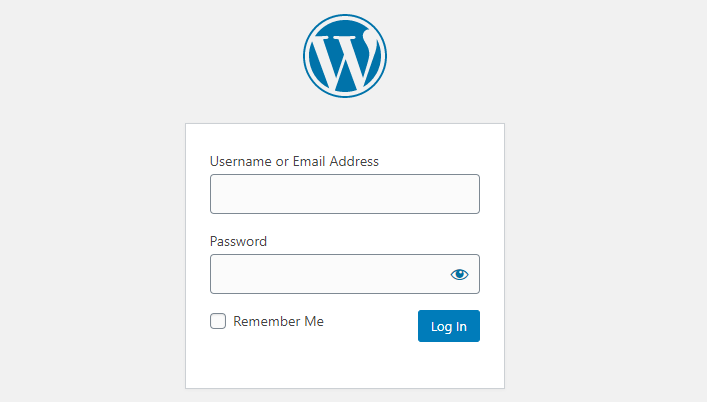
After entering your login details, click on the ‘Log In’ button. Then, you’ll directly reach your dashboard or WordPress admin area.
Pretty easy. Right?
i) Logging in to a Subdomain
There are cases when people have installed WordPress into a subdomain of a website. Generally, this is done to make a certain portion of your site function differently.
You can log in to the subdomain with the URL format like this:
subdomain.example.com/wp-admin
subdomain.example.com/wp-login.php
ii) Logging into a Subdirectory
If you’ve installed WordPress in a SubDirectory of a Website, then you can go to its login page with these URLs.
example.com/subdirectory/wp-admin
example.com/subdirectory/wp-login.php
C. How to Remember your WordPress Login URL?
Here’s a fact. People are used to forgetting the login URL. Let’s admit it! You might also have trouble remembering the URL. It’s no big deal because there are many ways you can save the link so you don’t have to remember it. Also, you won’t have to enter the URL every time you want to go to the dashboard.
Some of them are explained below:
i) Bookmarking the URL to your Browser
You can easily save the login page URL as a bookmark in your browser. It’s a way of saving the URL so that you don’t have to enter the URL manually on further visits. Most web browsers have that facility.
Different web browsers have a similar way of bookmarking the page. Here, we’ll see the steps for bookmarking the URL to the Chrome browser.
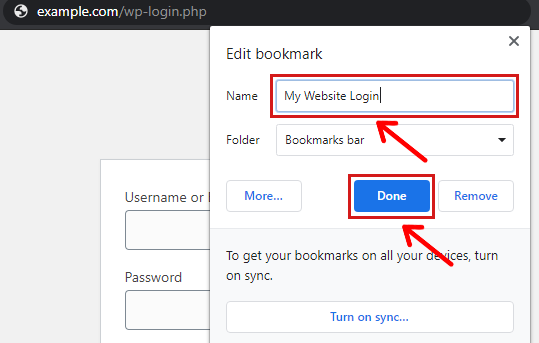
Step 1: Go to your login page using the URL.
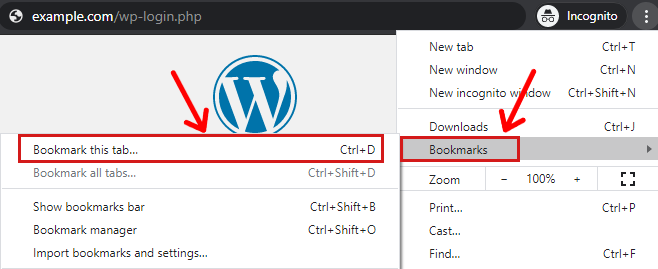
Step 2: Click the options buttons at the top right. Then, go to Bookmark > Bookmark this tab. Or, you can simply press Ctrl + D.
Step 3: Name the bookmark in the next screen. E.g. My Website Login
Step 4: Click Done.
ii) Adding Login Link to a Menu
It requires creating and displaying a new item on the menu and then linking the login page URL to it. For that, the following steps are required.
- Step 1: Go to Appearance > Menus.
- Step 2: On the next page, go to Custom Links.
- Step 3: Then, insert the login URL (https://sitenerdy.com/e.g. example.com/wp-login.php) and give a Link Text name (e.g. Login).
- Step 4: Click on Add to Menu.
- Step 5: Click on Save Menu.
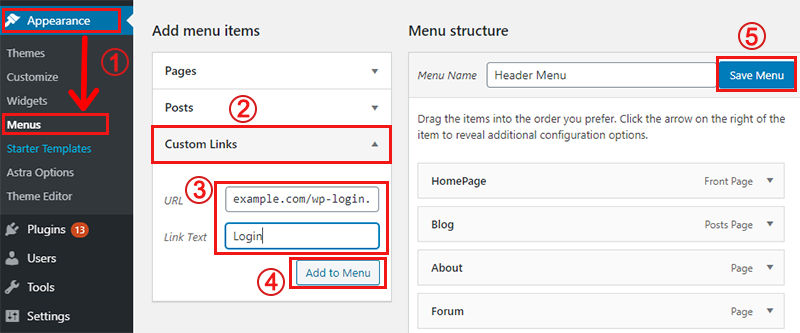
Then, a new item named ‘Login’ will be added to your site’s menu. And, clicking there will take you to the login page.
iii) Adding the ‘Meta’ Widget
Another alternative is to add the Meta Widget. It’s a default WordPress widget that mainly adds the site login link and other links like Entries feed, WordPress.org, etc. on widget areas.
Mainly, the sidebar and footer are the default widget areas. However, there can be more areas depending upon the WordPress theme you use.
Simply, you can follow the following steps for adding the Meta Widget.
- Step 1: Go to Appearance > Widgets from your admin area.
- Step 2: Find the ‘Meta’ widget in the available widget section. Then simply, drag it to the widget area where you want to add it.
- Step 3: Write the display title of the widget.
- Step 4: Click on Save.
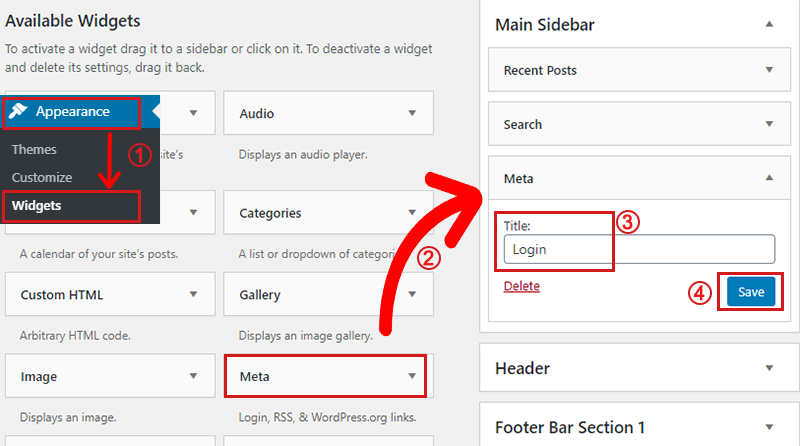
After that, the Meta widget will be added to the area you’ve chosen. You can easily go to your login page by clicking on the ‘Login’ link. Similarly, if you’re logged in, then it will display as ‘Log out’. You can use it to log out of your dashboard.
D) How to Remember your Login Credentials
Remembering your login credential helps you to avoid entering your username and password every single time you log in. Also, it eliminates the need of recognizing the login credentials.
But, you don’t want to remember your login credentials on a computer if it’s used by multiple users. It’s because they might log in to your site and misuse it.
Anyway, there’re plenty of ways to remember your website login details. Some of them are explained below.
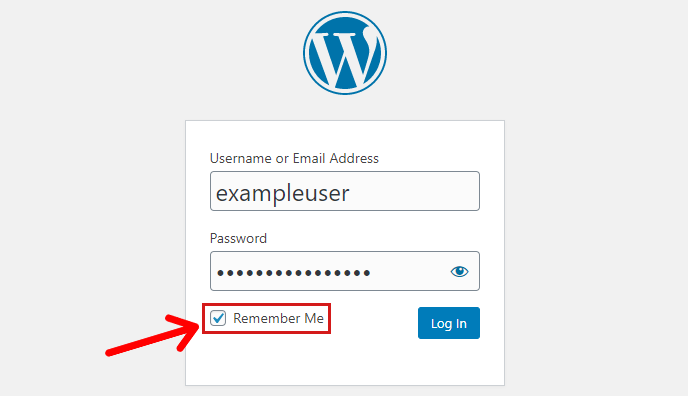
i) By Ticking Remember Login
In your WordPress login page, you’ll see a checkbox marked ‘Remember Me‘. Simply, tick the box. Then, your username and password will be saved for up to 14 days.
ii) With Password Managers
Third-party password managers are also useful for remembering your WordPress login info. Some of the best password managers are LastPass, DashLane, RememBear, True Key, etc. Most of them are paid services while some of them also provide limited free services.
We recommend using the free option of LastPass. It has an easy user interface. Also, you can add it to your browser as an extension.
To use the service, you just need to sign up and create an account on LastPass. For that, you can go to the LastPass site and go to Log In > Create an account. Then, you’ll have to sign up with your valid email address and a strong password there.
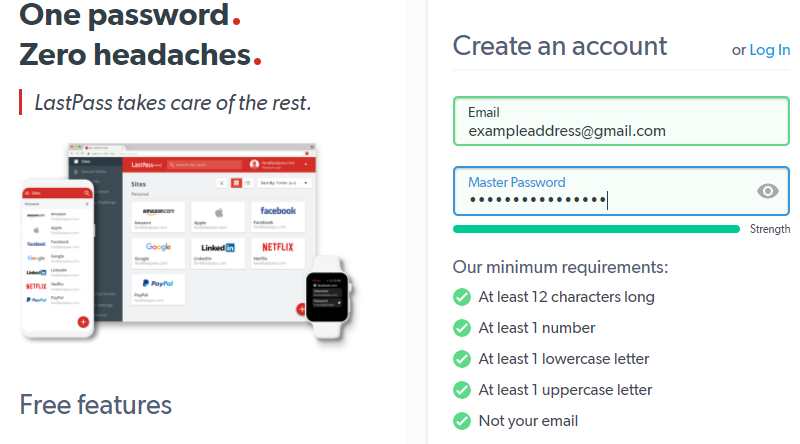
After successfully signing up, you can add the LastPass extension to your browser. Having that, it’ll automatically ask if you want to save the password after the login process. You just have to accept the suggestion and click on the ‘Add’ button. Then, your password will be securely stored.
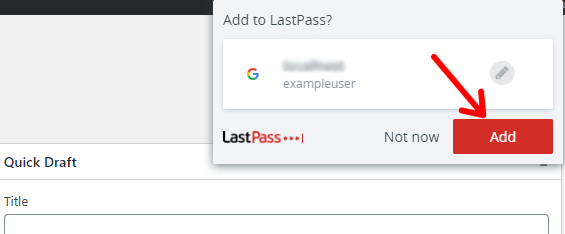
To your benefit, the login credentials will automatically be filled in on your login page during the visit. So, you won’t have to memorize and enter them every time.
Note: you can use LastPass to manage passwords of not only WordPress but other websites too.
iii) With Plugins
Similarly, you can use plugins for remembering your login details. There’re tons of such plugins available in the WordPress plugin repository for free.
You can install any one of them. Among them, we recommend the ‘Remember Me Controls’ plugin.
To install it, go to Plugins > Add New.
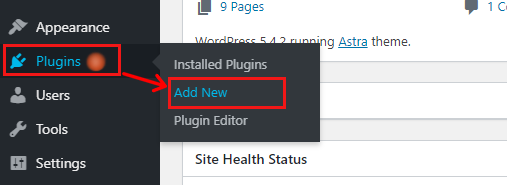
Then, search the plugin by its name. After it shows, click on Install, and then Activate. The plugin will be successfully installed on your site.
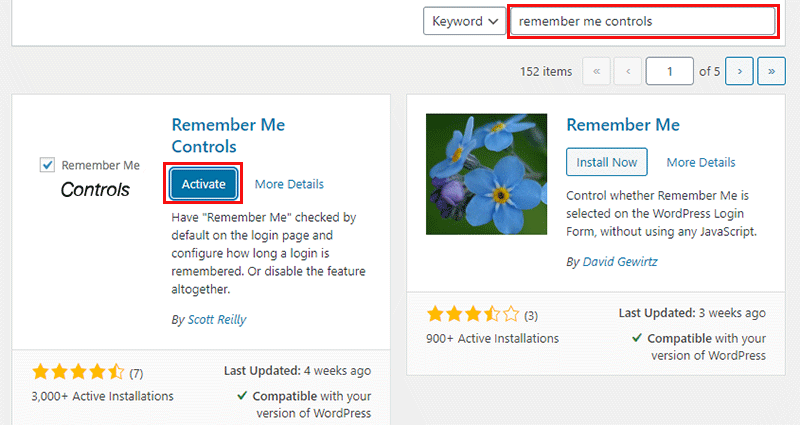
It lets you carry out 3 tasks specifically:
- Tick the ‘Remember Me’ box.
- Set the duration for how long it remembers your login credentials.
- Disable ‘Remember Me’ feature.
Now, you can manage those settings from Settings > Remember Me.
E) Adding a Custom Login Page
You can also create and use a custom login page on your site. It can be useful for logging in for multiple users, subscribers, and membership accounts. For those users, you might not want to display a WordPress-branded login form. Then, you’re in need of a custom login page that matches the theme of your site.
There are multiple ways to do so. But, the easier way is to use plugins like Theme My Login. Simply, you can install it from Plugins > Add New from your WordPress admin area.
Read here how to install plugins in WordPress.
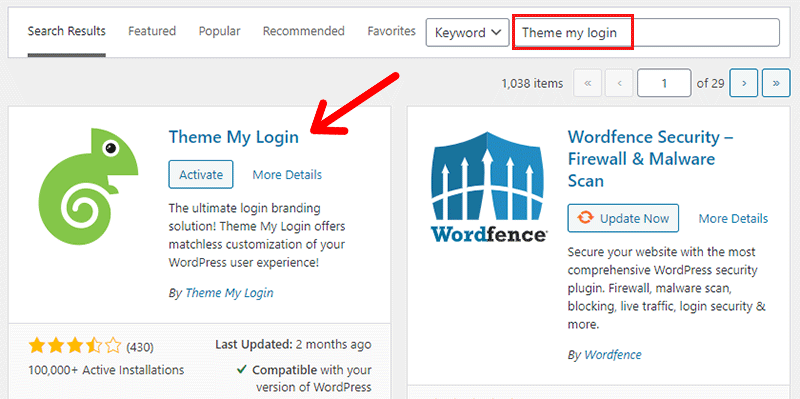
It can help you do a multitude of tasks. For instance, you can create custom login pages, custom registration pages, redirects, add ReCaptcha, etc. Also, you add links like Login, Logout, Register, etc. in the front of your site.
Most importantly, it also lets you change the login URL of your site. It’s useful if you want to protect your site from brute-force attacks and other login-related threats.
Conclusion
We hope this article helped you to know how to login to WordPress. Also, we’re sure that you can now easily log in to your site without the hassle of remembering the login URLs and passwords.
If you find this article helpful, then let us know. Also, you can ask for help with anything related to this article. Kindly, use the comment section to inform us.
Also, you might find our tutorial ‘How to Optimize your Website Speed‘ helpful. Be sure to go through it once.
Lastly, connect with us on Facebook and Twitter for more useful updates.
