Want to add images side by side in WordPress Gutenberg? If yes, then you’ve come to the right place to figure that out.
Back then, putting images side by side on pages and posts was a real struggle. But it’s no more! The introduction of the new WordPress block editor (Gutenberg) has made that a lot easier.
To be precise, it has a ‘Gallery’ block that allows you to showcase images in rows and columns. And the best part, you don’t have to write a single line of code. But still, newbies may find it difficult to add images side by side in the Gutenberg block editor.
Keeping that in mind, we’ve arranged a step-by-step guide on how to put the pictures side by side in WordPress. Let’s get started.
What is Gutenberg WordPress Editor?
Before getting into the topic, let’s know what actually is Gutenberg WordPress Editor briefly.
With the release of WordPress 5.0 in 2019, it came up with a new editor called “Gutenberg”. The old classic editor was simply a text editor with formatting options, just like Microsoft Word.
On the other hand, the new editor uses a completely different approach to creating content. Here, the content is added in individual ‘blocks’, instead of within one large content field. Thereby, it’s called a block editor.
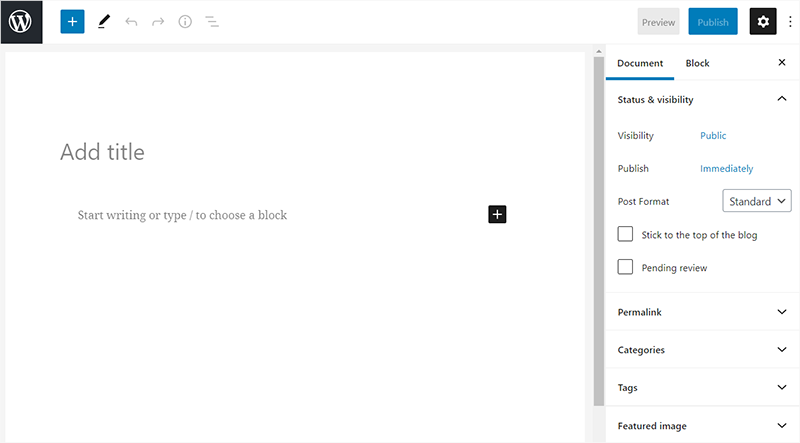
Blocks are the content elements that you add to the edit screen to create content. Every single piece of content in Gutenberg is a block. To be more specific, an image is a block, and so is a gallery, paragraph, headline, button, etc.
Each block includes its own set of properties for changing things like color, width, and alignment.
Gutenberg is now the default editor that every up-to-date WordPress site uses. The main difference between it and the classic editor is the block-based approach to creating content.
All in all, the block editor gives you more visual and intuitive ways of creating content.
How to Add Images Side by Side in WordPress Gutenberg?
You can put your images side by side in WordPress Gutenberg by just following a couple of steps. The only thing you’ve to do is use the Gallery block. With it, you can add multiple images and arrange them in the way you like.
Here, we’ll show you how to do it from scratch. So, just follow along with us.
Step 1: Create a New Post or Page
First of all, you’ve to create a new post to open the content editor.
For that, you’ve to log in to your WordPress website. With that, you’ll reach your WordPress dashboard. From there head into Posts > Add New.

Step 2: Select the Gallery Block
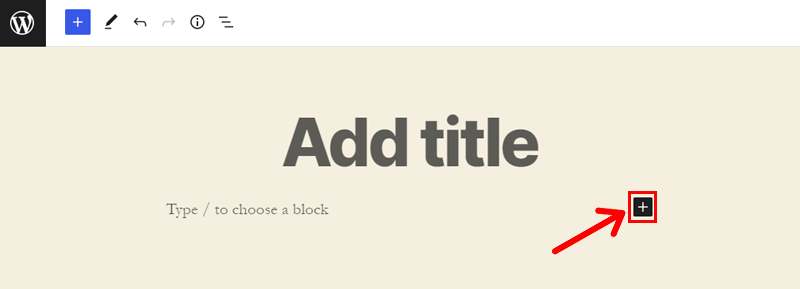
Once you get there, click on the (+) symbol to add a new block.
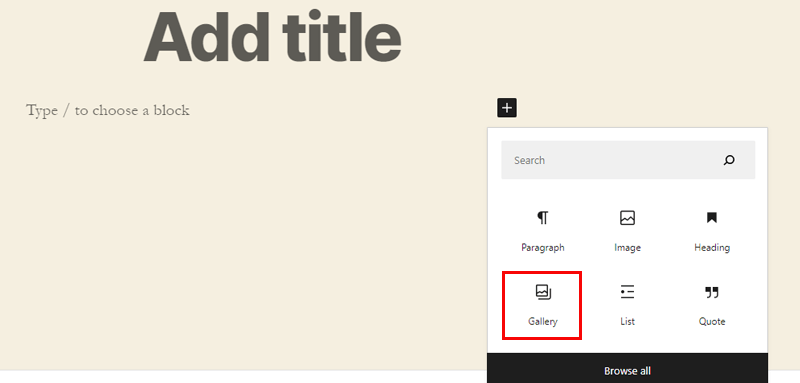
Afterward, you’ve to click the Gallery block and add it to your page. You can even take the help of the search bar to find it.
Step 3: Add Images to the Gallery Block
Now, you can add images of your choice to the gallery block. Either, you can drag, upload or select images from your WordPress media library.
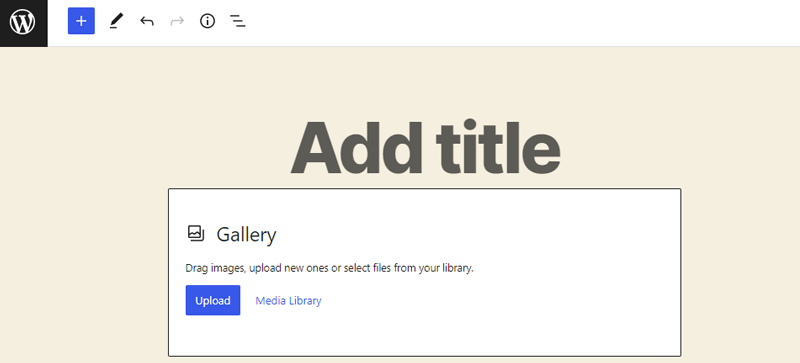
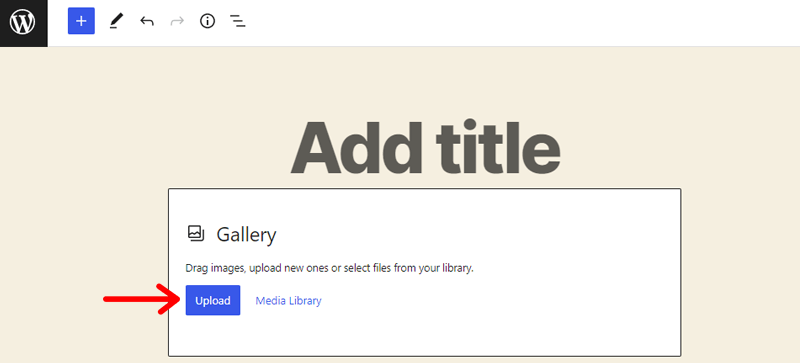
Okay, let’s upload images, by clicking on the Upload button.
After adding 2 images to the Gallery block, the results look like this:
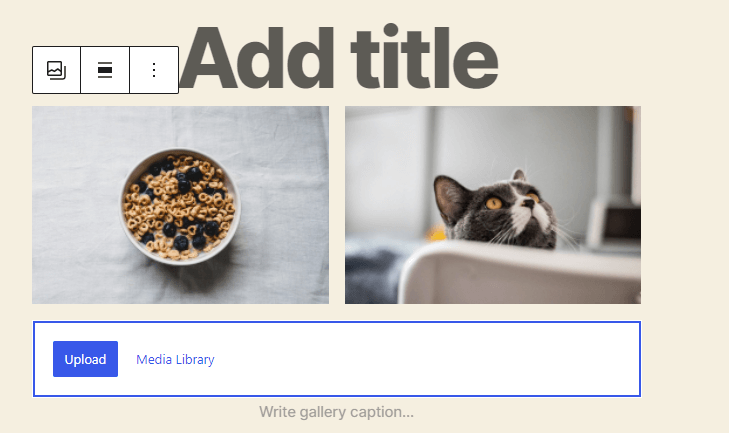
WordPress by default has positioned these images side by side. But what the output will be if you add 3 images, instead of 2? Let’s try that out!
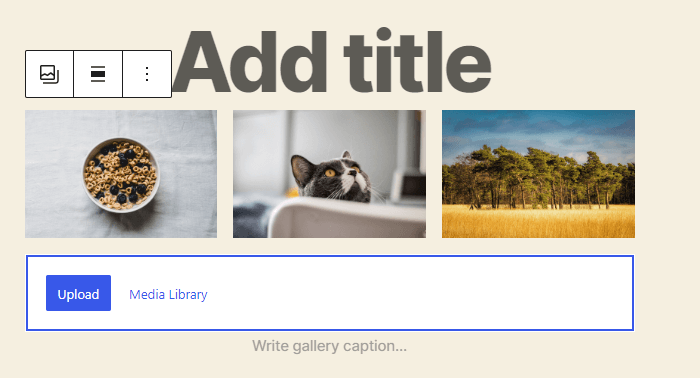
As you can see, WordPress has adjusted the sizes of all three images. So they sit side by side in a single row.
Next up, let’s see what will happen if we upload the fourth image.

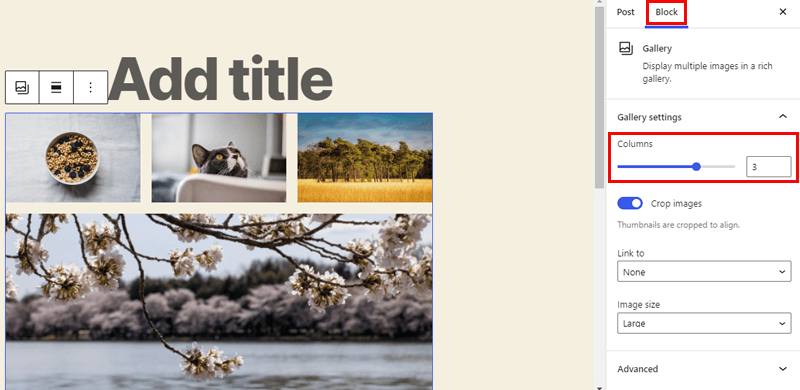
The last uploaded image will sit below, while the other 3 images fit side by side.
If you look at the right-hand side, there is the Gallery’s block setting. From there, you’ve full control over the number of images you want in a single column.
Let’s check out these options. It allows you to set the columns from 1 to 4.
For putting two images side by side and two on the next column, you’ve to set the columns to 2.
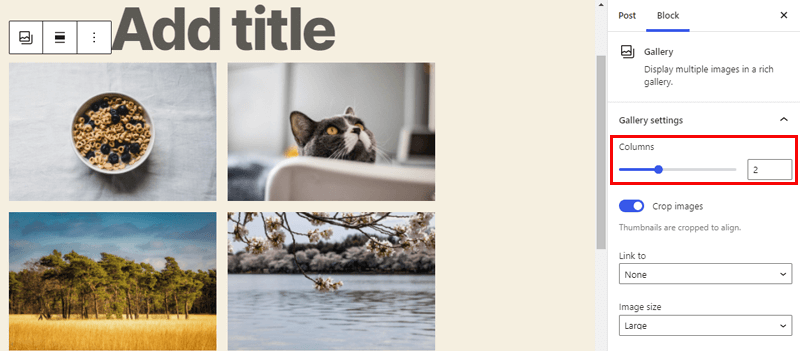
This is how it works!
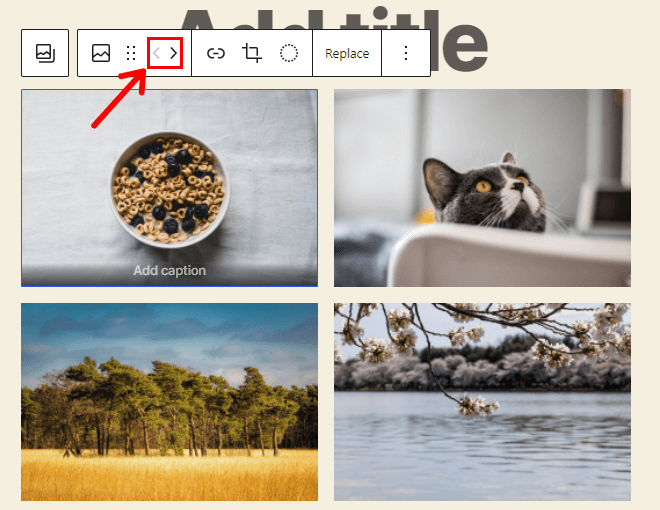
Similarly, you can also change the position of an image in your gallery. For that, you’ve to click on an image. And there, you’ll see arrows by which you can move images in the upward or backward direction.
Step 4: Save and Publish!
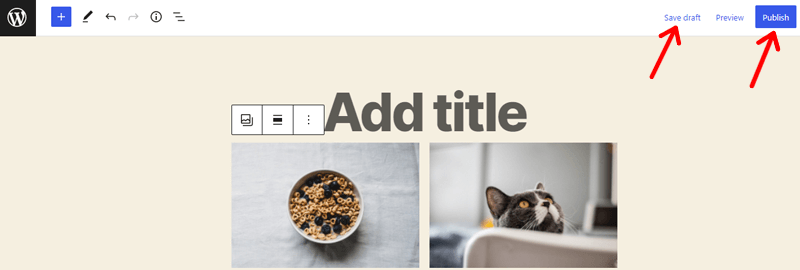
Finally, the last remaining task is to click on the Save button at the top right corner.
Once everything is done you can click on the Publish button to make your gallery live on your site.
That’s it! Pretty easy right?
How to Add Images Side by Side by using a Plugin?
Likewise, if you’re looking for creating highly advanced galleries, then we recommend you to use a WordPress gallery plugin. In this tutorial, we’ll be using one of the well-known WordPress gallery plugins named Envira Gallery.
So, let’s get started.
Step 1: Install a WordPress Gallery Plugin
First and foremost, you need to reach your WordPress dashboard. Only from there, you’ll be able to install this plugin.
Now, navigate to Plugins > Add New.
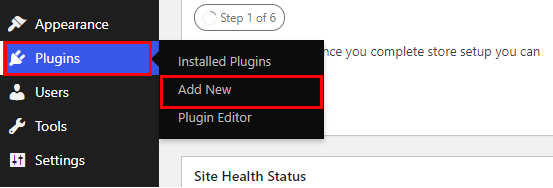
With that, you’ll be redirected to another page.
Next up, search for ‘Envira Gallery’ once it appears, click on the Install button.
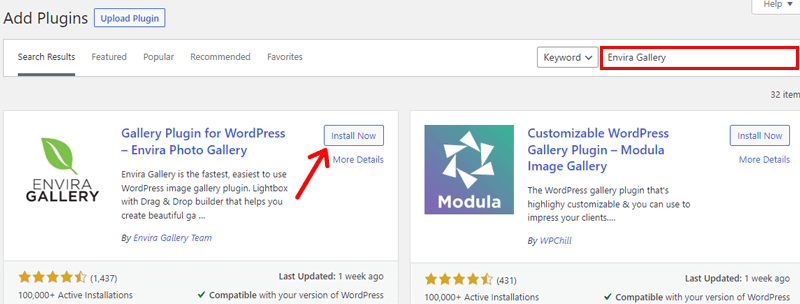
The moment the plugin gets installed, click on the Activate button. And with that, the plugin is successfully activated on your WordPress website.
Step 2: Set up your Gallery
After activating the Envira Gallery plugin, go to Envira Gallery > Add New.
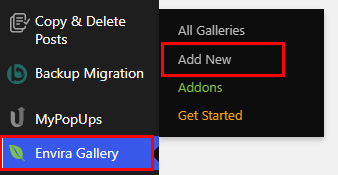
Now, it’s time to add a title to your gallery. Next up, you’ll see some options to upload images that you like.
Step 3: Upload the Images
Either you can drag and drop those images or use any of the ‘Select Files’ buttons.
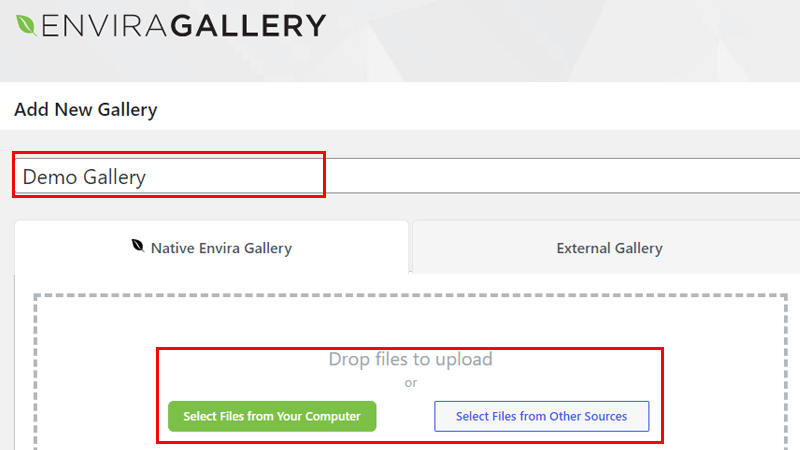
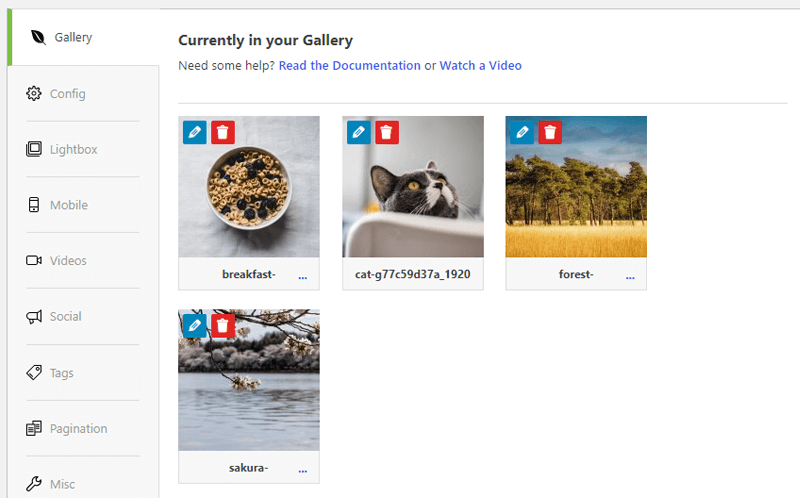
After waiting a while, this is how the images look when they’ve been uploaded successfully.
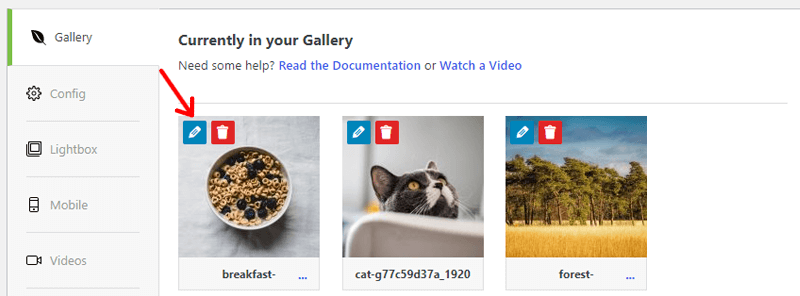
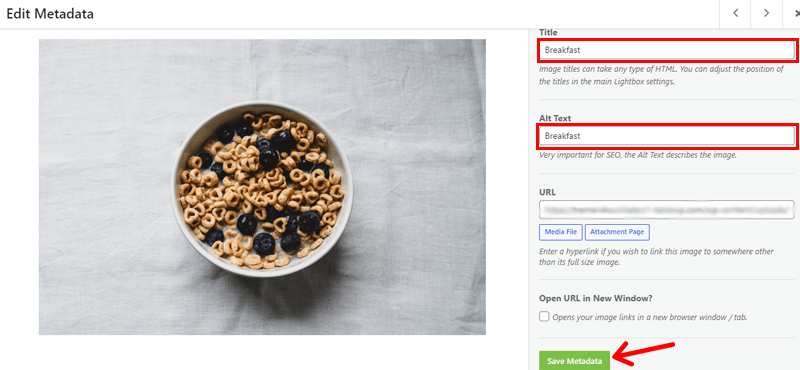
There you’ll see a blue ‘Pencil Icon’, click on it. Now, from there you can provide your images with a title and alt text.
This is useful for describing the image so that both search engines and viewers have a fair understanding of it.
After filling in, don’t forget to click on the ‘Save Metadata’ button.
Step 4: Save and Publish!
You need to publish your gallery first so that you can add it to your site. Thereby, click on the Publish button which is on the right-hand side of the screen.

Following that action, you’ll receive a notification, i.e. “Envira gallery published”.
Step 5: Create a New Post or Page
With that, the time has come to create a new post. Go to Posts > Add New on your WordPress dashboard.
Step 6: Select your Gallery Block
Once you do that, click on the (+) symbol to add a new block to your post.

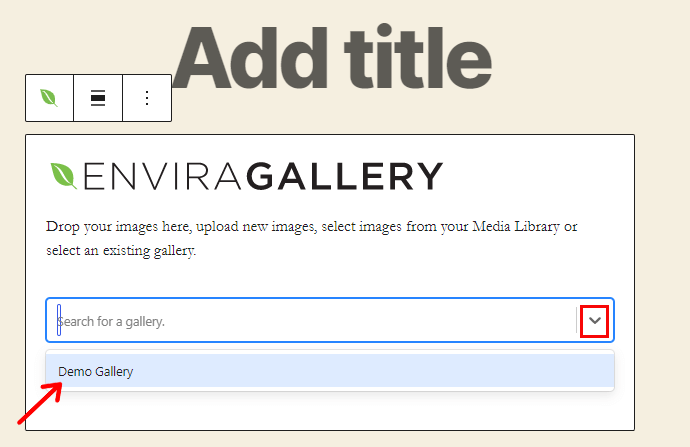
Afterward, you’ve to select the Envira Gallery block. You’ll see it right there, if not, you can use the search bar to find it.
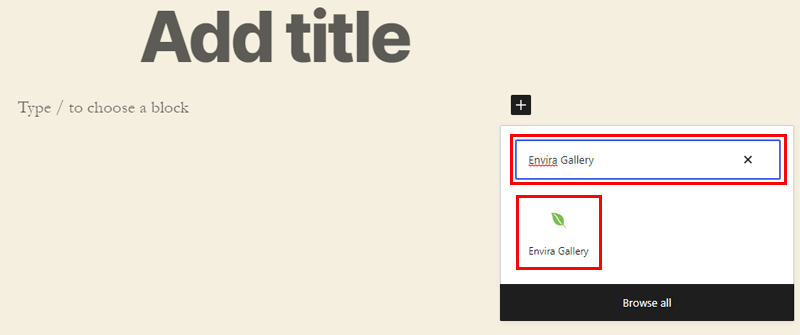
Next up, you’ve to click on the dropdown there. And select the gallery which we’ve created just a while ago.
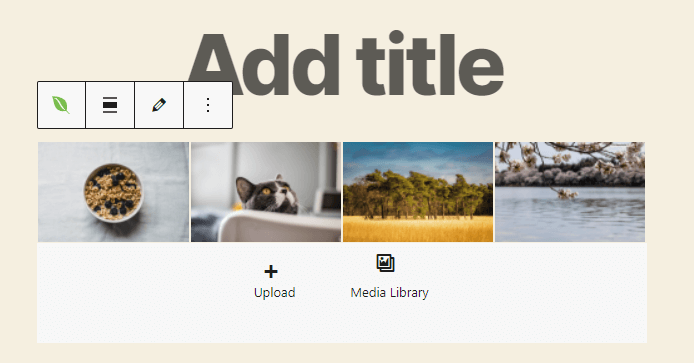
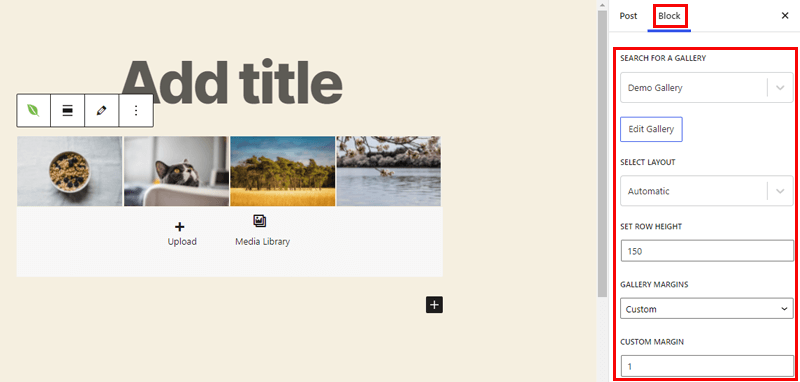
As you can see, the gallery is placed on your post. Now, you can make adjustments if you want from the right-hand side of the screen.
From there, you can set the gallery to display in either one, two, three, four, five, or six columns. You can even add a wider margin between the images.
The best part is, that users can view all the inserted images in the full-size mode in a lightbox. To see this effect, all you have to do is preview the gallery in a new tab.

You can add more images to your gallery without putting much effort. For that, you’ve to head on to Envira Gallery > All Galleries in your WordPress dashboard.
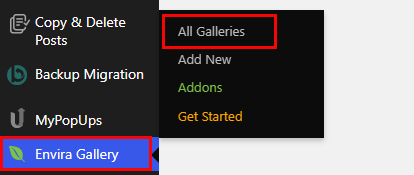
Now, you’ve to simply click on the title of your gallery for editing purposes.
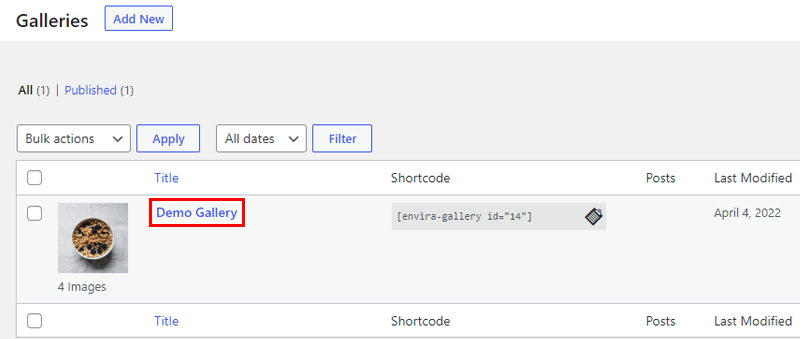
Thereafter, you can make your desired changes to your gallery. That’s it, these changes will reflect automatically on the posts/pages where you’ve inserted the gallery.
Conclusion
And that’s a wrap! So, in this article, we’ve covered how to add images side by side in WordPress Gutenberg. We hope you liked it!
We also believe that this guide has helped you to make photos side by side in WordPress Gutenberg.
The easiest and most time-saving method for getting your images side by side is; using the WordPress block editor. If you want cutting-edge galleries beyond simple ones, then Gutenberg isn’t that handy. In such cases, it’s better to use a gallery plugin.
Check out our article on what is WordPress full site editing & how to use it? Also, you might be interested to know how to insert GIF in WordPress?
If you liked it, then follow us on Facebook and Twitter for similar types of content.
Still, do you’ve any questions? Then leave a comment below.
