Are you wondering how to create a reusable block in WordPress? If yes, then you’ve landed in the right place to master that.
When writing a blog or review article, there’s a chance that you’ll be using the same content snippets in your posts. So this is where a reusable block will come in handy and save you time to create a new one. Reusable block also allows you to save any content block and reuse them in any posts and pages.
Therefore, in this article, we’ll walk you through how to create a reusable block in the WordPress block editor. So, stick with us as we guide you through until the end of this article.
Let’s get started!
IN THIS GUIDE
hide
What is a Reusable Block in WordPress?
Before moving on, let’s talk about what is a reusable block in WordPress.
A reusable block is any content block that is saved separately so you can use it later in your post. This helps you add the same content snippets like call-to-action, links to follow on social media, etc., in multiple blogs.
With Gutenberg editors’ reusable blocks, you can instantly add them anywhere on your post and pages. For example, you have a paragraph block where you often use the same text. So, to avoid rewriting it every time, save it as a reusable block for later.
Another amazing this is that you’ll be able to edit the design of the reusable block. And that’ll make auto-changes to the same blocks you’ve used in other posts or pages. Therefore, you don’t need to modify the reusable block in every post manually.
There are some instances where you can use reusable blocks to make your workflow easier.
- Adding social media links at the end of the article.
- Use call-to-action buttons on your post and pages.
- Able to save and reuse tables.
- Also helps to add feedback forms to your pages quickly.
Hence with reusable blocks, you can save a single block or group of blocks to use later on your website.
Do you want to learn to create a website from scratch? If yes, then here’s our blog on how to create a website. So, make sure to look into it!
That being said, let’s check how to create a reusable block in the WordPress Gutenberg editor.
What are the Benefits of Using Reusable Block?
Before moving on, let’s learn the benefits of using reusable blocks.
- You don’t need to copy and paste a content template to a post or page.
- Easily design a webpage and duplicate it on another website.
- Allows you to add blocks like email opt-ins and author biographies at the end or beginning of the article.
- Also, save surveys, forms, and quizzes as reusable blocks and change the content later to add to your post.
- Able to duplicate complicated tables and reuse them next time.
There are unlimited benefits of reusable blocks. You can create any block as a reusable block and use them later on your website. Also, reusable block helps to save time and unnecessary workload.
If you’re making an eCommerce website, then there are several block plugins for WooCommerce to use. Learn those best WooCommerce block plugins for Gutenberg Editor here! One of the top plugins we recommend is ProductX. So, also look into the ProductX review.
Now, let’s start by creating a reusable block in WordPress.
How to Create a Reusable Block in WordPress?
When working with the Gutenberg block in WordPress, all the blocks are individual content; therefore, save them individually as reusable blocks. Or you can make a section using those blocks and save them as reusable blocks. We’ll describe it in detail later below.
Now, let’s start!
1. Creating a Reusable Block in WordPress
To start the process, first, you need to create a new post or edit an existing one.
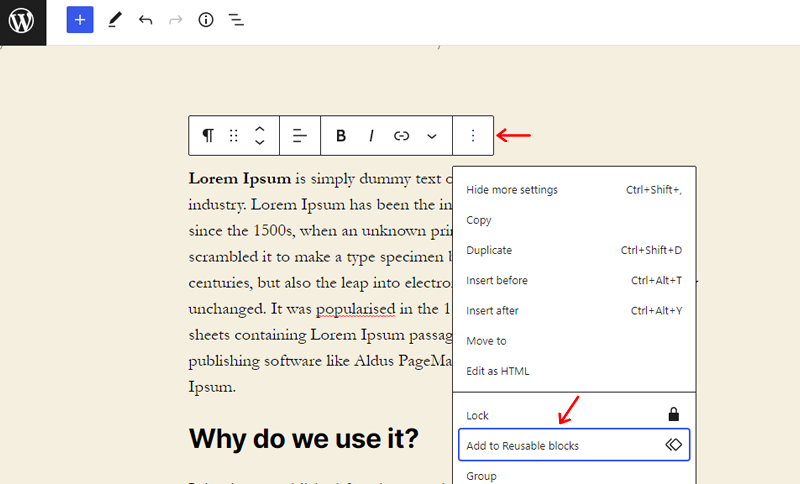
After that, select the block you want to reuse and click on the 3 dots on the toolbar. Now click on the “Add to Reusable Blocks” option. In this example, we’ll take a paragraph block and save it as a reusable block.
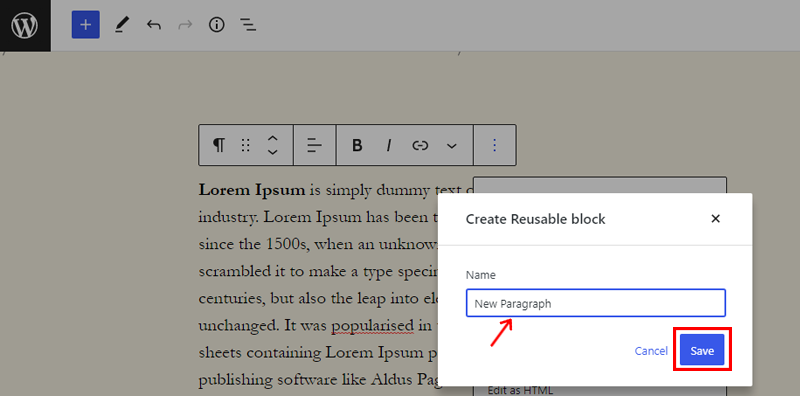
Following that, you need to name the reusable block. So, name the block that’ll make it easy for you to identify later.
Lastly, click on the save button to save your reusable block. And this will save your block in the WordPress database.
Group Multiple Blocks into Reusable Block
A reusable block is not always a single block, and you can add a group of blocks as reusable blocks. Here, we’ll take an example of 2 paragraph blocks and create a reusable block.
First, select the blocks you want to create reusable blocks. Now click on the 3 dots on a toolbar and click on the “Add to Reusable Block” option.

Name the block and save it. And you’re done creating a group of blocks into a reusable block.
Convert to Normal Block
If you want to convert the reusable blocks into regular blocks, then it’s easy.
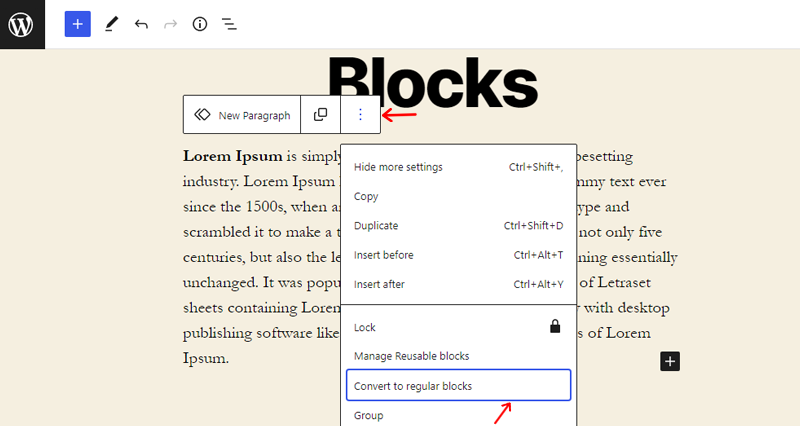
After adding the reusable block to your post, click on the “Convert to Regular Blocks” option on the toolbar.
Now save the block, and you’re done.
2. Add Reusable Block to Post or Pages
Now you know how to create a reusable block. Let’s learn how to add a reusable block to posts or pages in WordPress.

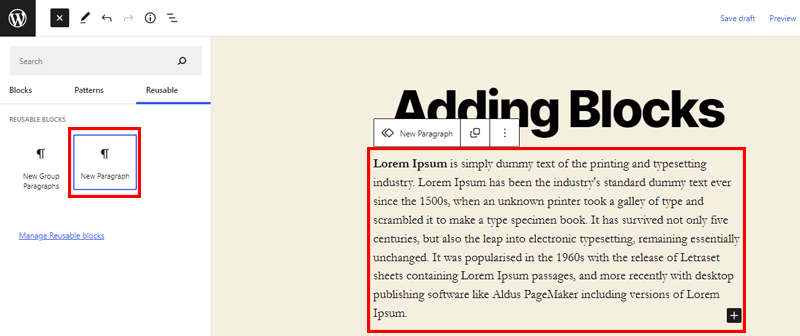
Now, start by creating a post or editing the existing post where you want to add the reusable block. Now click the add new button (+) on the edit screen. There you’ll find the reusable blocks under the “Reusable Tab.”
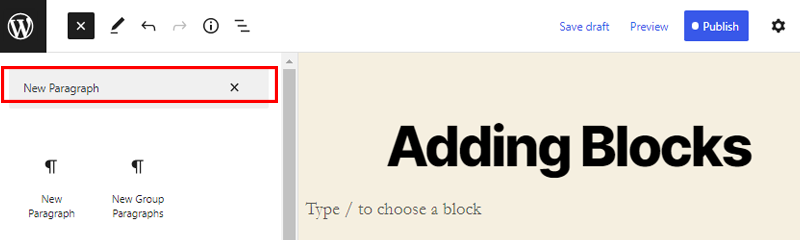
You can also search your reusable block by typing its name on the search box.
Now click on the block that you want to add to your post. And your block will appear on the post.
Congratulation! you’ve successfully added the reusable block to your post.
3. Edit Reusable block
You’ll always be able to edit the reusable block simply by clicking on the edit button on the block. However, modifying the reusable block will alter it in all the locations where you’ve added the block.
So, if you want to modify it on a single post, then you’ll need to convert it to a regular post first. And you’ll be able to make changes without altering the original reusable block.
4. Import or Export Reusable Block
The best part is that you can use reusable blocks on any other WordPress website. This means it’s not only for the website it’s created for.
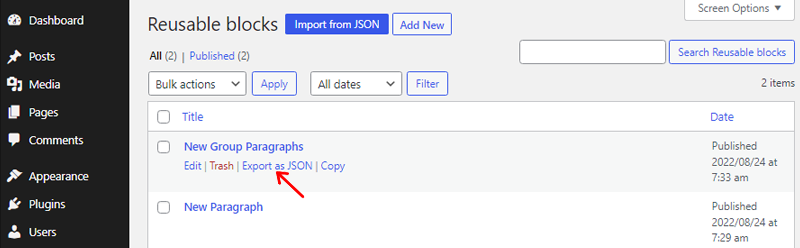
To import or export the blocks, go to the block management screen on your WordPress dashboard. Now click on the “Export” option on the blocks you want to export. And WordPress will send your file as a JSON file.

After that, switch to another WordPress website’s dashboard. Go to the block management screen and click the “Import from JSON” button.
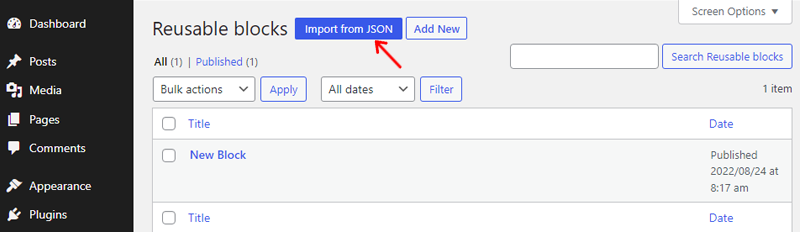
Following that, you will see a file upload box. Click the “Choose File” button and select the file you want to download, then click the “Import” button.
Now your reusable block will be saved on your WordPress dashboard. You can start using it instantly on your website.
5. Managing Reusable Block
After creating many reusable blocks, there may be instances where you don’t want to use some blocks. Or you may want to rename your reusable blocks. Hence, the Gutenberg editor allows you to manage all your reusable blocks from a single screen easily.
So to manage blocks, simply click the add block button and the “Reusable” tab. There you’ll find the “Manage All Reusable Blocks” option.
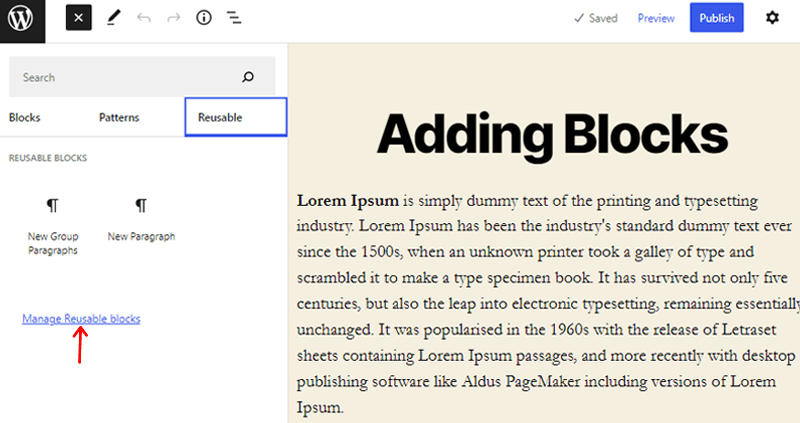
After clicking on the option, you’ll be directed toward the block management page. From this page, you’ll be able to easily edit, delete, export, and import your reusable blocks.
That’s how you create a reusable block in WordPress. And thanks for sticking with us till the end!
Conclusion
Well, that’s all for now! In this article, we’ve mentioned how to create a reusable block in WordPress. We hope that’ll help you know how to create, edit, add, manage, and import your reusable blocks in the WordPress Gutenberg editor.
So, if you’ve any queries or suggestions regarding this article, then let us know in the comment below. You can also share your experience of creating a reusable block in WordPress.
You can also check our article on what WordPress block patterns are and the best WordPress block themes and templates for Full Site Editing.
Also, don’t forget to follow us on Facebook and Twitter for more useful updates.
YOU MIGHT ALSO LIKE...
We've picked you some best articles that you might be looking for. Check them now!