DDoS (Distributed Denial of Service) attacks can interrupt a website’s performance. So, understanding how to prevent DDoS attacks on WordPress is critical. This reduces their impact and minimizes the chances of them happening.
To protect your website from DDoS attacks, it’s important to take proactive measures. Pick a reliable host and properly configure your security settings.
Otherwise, DDoS attacks lead to downtime, lost revenue, and lower search rankings. Ignoring these steps is risky, so it’s vital to reduce the potential damage.
This ultimate guide offers actionable strategies to prevent your WordPress site from DDoS attacks. Keep reading to strengthen your WordPress site’s defenses.
Here we go!
IN THIS GUIDE
hide
What is a DDoS Attack? What are its Types?
First, let’s start by having a clear understanding of DDoS attacks and their types.
A DDoS attack is when someone tries to overload a website or server with too much traffic, causing it to slow down or crash. Attackers use many hacked computers to send a flood of traffic all at once.

In fact, such attacking traffic comes from many sources. So, blocking one source won’t stop the attack.
As a result, the heavy traffic can overwhelm the server or network. With that, it may not be able to handle real users trying to access your site. That’s how your website becomes unavailable.
Let’s say 1000 people are simultaneously trying to open the door to your small store. They aren’t here to buy anything but block real customers from getting in.
That’s what a DDoS attack does to your site. It floods it with fake traffic from many sources so real visitors can’t access it.
Types of DDoS Attacks
Further, DDoS attacks can vary, depending on which part of the network component they aim for. Understand them to use reliable mitigation methods:
- Volumetric Attacks: These attacks try to overload your website’s bandwidth by sending large amounts of data.
- Protocol Attacks: This attack focuses on exploiting weaknesses in the protocol (communication rules) to imbalance server resources.
- Application Layer Attacks or Layer 7 Attacks: Such attacks use some specialized software or services (like HTTP) to overwhelm resources.
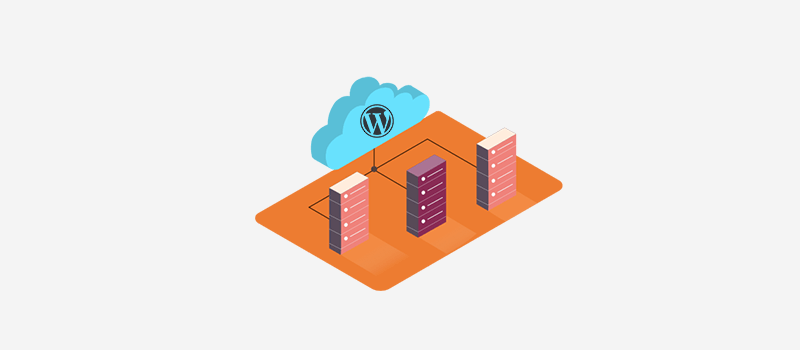
How Do DDoS Attacks Impact WordPress?
Wondering why DDoS attack protection is crucial on WordPress? Here’s a list to describe how this attack can negatively impact your website.
- Slow Performance: Large amounts of fake traffic can slow down the page speed for genuine users. This negatively affects your site’s performance.
- Site Downtime: When your server can’t handle all the incoming requests, it gets overwhelmed and shuts down. So, your website becomes unavailable.
- Poor User Experience: Obviously, frustration among the real visitors increases as the website is no longer available. This maximizes bounce rates.
- Loss of Revenue: Let’s say you have an online store. Your slow or unavailable site can decrease the sales or leads. This results in revenue loss.
- Security Risks: Your website also becomes vulnerable to other risks. That’s because it becomes easy for hackers to get access from weak spots.
Did you know? According to Statista, the total number of registered DDoS attacks was about 512K in 2024. With the growing cases, taking action becomes crucial.
But how to detect such an attack? Keep reading!
How to Detect a DDoS Attack on WordPress?
Early detection of a DDoS attack lets you quickly respond and minimize damage to your WordPress website. If your site has these common signs, then this may indicate that your site is under a DDoS attack:
- Sudden Traffic Spikes: Check if there’s a rapid and unusual increase in site traffic from unknown sources.
- Slow Site Performance: Ensure that your web pages aren’t taking too long to load or getting timed out.
- Server Resource Overload: Go through your hosting dashboards and logs to see if there’s increased memory usage or CPU value.
- Frequent 503 Errors: If your website displays ‘Service Unavailable’ errors due to server strain, then it’s likely to be an attack.
- Unusual IP Activity: Several requests from a single or group of suspicious IPs is also a sign.
- Alerts and Warnings: Be aware of the alerts from your host and security plugins. They warn you about high traffic, repeated requests, or abuse.
With that, let’s dive into the practical methods for reducing DDoS attack chances.
How to Prevent DDoS Attacks on WordPress?
Prevention is better than cure. So, why wait to repair your website after it’s vulnerable when you can try to prevent a DDoS attack on WordPress beforehand?
Check out these prevention measures and follow them on your WordPress site.
1. Use a Reliable Hosting Provider
The first and most important step of securing your WordPress website is picking a reliable web hosting provider. You’ll know if your hosting platform is good if it has at least these features and functionalities:
- Built-in DDoS protection to automatically filter malicious traffic at the network level.
- Offers 24/7 monitoring and support to detect attack attempts in real-time and quickly respond to them.
- Supports WAF (Web Application Firewall) to block suspicious requests.
- Offers scalable resources that can handle traffic spikes to avoid downtime.
- Built-in or integrated CDN (Content Delivery Network) to distribute traffic.
Here’s our guide on how to pick a web hosting service with criteria to focus on.
What to Say to Your Hosting Provider When Under Attack?
Suppose you suspect a DDoS attack. Then, you must quickly contact your hosting provider to report the issues. This involves stating when it occurred, what changes were found, and any impact it led to. Go with these questions:
- Can you please confirm if my website is under DDoS attack?
- Are DDoS protection features in place? If not, then can you activate them?
- Can you block malicious IPs or suspicious countries?
How to Choose a Reliable Hosting Provider?
There’s a list of good web hosting platforms, but we recommend using Hostinger. We’re using the Premium plan. So, when you open your Hostinger panel and click the ‘Dashboard’ button for your website. You’ll find your website’s options.

There, you’ll get these security measures on different menu options:
- Different auto-update options to automatically update WordPress core, themes, and plugins. Updates are essential for having new security patches.
- Automated malware scanner to detect and remove malicious files.
- Lets you check the SSL status for encrypted data during transmission.
- IP Manager lets you allow or block IP addresses to access your site.
- Built-in analytics to access insights on logs, requests, IP addresses, etc.

In a nutshell, Hostinger also offers the following security features for such attacks:
- Built-in DDoS mitigation features to prevent your site from crashing.
- Includes an advanced WAF to protect your website from unknown requests.
- Global CDN integration to serve content throughout the globe even in heavy traffic.
- 24/7 customer support in 10+ languages and a response record of 2 minutes.

2. Enable a CDN with DDoS Protection
Enabling a CDN service is another effective way to protect your WordPress site from DDoS attacks. It stores cached website copies across several servers globally. Now, if visitors land on your site, then the CDN routes them to the nearest server.
The increasing traffic spreads out to different servers and reduces the load on your origin server. This makes it difficult for the attackers to overwhelm your site.
Benefits of Using a CDN
Other than distributing traffic load, CDNs are also beneficial because:
- Using a CDN minimizes latency and enhances website speed for real users.
- Filters and blocks malicious traffic when they try to access your server.
- Minimizes the server resource utilization and avoids potential downtime.
Check out why you need a CDN from this guide.
Your web hosting platform may already have a built-in CDN service or complete integration to a specific CDN. However, you can also use a CDN of your choice.
How to Use a CDN?
One of the recommended CDNs is Cloudflare. It has a free version with basic DDoS protection for your site. Get advanced features by buying a premium plan.
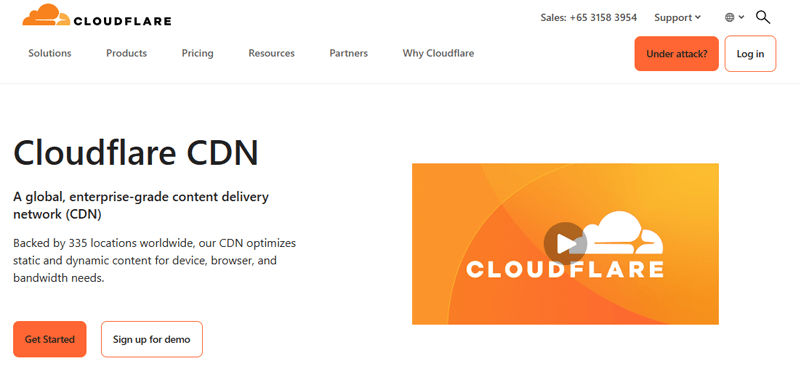
These are the Cloudflare’s DDoS protection features:
- It has a huge network capacity of 388 Tbps, i.e., 23x larger than the biggest recorded DDoS attack.
- Advanced features, like WAF, site acceleration, advanced bot mitigation, etc.
- The load balancing feature can send traffic across several CDN locations.
- Cloudflare also allows IP blocking, rate limiting, and user-agent filtering (filtering based on user role).
If you access your free Cloudflare dashboard, then you’ll find the ‘Security’ tab for DDoS protection measures on your website. This involves automatic DDoS protection on HTTPS, SSL (Secure Sockets Layer), etc.

Further, navigate to the ‘Security > Settings’ menu. There, you can turn on the ‘I’m Under Attack Mode’ to begin DDoS protection within minutes. This adds challenge pages to your website like CAPTCHAs.

Check out our guide on how to add CAPTCHAs on WordPress forms.
3. Configure a WordPress Security Plugin
Installing a WordPress security plugin on your website is one of the easiest ways to improve your site’s protection against DDoS attacks. Configuring it in the right way makes it an online security guard to monitor your site activities.
There are many WordPress security plugins, like Wordfence, MalCare, Sucuri, etc. Among them, we recommend Wordfence Security.

Using Wordfence to Block IPs, Rate Limiting, and 2FA
Wordfence is the most famous and comprehensive security plugin. It features:
- You can have manual and automatic IP blocking to stop suspicious traffic.
- Block high-risk countries to restrict traffic with malicious activities.
- Add custom rules to block visitors with suspicious behaviors.
- Google’s reCAPTCHA v3 adds puzzles and checkboxes to identify bots.
- Proactive monitoring and activity logging to recognize unusual traffic.
Check out the guide to install and activate a WordPress plugin here. Once you activate the Wordfence license, let’s explore its essential DDoS protection options.
i. Block the IP of the Possible DDoS Attackers
First, let’s check out the process to block the IP addresses of potential attackers identified by Wordfence. This involves generating the list of all the IP addresses and blocking the warning and suspicious ones.
For that, navigate to the ‘Wordfence > Tools’ menu. On the ‘Live Traffic’ menu, you can pick ‘Live Traffic Options.’ For example, traffic logging mode includes two options, which are ‘Security Only’ and ‘All Traffic.’

Depending on your mode, you’ll get a list of your site activities. In the ‘Security Only’ mode, there are login and firewall activities.
There, you can check out the human, bot, warning, and blocked users. Other than humans, other traffic with many requests denotes a DDoS attack.
To take action, just click the ‘View’ icon on the request.

Now, just click the ‘Block IP’ button on all the non-human activities. Here, we blocked the IP of a blocked activity so that there won’t be any request repetition.

ii. Adjust Rate Limiting
Moving forward, Wordfence lets you configure rate limiting. Simply put, rate limiting is a way to control how often a user can make requests to a website or server in a specified time. This prevents overload and minimizes DDoS attacks.
Just open the ‘All Options’ menu and scroll to the ‘Rate Limiting’ option. Ensure it’s turned on.
There, set up all the given options. For example:
- If anyone’s requests exceed 120 per minute, then block it.
- If a crawler’s page views exceed 120 per minute, then block it.
- If a human’s page views exceed 120 per minute, then throttle it. And more.

Save the changes that you made before going elsewhere.
iii. Enable 2FA for Login Security
In addition, it’s best to enable 2FA (Two Factor Authentication) with Wordfence. Using 2FA on the login page lets only legitimate users access your site dashboard through the use of a real-time code generated on their device app.
Just go to ‘Login Security.’ There, adjust the 2FA options in the ‘Settings’ tab. This includes 2FA roles and grace periods.

Then, add a new entry on an authenticator app. Just scan the QR code or enter the entry code of the ‘Two-Factor Authentication’ tab.
Don’t forget to activate 2FA by entering the generated code. Also, download the recovery codes.

Here’s a detailed guide on how to enable 2FA on WordPress.
Wordfence Alternatives
Looking for a different security plugin? Here are other suggestions:
- Sucuri Security: Blocks layer 3, 4, and 7 DDoS attacks. Offers the ‘I am currently under attack’ emergency protection option. Uses high-performance servers. Includes 3 CDN service locations.
- MalCare: Offers real-time firewall, activity logs, bot protection, etc.
- All-In-One Security: Provides country blocking, advanced login security, malware scanning, firewall protection, etc.
4. Limit Login Attempts and Hide/Rename Login URL
Brute-force attacks mean trying multiple username and password credentials to gain access to your website. In this attack, the number of attempts can go so high that this could overwhelm the server and lead to DDoS attacks.

Hence, WordPress login page protection is another way to prevent DDoS attacks. This involves limiting the number of failed login attempts. Ultimately, this reduces the consumption of your server resources.
Further, you can also hide or rename your login URL. Now, automated bots can’t locate the login page of your website and minimize getting targeted by attacks. Both of these add an additional security layer to prevent malicious traffic.
How to Limit Login Attempts?
Here, we’ll show how to configure login attempt limits with Wordfence. Just go to the ‘Wordfence > All Options’ menu and open the ‘Brute Force Protection’ tab.
First, ensure you enable the brute force protection with the ‘On’ toggle option. Then, perform actions like:
- Set the number of login failures after which users get locked out.
- Configure the number of forgot password attempts before lockout.
- State the amount of time a user gets locked out, and more.

Don’t forget to save the changes.
How to Hide or Rename the Login URL?
Now, check out how you can make your login page less obvious by hiding or renaming it. Know everything about WordPress login in this guide.
In this case, we’ll use a feature-specific plugin, Hide My WP by WP Ghost. Once the plugin is installed on your website, go to ‘WP Ghost > Change Paths’ for activation. Now, go back to this same menu and pick ‘Lite Mode.’

On the popup, understand how the plugin works and click the ‘Continue’ button. Don’t forget to save the changes.

Afterward, go to the ‘Admin Security’ option and give a new custom admin path if you want. Another way is to hide ‘wp-admin’ on the login URL from all visitors and non-admin users. Then, click the ‘Save’ button.

Similarly, open the ‘Login Security’ option and do the same. Here, add the new custom login path you want on the login URL. Once changes are made, save it.

Now, you can perform the frontend test, login test, and security check from the given options. Once that’s done, you can see that the login with ‘wp-admin’ redirects you to the homepage of the website.
Only after adding ‘newcustomlogin’ does the login page open.

This adds an effective layer of defense against DDoS attacks. Now, onto the next one!
5. Set Up WAF
Web Application Firewall (WAF) is an effective way to protect your website from harmful traffic and attacks, including DDoS attacks. It filters and blocks malicious data by only letting safe information and users pass through.
It provides a barrier between your site and incoming traffic. So, only legitimate requests pass, not the harmful ones. That’s how it can reduce DDoS attacks, too.

Check out the benefits of setting up WAF:
- Blocking suspicious traffic means they are not transferred to your server.
- Prevents server overload by no consumption of server resources by attacks.
- Your site remains accessible for real users.
Which Platforms Offer WAF?
Different kinds of platforms let you configure firewall rules for your safe site.
- CDN services like Cloudflare, Sucuri, Akamai, StackPath, etc.
- Platforms like Microsoft Azure, Amazon Web Services, Google Cloud, etc.
- WordPress security plugins like Wordfence, MalCare, and many more.
How to Set Up a WAF?
First, pick your WAF provider based on your requirements and budget. Using the cloud-based WAF like Cloudflare is recommended when it comes to DDoS attacks. However, most platforms offer it in their premium plan.
So, you can begin with the free features of plugins like Wordfence. Then, use the hosted WAF services for advanced capabilities.
Here, we’ll show some steps while using the Wordfence security plugin.
Navigate to the ‘Wordfence > Firewall.’ Here, click the ‘Manage WAF’ option in the ‘Web Application Firewall’ section.

By default, WAF is in the ‘Learning Mode.’ But you must ensure that it goes to the ‘Enabled and Protecting’ mode after a week.
Further, you can perform these actions inside the ‘Advanced Firewall Options.’
- Quickly block IPs if they access your critical URLs.
- List IP addresses that can bypass every firewall rule.
Plus, you can click the ‘Optimize the Wordfence Firewall’ button.

Go through the Wordfence guide on optimizing the firewall. Just press the ‘Download .htaccess’ button and complete the setup.

6. Keep WordPress Core, Themes & Plugins Updated
Keeping your WordPress core, themes, and plugins up to date is one of the simplest things you can do to keep your site secure. If you’re not updating them, then the outdated versions increase the chances of being targeted and hence compromised.

That’s because these also include security updates, which remove security gaps and keep your site more secure. Yes, secure even from attacks, like DDoS.
Remember, attackers usually find and use the faults in outdated plugins and themes. That’s how they attack. So, you must update all your plugins and themes.
Update WordPress Core
Update the WordPress core by navigating to ‘Dashboard > Updates’ and clicking the update button. Here, we should use the ‘Update to version 6.8.1’ button.

Here’s how you can update WordPress to the latest version.
Update WordPress Plugins
Similarly, the ‘Dashboard > Updates’ menu also contains a ‘Plugins’ section. If there’s a new update for a plugin, then click the ‘Update Plugins’ button.
It’s a similar case for themes. You’ll find the ‘Update Themes’ button under ‘Themes.’

But you can make maintenance way easier by enabling auto-updates if you completely trust those plugins or themes. Many hosting platforms let you do that.
Still, you should back up your site before making major updates and test the changes on a staging site. It’s best to remove the unwanted plugin from your site.
7. Disable XML-RPC and REST API if Not in Use
Most of all, minimizing the number of highly attacked areas of your WordPress website is vital. If you do so, then it lets you minimize getting DDoS attacks.
Which are the most attacked areas of WordPress? Hackers generally attack two features. They are:
- XML-RPC
- REST API
Hence, it’s better to disable them if you’re not even using them. This significantly reduces your website’s chances of getting DDoS attacks.
XML-RPC
For those who don’t know, XML-RPC works for enabling external apps. For example, it communicates between your website and mobile apps.
Why is it DDoS attacked? That’s because attackers can flood your server with requests through the xmlrpc.php file. Hence, turn XML-RPC off if you don’t need the integrations. This lets you remain on the safe side.
There are two ways to disable the XML-RPC functionality:
- Use a plugin that disables it. For example, install and activate Disable XML-RPC-API and configure its settings to disable the feature.

- Insert the following CSS code into your ‘.htaccess’ file. Remember to back up your original ‘.htaccess’ file.
<Files xmlrpc.php>

order deny, allow

deny from all

</Files>
WordPress REST API
In WordPress, the REST API lets you use programs to achieve the remote retrieval and update of data. Despite being a useful feature, not properly monitoring it can lead your website to get the attention of attackers.
If you don’t use this feature, then turn it off right away. How? Disabling REST API is possible with these two methods:
- Use a plugin to avoid unregistered users getting access to data. Just install and activate the Disable WP REST API plugin, and the disabling is done automatically.

- Insert the following code into the functions.php file of your theme.
add_filter('rest_authentication_errors', function($result) {

    if (!is_user_logged_in()) {

        return new WP_Error('rest_not_logged_in', __('You are not currently logged in.'), array('status' => 401));

    }

    return $result;

});
Cherry on top, hosting providers may offer options to disable XML-RPC and/or WordPress REST API on your hosting account. If that’s available, then easily disable those features. For example, Cloudways lets you do that.
Check out our comprehensive guide on how to secure a website.
Frequently Asked Questions (FAQs)
Find answers to commonly asked questions and be clear about DDoS protection.
1. Does WordPress have built-in DDoS protection?
No, WordPress doesn’t have built-in DDoS protection. That’s why you require platforms or tools, such as CDN, WAF, or security plugins, to improve your website security.
2. What’s the difference between a DDoS attack and a brute-force attack?
A DDoS attack floods your website with fake traffic to crash it, while a brute-force attack repeatedly tries to log into your website to get the right login credentials.
3. What should I do if my WordPress site is under a DDoS attack?
If your WordPress site is under a DDoS attack, then enable ‘I’m Under Attack Mode’ (in case you’re using Cloudflare), contact your host, initiate WAF rules, and block harmful IP addresses and/or IPs from suspicious countries.
4. How to differentiate a DoS from a DDoS attack?
A DoS attack uses a single source, while a DDoS attack uses several devices to flood your website to crash it.
5. How can I monitor my WordPress site for signs of a DDoS attack?
You can monitor your WordPress site for signs of a DDoS attack by using security plugins, server logs, or real-time analytics. Just detect sudden traffic spikes or check resource overload cases to identify if your site is attacked.
Final Words
That’s all we’ve got here! Hopefully, you’ve understood how to prevent DDoS attacks on WordPress.
We recommend using most of these prevention measures to prevent DDoS attacks on your WordPress site. Start with making the right choice on the host selection to disable unused vectors or features of WordPress.
Comment down if you’re confused about anything related to website security. We’ll gladly try resolving your concerns.
Check out our related blogs on how to install SSL certificates on WordPress and how to remove ‘Not Secure’ from your website.
Follow us on Facebook and X (formerly Twitter) to stay connected.
YOU MIGHT ALSO LIKE...
We've picked you some best articles that you might be looking for. Check them now!