Are you wondering how to remove Not Secure from website? Or are you scared by seeing the ‘Not Secure’ message popping up in your browser? If yes, then we’ve solutions to fix them.
As a website owner, it really bothers us to see the “Not Secure” warning flashing in front of our eyes. Even more, our very own visitors would also feel insecure using and buying products via our site.
If this same thing bothers you and doesn’t know what causes it, then it’s a lack of proper website security. So, this article reminds you all that website security is important.
Plus, we’ll also look into how we can remove “Not Secure” messages from the website. Read along to find out how. Here we go!
Video Guide – How to Remove ‘Not Secure’ from Website?
Wait a second! Do you prefer a video tutorial instead? Then, here’s our complete guide on the process to find and remove the “not secure” message from the website. Check it out now!
Still, prefer a detailed guide? Then, continue reading the article below.
What are HTTP and HTTPS?
When you browse the internet, have you noticed a gray padlock appear in the browser’s search bar? If that icon appears in the browser address bar, then it indicates that your website is secured.
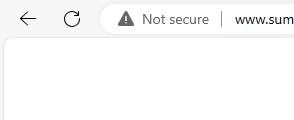
However, a browser can display the “Not Secure” message in the address bar. That’s when you’re using HTTP instead of HTTPS for your website.
Before jumping into this article, let’s learn about HTTP and HTTPS first.
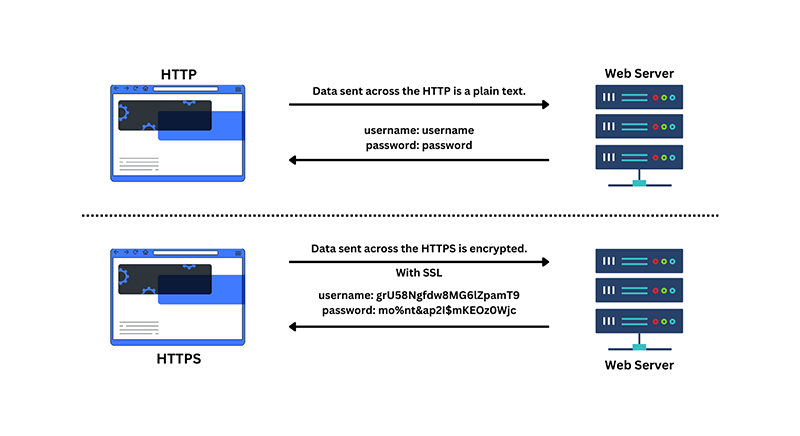
HyperText Transfer Protocol (HTTP) is a standard set of rules for transmitting data over a network in plain text format. After an HTTP request is made on the browser, the web server sends the requested data to the user as web pages. So, it allows data transfer from the server to the client.
However, the problem with HTTP is that it isn’t secure enough. That’s because all your information, including your passwords, can be easily stolen since it’s visible to anyone.
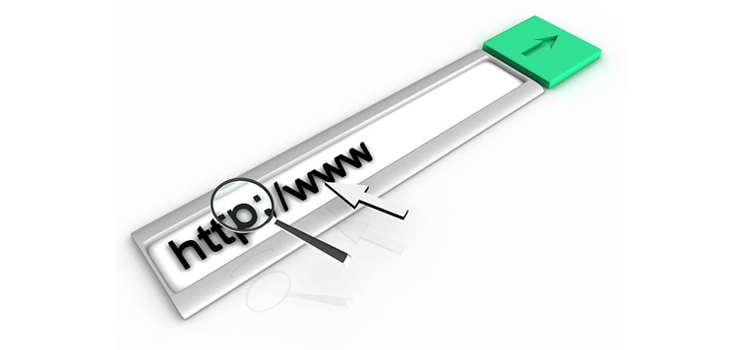
Meanwhile, HyperText Transfer Protocol Secure (HTTPS) is a much more advanced and secure version of HTTP. Unlike HTTP, it conducts secure transactions by encrypting the entire communication via SSL (Secure Sockets Layer).

Now focusing on the main topic, the website that uses HTTP instead of HTTPS will pop up a message with “Your connection to this site is not secure”. This warning message to the visitors lets them not to continue using that site since it’s not secure.
Especially if we talk about the Chrome browser, this type of message will frequently pop up on your screen. It encourages its users not to visit and interact with such websites. That’s because all HTTP sites can be interrupted by third parties and intercept data transmitted between users and servers.
Why Does Your Website Show a “Not Secure” Message on Browser?
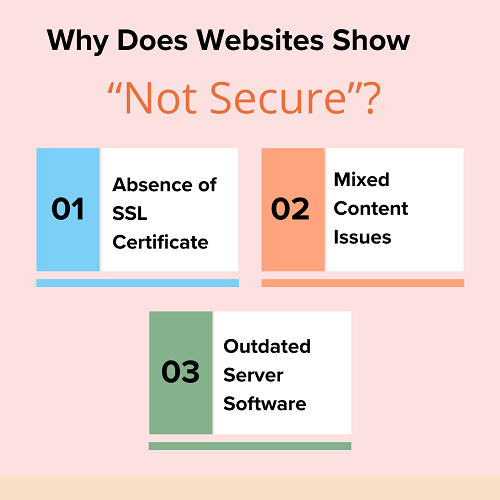
But why does the website show this ‘Not Secure’ message on the browser? It can be one or more of the following reasons:
| Reasons | Description |
|---|---|
| Absence of SSL Certificate | An SSL certificate is a digital certificate that authenticates the website identity and encrypts information sent to the server. It ensures that data transmitted between a user’s browser and the website’s server remains confidential. Browsers display a “Not Secure” warning for websites without SSL certificates, alerting users to potential security risks. |
| Mixed Content Issues | Mixed content occurs when a secure (HTTPS) webpage contains both secure (HTTPS) and non-secure (HTTP) resources, such as images, scripts, or stylesheets. Thus, loading non-secure resources poses a security risk they can be tampered with or intercepted by attackers. So, browsers display warnings or block the loading of mixed content. |
| Outdated Server Software | Server software, such as web servers (e.g., Apache, Nginx) and other backend components, require regular updates to address security vulnerabilities and improve performance. Outdated server software can contain known security flaws. So, keeping server software up-to-date with the latest security patches and updates is essential. |
How to Check If a Site’s Connection is Secure?
In this very section on how to remove “not secure” messages from a website, we’ll look at how we can identify whether the website is secure or not.
No doubt, before you share any information online, you should always check whether your communication with the website is secure. Indeed, to learn whether the website is safe to visit, you need to check for security info about the site.
Thankfully, there are 2 quick ways through which you can check if a site’s connection is secure or not:
1. Look at the URL of Your Website
When we talk about any secured website, you should first always check the URL of the website.
A secure website always begins with “https” instead of “http”. For instance, https://sitenerdy.com/ and https://www.google.com/.

Now you might ask what difference it makes here. Here, the “s” at the end of “https” stands for ‘secure’. And it indicates that your site is using an SSL certificate
As a result, you can ensure that all your communication and data are encrypted. And the data only passes from your browser to the website’s server.
2. Check for the Padlock Icon Near Your Web Address
Similarly to the first one, the second one is also quite easy to find whether your site is secure. In this, you look for the padlock icon to the left of the web address in the address bar.
If you find the address bar with the padlock icon, then it means that the connection between your web browser and the website server is encrypted. And the information you send or get through the site is private.

With that, no other can eavesdrop on or intercept your communication between your browser and the website’s server. As a result, you can continue using that site without any worry.
However, even if it’s secure, then you must always be extra cautious when sharing private information. Hence, you should always check the address bar to make sure you’re on the site you want to visit.
Why Do You Need to Secure Your Website?
We all know that website security is not an option, rather it’s our responsibility to keep our website safe and secure. Therefore, we cannot compromise running our website with HTTP without an SSL certificate.
Nobody wants their dream project to be swept away from under their eyes. This will be quite heartbreaking and sad.
If you’re running an insecure website, then at the very beginning only it leads you to lose the trust of your visitors. Nobody will believe that your business is genuine and lose the brand value.
Plus, in the case of an eCommerce website, your customers will hesitate to buy products from your website. That’s because they don’t feel confident to share their personal information on your site.
Likewise, you and your website will be restricted with some important features. That includes Google’s Accelerated Mobile Pages (AMP), push notifications, geolocation, online payments, and more.
With that, here are some other reasons why you should not use non-secure websites:
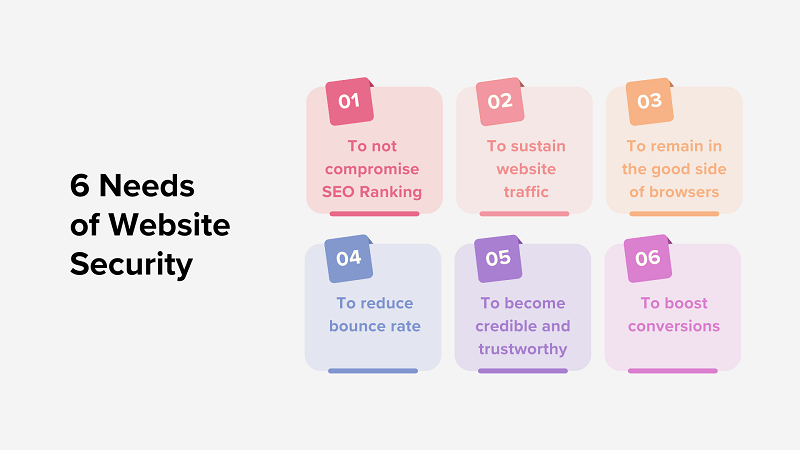
- An unsecured website results in poor SEO ranking. According to Google, websites with HTTPS have a higher chance of ranking at the top of SERP.
- Poor SEO ranking leads to low web traffic. As mentioned earlier, nobody will visit your website.
- Many web browsers such as Google Chrome would encourage users not to visit your site if it does not use HTTPS.
- Similarly, most visitors will quickly leave your website if they see a “Not secure” warning, which results in a higher bounce rate.
- When your credibility decreases, visitors fear data risk, impacting their trust and interaction.
- Unsecure websites can reduce conversion, as users won’t engage in monetary transactions.
With all this information, the next section will be about making a secure website. In it, we’ll teach you a few tips and tricks on how to remove ‘not secure’ from the website.
How To Remove the “ Not Secure” Message from Your Website?
Now that we know why we must keep our website secure. Let’s learn how to find and remove “not secure” from a website now!
The best solution to this problem would be to set up an SSL certificate. It’s one of the reasonable and straightforward processes to fix this problem.
But before that let’s try to understand a bit about what an SSL protocol is.
What is a Secure Sockets Layer (SSL)?
SSL is a cryptographic protocol providing secure communication across a network. Netscape developed it for an encrypted link between a web server and a browser.
So, it guarantees private and secure data transmission of your data over the internet. Indeed, all SSL communication takes place using the Transport Control Protocol (TCP).
Thus, in an SSL-certified website, SSL encrypts data communicated across the web guaranteeing a high level of privacy. Anyone who attempts to intercept this data will have a hard time decrypting the data.
The image below showcases how SSL forms a secure HTTPS connection.
With this small description, let’s look at the process to remove the ‘Not Secure’ message from the site.
1. Use a Free SSL Certificate with Hosting Providers
Suppose you’re a beginner who doesn’t want to spend any buck. Or you want to build a blog or portfolio site. Then, the best option would be to use a free SSL certificate offered by web hosting providers.
Therefore, at the beginning only when choosing the web hosting provider, ensure the web hosting provides a free SSL certificate. This gives general encryption enough for your small website. Plus, it can be easily installed through your hosting panel.
Some of the best cheap web hosting providers that offer free SSL certificates are –
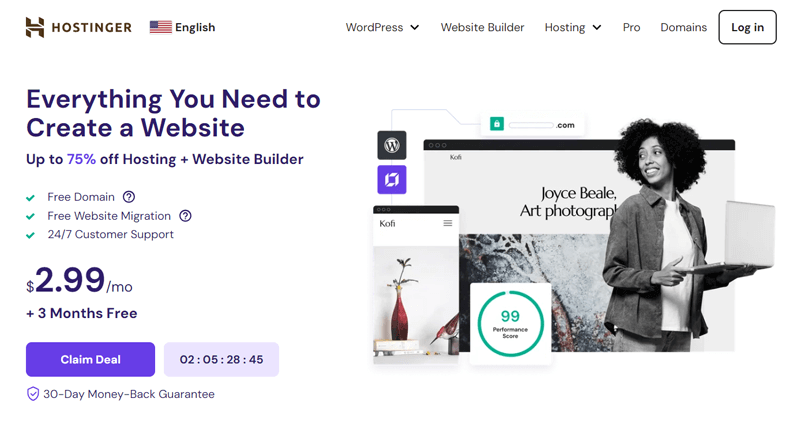
Let’s take the example of Hostinger. This host provides free SSL certificates for all your domains and subdomains when purchasing any hosting plan. Moreover, it’s auto-installed after you add a domain to your hosting plan.
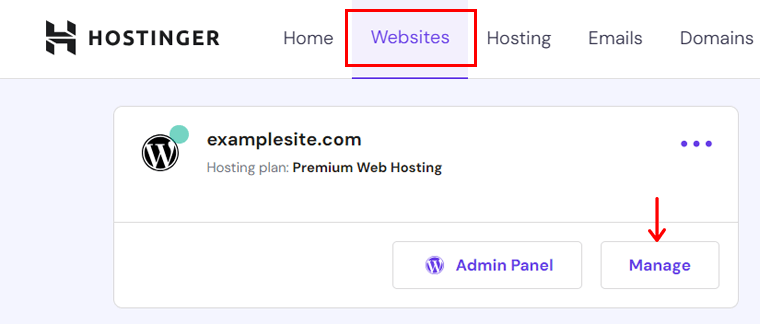
Another way is to manually add the lifetime SSL certificate to your website. Here’s how to do it!
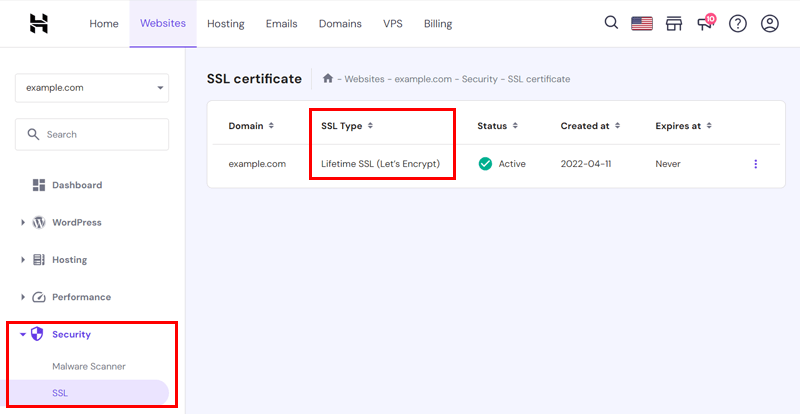
First, ensure you add a domain to your hosting plan. After that, you can move to the ‘Websites’ section and click on ‘Manage’ next to it. In the sidebar, navigate to ‘Security’ and then ‘SSL’.
Now, the SSL settings contain the ‘Install SSL’ tab with the ‘Install SSL‘ button. After clicking on it, the free SSL certificate will be installed in a few minutes.
Congrats if the status is shown as ‘Active’ on your website!
Besides that, most hosting providers will automatically activate the SSL certificate, without you having to worry about manually configuring an SSL.
Learn how to install an SSL certificate on WordPress here! This includes the SSL certificate addition process through web hosts and also with a WordPress plugin, i.e. ‘Really Simple SSL‘.
2. Purchase an SSL Certificate
Until now, you know the best way to deal with that problem is an SSL certificate. Suppose you own a complex website, like eCommerce, where transactions are frequent. Then, a free SSL with general encryption won’t be enough.
Therefore, you can purchase an SSL certificate for your website without wasting time. Just you must consider factors such as the encryption level and compatibility with your hosting provider.
If you look online, then you’ll find many such vendors selling SSL certificates at reasonable prices. That includes web hosting platforms and 3rd-party vendors.
We recommend some of the renowned 3rd-party vendors offering powerful SSL certificates. They are:
Once you buy and install an SSL certificate to your website, it’ll guarantee your website is safe when people are using a search engine.
When choosing the SSL certificate, make sure you choose it based on the type of site you are running. With that, you’ll no longer have the message popping up when visitors visit your website.
3. Update Your Website URL
Now if you’ve already purchased and installed the SSL certificate, then your site is almost ready to be secure. But just installing and activating the SSL won’t solve the problem.
It’s because it’s only the first part of removing a “not secure” message from popping up when someone visits your website. Even after you can change from HTTP to HTTPS, it’ll continue to load your old HTTP URL.
So, completely stop that by changing your URL before it can run as HTTPS. Learn how to do it on WordPress!
To do so, log in to your WordPress dashboard and navigate to Settings > General option.
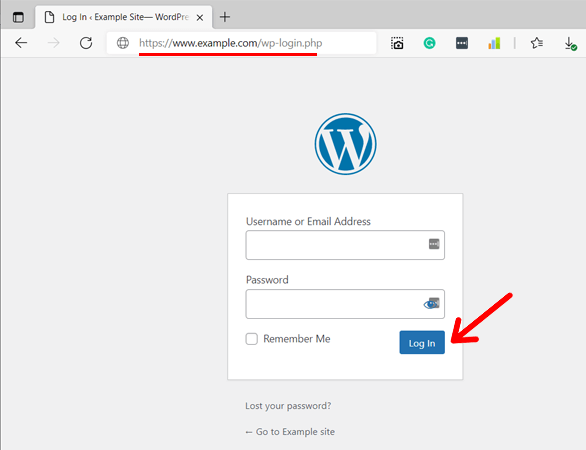
Following that, go to the General tab and search for the WordPress Address (URL) and Site Address (URL) options. Under that change both URLs by adding an extra “s” to the “http”. And then, click on the Save Change button to save your settings.
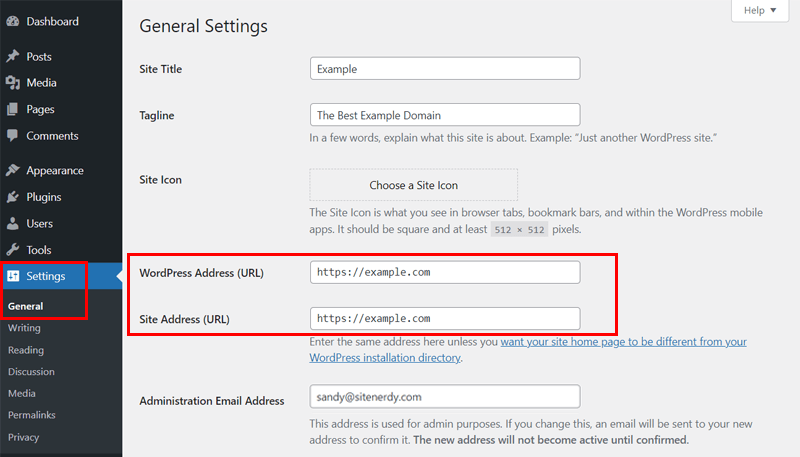
In addition, it’s essential to verify and update internal links on your website to point to secure HTTPS URLs. So, ensure the internal links use the new HTTPs URL, replacing the old HTTP URL.
By following these tips and tricks, you not only fix the “no secure” website problem but also you can redirect your visitors to the correct site.
FAQs – How To Remove the “Not Secure” Message?
1. What are HTTP and HTTPS?
HyperText Transfer Protocol (HTTP) is a network protocol through which all data communication on the web happens. It transfers data from the server to the client. Similarly, HyperText Transfer Protocol Secure (HTTPS) is a highly secure version of HTTP that uses encryption to conduct secure communication over a network.
2. What is an SSL?
A Secure Sockets Layer (SSL) is a set of rules that verifies secure communication between a web page and a web browser. It stops unauthorized users from accessing exchanged data between a site and its visitors.
3. Why does my website show a “No Secure” message over my Chrome browser?
The only possible reason for the browser showing the “No Secure” message would be that your website uses HTTP instead of HTTPS.
4. What are some of the best web hosting providers that offer free SSL certificates?
5. What should I do if my website still shows ‘Not Secure’ after installing SSL?
If your website still displays “Not Secure” after installing SSL, then check for mixed content errors, ensure proper SSL configuration on your server, update all internal links to HTTPS, verify SSL certificate installation, and clear the browser cache.
Conclusion
In this article, we looked at how to remove Not Secure from website. We hope this article helped you fix the “not secure” problem in your Chrome browser.
Please freely comment below for further queries regarding the website’s security. We’ll do our best to respond as soon as we can.
Also, let us know how you’ll implement an SSL certificate on your website. You can share your top tips and tricks in the comments section below.
Besides that, we’d also love to hear your thoughts on this article. So, please feel free to comment on any queries or suggestions below.
You may also want to check our guide on website maintenance and how to update WordPress to the latest version. Also, find the best ways for eCommerce security.
Follow us on Facebook and Twitter for more articles like these. Also, if you liked this article, then share it with your friends and colleagues.
