Are you wondering how to start a WordPress blog for free but don’t know where to begin?
Well, starting a WordPress blog might sound overwhelming, especially if you’re new in the world of blogging. But, don’t worry anymore!
As someone who’s started the blogging journey with WordPress and (doing it for free!), let us spill the beans – It’s easier than you think!
With platforms like WordPress, you get a simple and free way to get started with your blog in no time.
In this article, we’ll break down the process and walk you through the bite-size steps. So, you can start a WordPress blog effortlessly and completely free.
So, let’s dive right into it!
IN THIS GUIDE
hide
Start a WordPress Blog for Free – Video Tutorial
Would you prefer to watch a video tutorial instead? We have a complete video tutorial attached below on how to start a WordPress blog for free. Watch it now!
Nevertheless, keep reading for a detailed guide!
A) 2 Proven Ways to Start a WordPress Blog For Free
Before we dive into creating your WordPress blog, did you know there are actually 2 proven ways to start a WordPress blog for free? Wondering, what are they?
Let’s check them out!
1. WordPress.com
The first way is using WordPress.com, a popular platform trusted by 160 million users worldwide. No doubt, it offers a straightforward, no-cost way to start a blog.
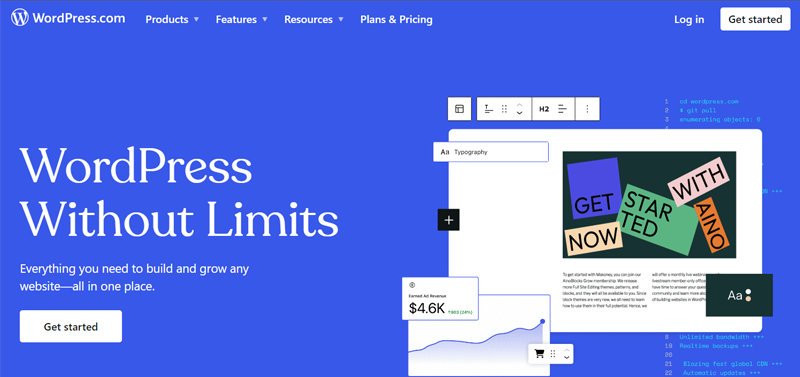
To be precise, it’s an all-in-one solution where everything is taken care of! From hosting, and maintenance to updates. What’s more, you get a subdomain like (yourblog.wordpress.com). As a result, you can start your WordPress blogging journey without any technical knowledge.
Also, the platform includes basic customization options, themes, and plugins that cover beginners’ needs. Additionally, fast data transfer and performance come as standard with its global CDN.
Pros:
- It doesn’t require any hard setup. So, it’s super easy for beginners to use.
- Firewalls, encryption, brute force, and DDoS protection, security’s all taken care of.
- Also, provides access to WordPress’s extensive theme library.
- It’s a good option to get started with your blogging journey for free.
Cons:
- In the free version, there are limited customization and control options.
- Several ads are displayed on your website unless you upgrade it.
- Your blog is tied to the WordPress.com domain.
- You’ll need to upgrade to the premium version of WordPress.com even to install many free WordPress plugins.
Confused about the difference between WordPress.com and WordPress.org? Check out our detailed comparison article WordPress.com vs. WordPress.org. to understand both platforms.
2. With Free Hosting
Another way to start a WordPress blog is by using free web hosting services. Well, there are certain hosting providers that provide server space and hosting without any charge for particular targeted groups.
When you choose free web hosting to start a WordPress blog, you get greater control and flexibility as compared to WordPress.com. Meaning, you can fully customize your site’s appearance, add plugins, and manage your blog as you see fit.
Also, you can choose your domain which may also be available for free through some hosting providers, and install WordPress independently.
Pros:
- You have full control over your blog’s design and functionality.
- With a hosting provider, you don’t have to worry about ads as no ads are placed.
- You can use your own custom domain.
- Fully access all the free WordPress plugins available in the repository.
Cons
- Generally, you get limited resources in free hosting like restricted storage, bandwidth, etc.
- You may experience slower load times or even reliability issues.
- Often lacks customer support or timely updates.
Having said that, now let’s learn how we can create a WordPress blog for free via WordPress.com.
B) Creating a Free Blog on WordPress.com
Now, we’ll walk you through creating a free blog on WordPress.com, from signing up to launching your first blog post.
So, let’s get started, shall we?
Step 1: Sign Up for a Free Account
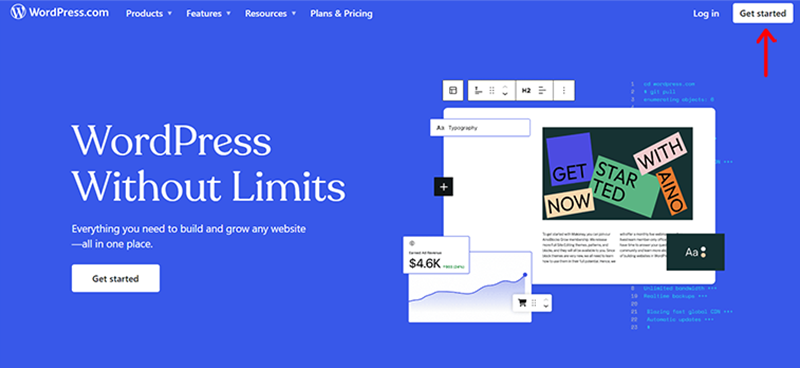
First thing first, open your web browser then go to its official website, and click on the ‘Get Started’ option.
Now, you need to connect your Google Account to log in to your WordPress.com account.
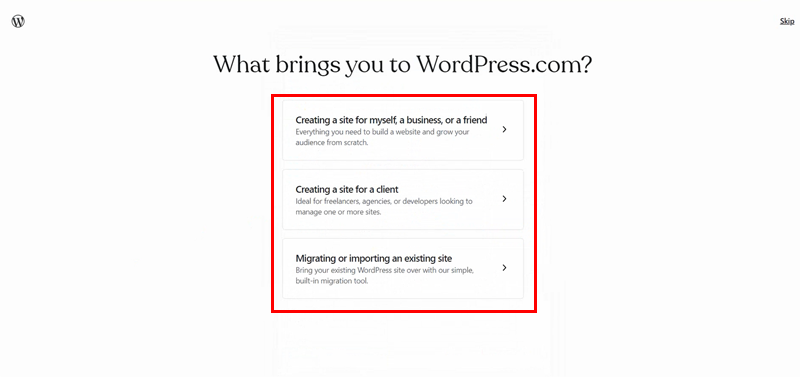
On successful login, you’re asked a question that says “What brings you to WordPress.com?”. You can simply go for the 1st option “Create a site for myself, business, or a friend.”.
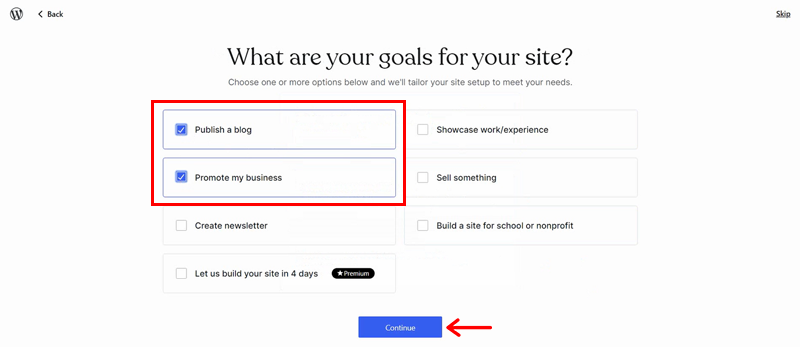
Afterward, you’ll see the page where you are asked ‘What are your goals?’. You can tick on the necessary goal boxes and click on the ‘Continue’ option.
Following that, you get to access the ‘Choose your domains’ page. Here, you need to type in your desired domain name to know whether it’s available or not.
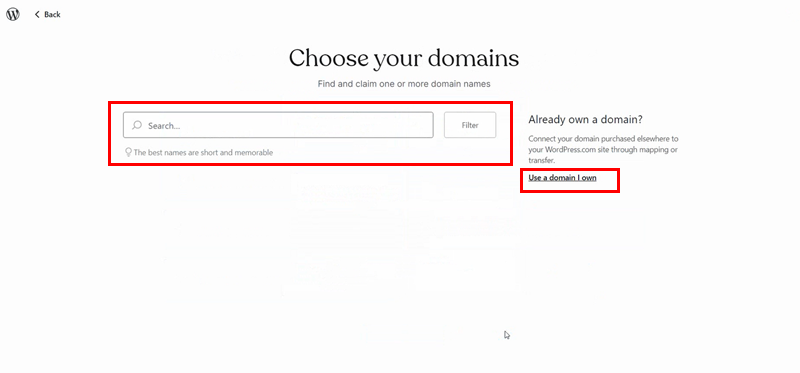
Here, if you already have a domain, then you can also click on the ‘Use a domain I own’ option.
Meanwhile, for now, we’ve typed in our desired domain name and choose domain with .wordpress.com, then, click on the ‘Select’ option.
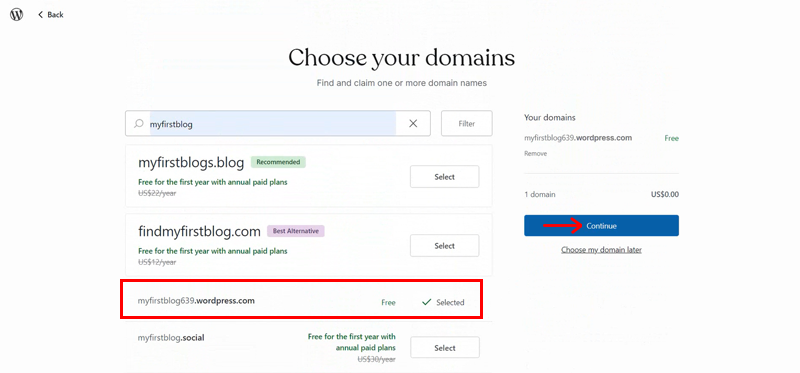
Then, you’re prompted to a quite similar page, here click on the ‘Continue’ option.
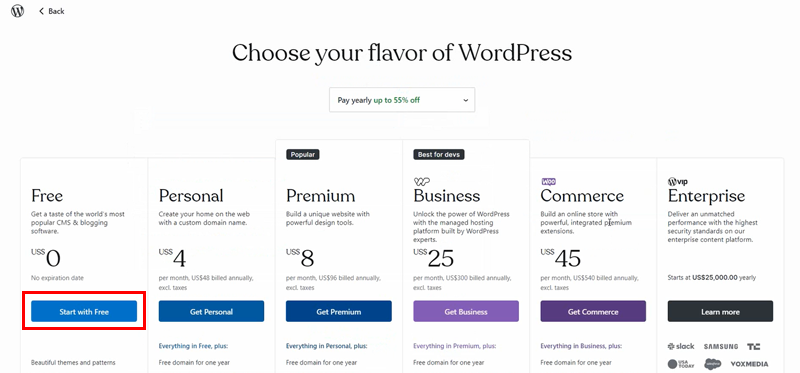
Once you do so, you’re taken to the WordPress.com different plan scheme page. Here, you can choose among the available plans.
For now, we’re going to ‘start with a free plan’.
Step 2: Setting Up the Blog
Now on the next step, you’re taken to a page where you’re given 2 choices. One is to Choose a theme for your blog website. And another option is to Design your own.
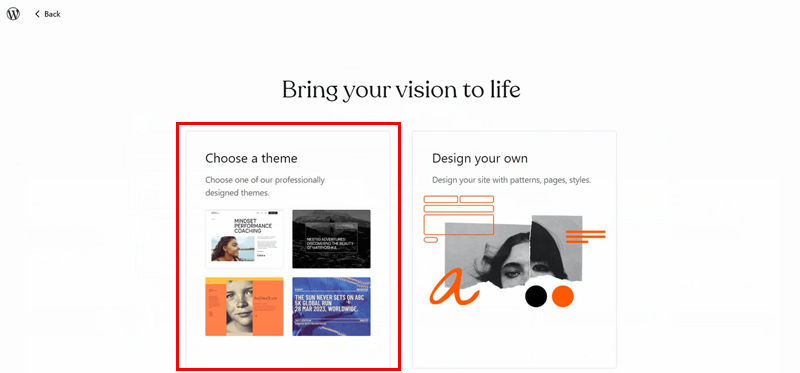
Here, we go for the ‘Choose a theme’ option.
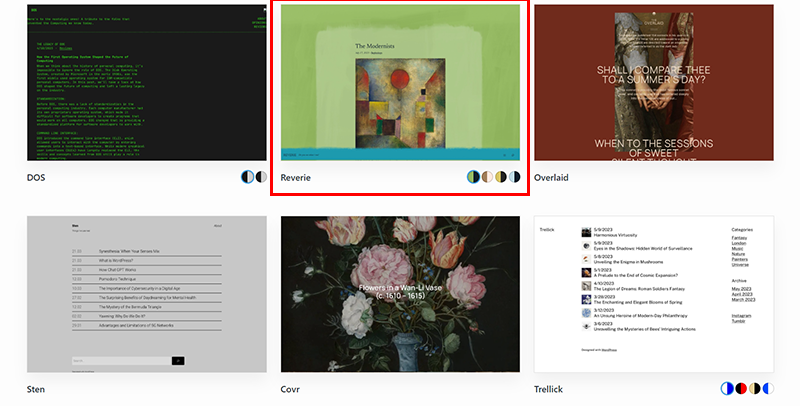
Following that, you’ll access several designs under several categories to start with. You can click on the ‘Blog’ tab to find the blog-specific templates.
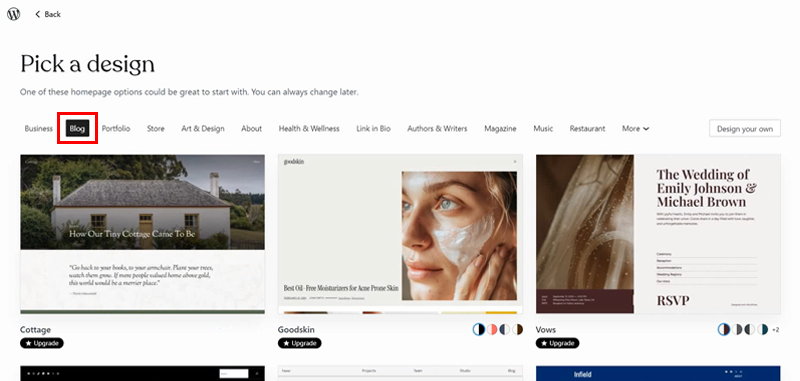
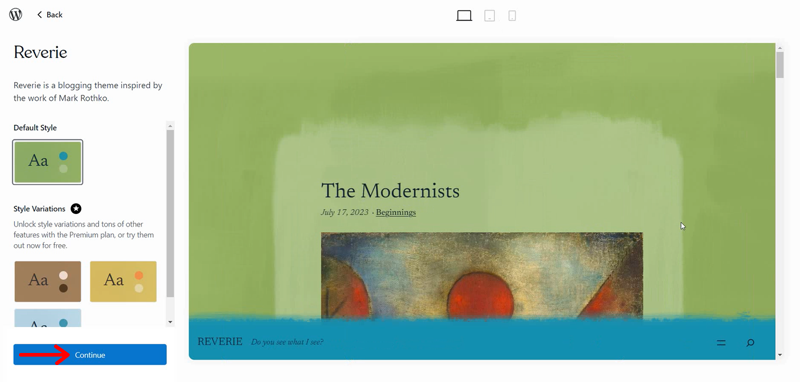
Here, we’ve chosen the ‘Reverie’ design with a quick hover over it. Once done, you can have a quick preview of your chosen design on different devices.
Also, you can choose among the different ‘Style Variations’, nevertheless it’s only available in the premium version. So, for now, let’s go for default and click on the ‘Continue’ option.
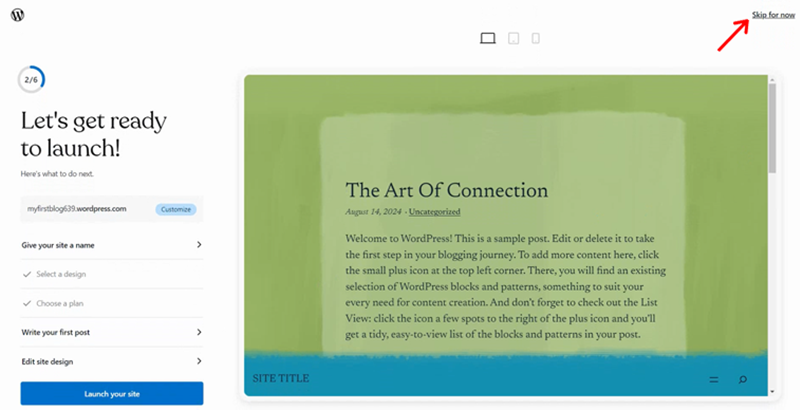
Shortly, you’ll land up to a direct launch page to launch your blog website. But, you can click on the ‘Skip for now’ option in the top right corner. As you can always launch later once you’ve completed most of your needful work.
Step 3: Configuring Basic Site Settings
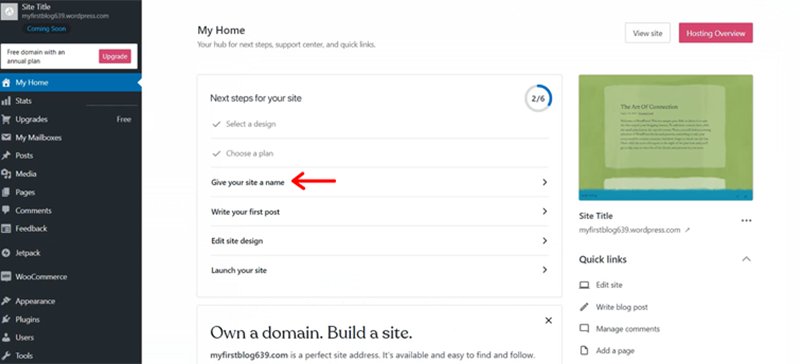
With that, you’ll land up to the WordPress dashboard panel. Here, you can see a glimpse of all the required steps that are left to be done before successfully launching your site.
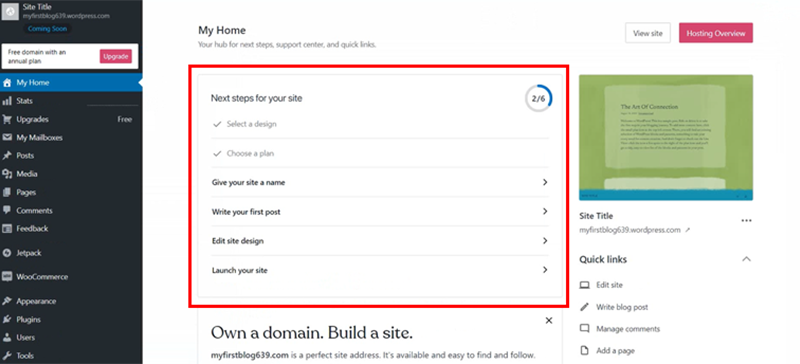
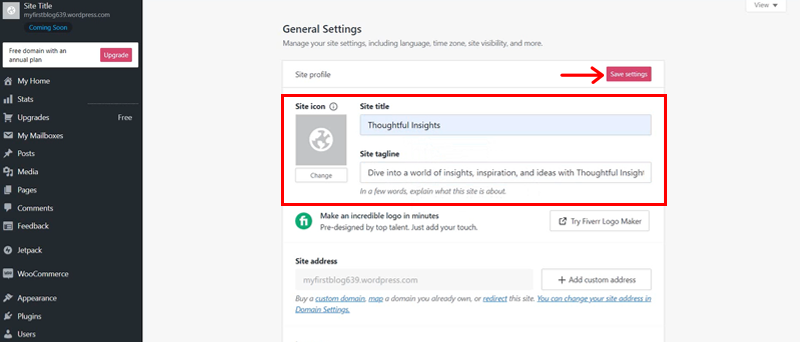
Now, here, let’s click on the ‘Give your site a name’ option.
Afterward, you can see options to give a proper ‘Site title’ and ‘Site tagline’. Once done, click on the ‘Save Settings’ option to save the changes.
Step 4: Writing Your First Blog Post
Are you excited to write and publish your first blog post? Well, we all are!
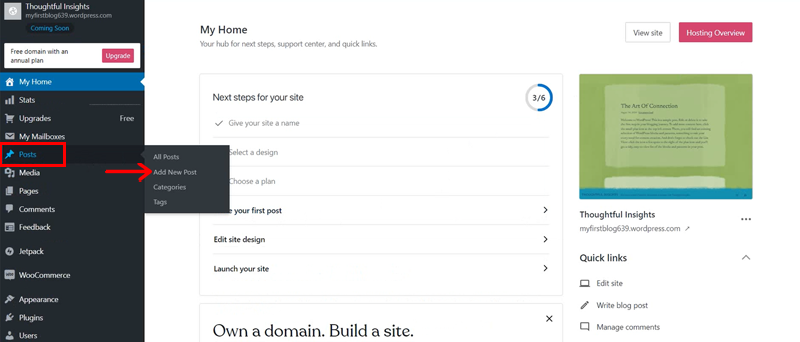
As of now, it’s finally time to write your first blog post. So, click on the ‘Write your first post’ option as shown in the screenshot below.

Alternatively, you can also go to the ‘Posts > Add New Post’ option.
Whichever way you choose, you’ll land up on the same editor panel as shown on the screen below.
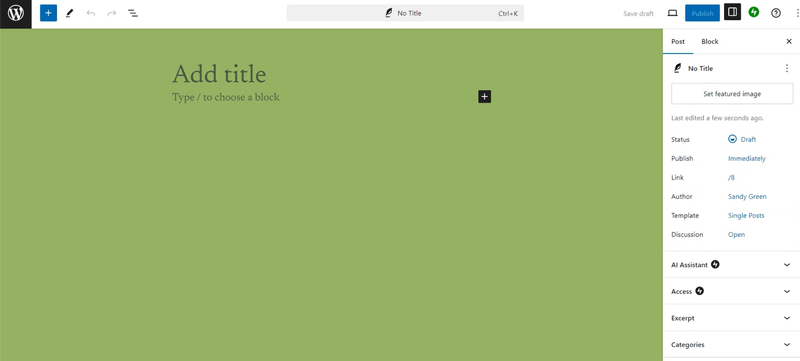
Then, add your blog title and write your very first blog post.
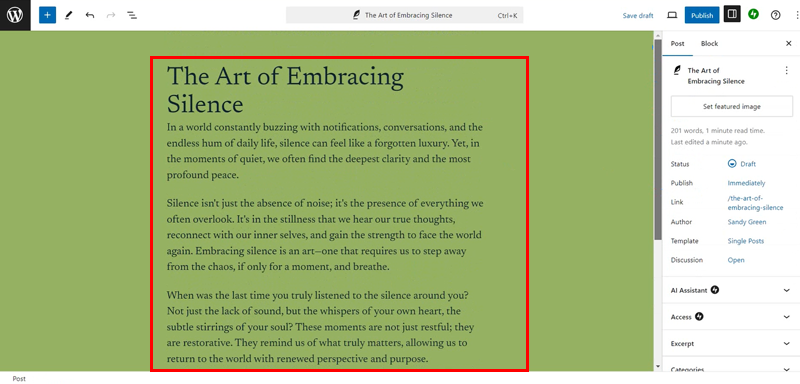
Also, you can specify a particular image for your blog. For that, simply click on the ‘Set featured image’ option on the right.
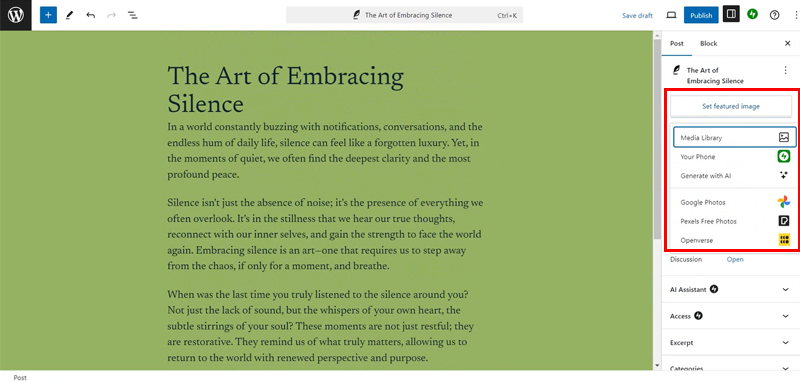
And choose your image for your blog whether from your media library or any free source.
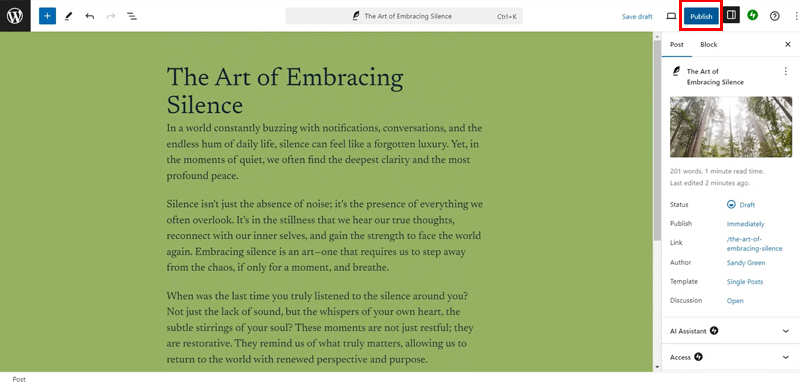
Once done, you can click on the ‘Publish’ button on the top right corner to make your blog post live on your website.
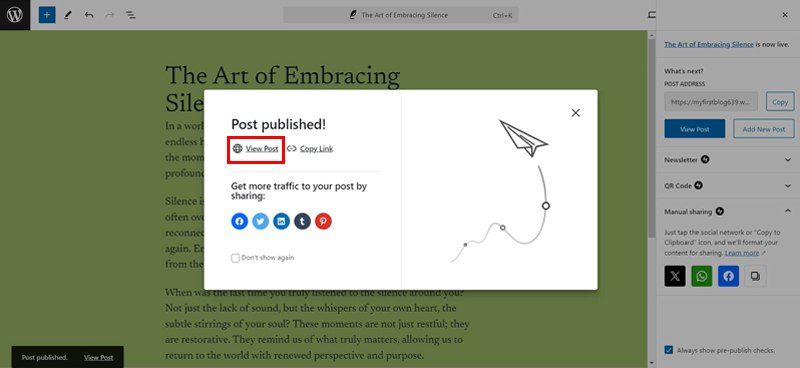
You can click on the ‘View Post’ option to have a quick preview of your first blog posted.
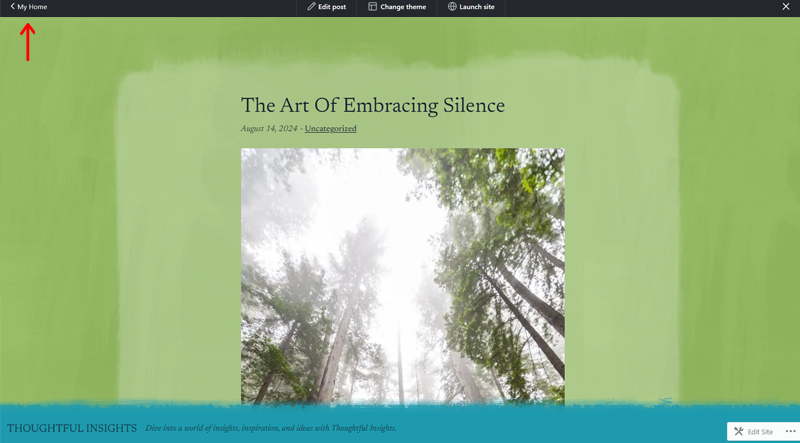
Next, you can click on the ‘My Home’ option in the top left corner to come back to the dashboard.
Step 5: Launching Your Site
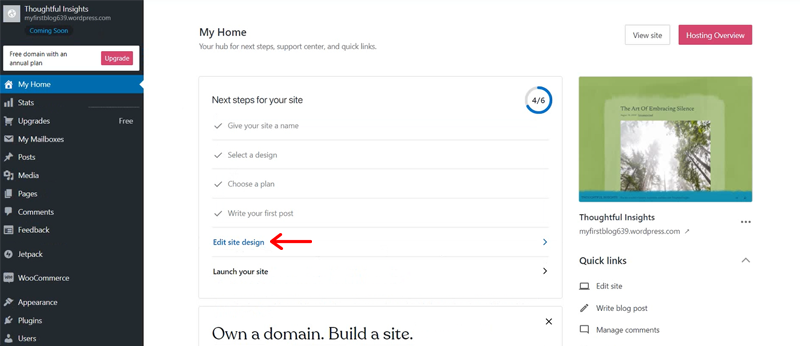
Now, before launching your site, there is one last secondary step that you can take i.e. ‘Edit site design’. Simply click on it to proceed.
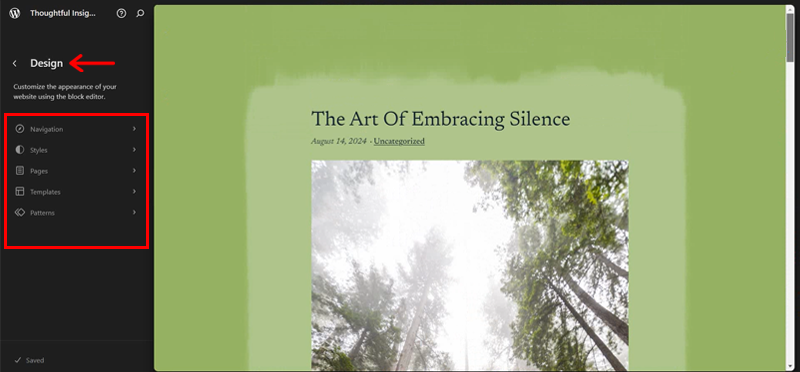
With that, you’ll reach the ‘Design’ panel with several options like Navigation, Styles, Pages, Templates, and Patterns.
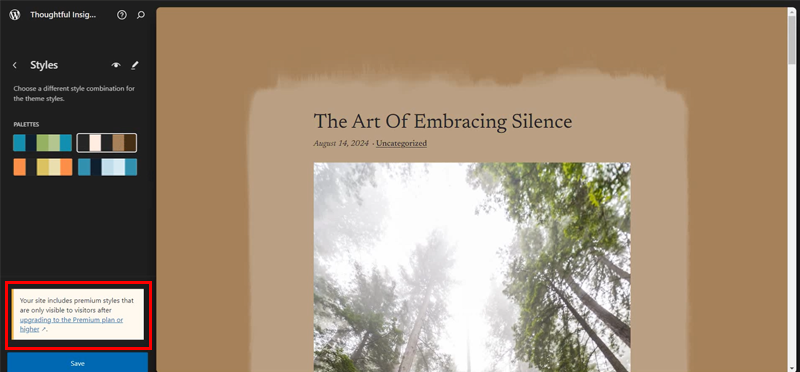
You can then experiment with these options the way you like to portray your blog website to your vision. (However, do note that some Style options are only available only with the premium version.)
So, if you’re happy with the default design version, then you can keep it as it is and move back to the dashboard.
Also, to let you know, when you imported the predesigned template, by default few blog posts were added. So, you need to delete them.
For that, on the left-hand side of your dashboard, go to the ‘Posts > All Posts’ on the left-hand side of your WordPress dashboard.
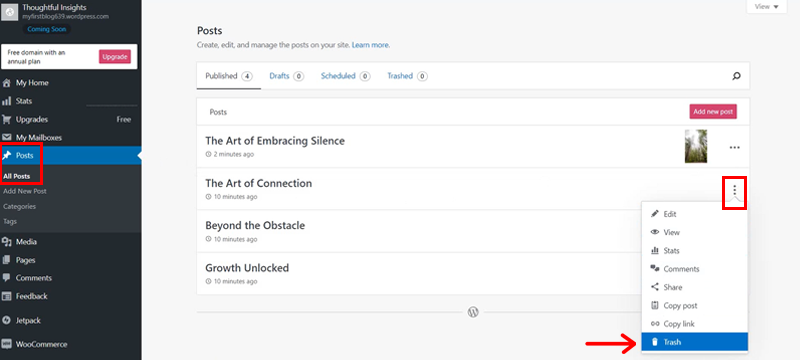
Then, you need to click on the triple dot icon and the ‘Trash’ option of the blogs that you want to delete.
Once done, click on the ‘My Home’ menu and finally hit the ‘Launch your site’ option,
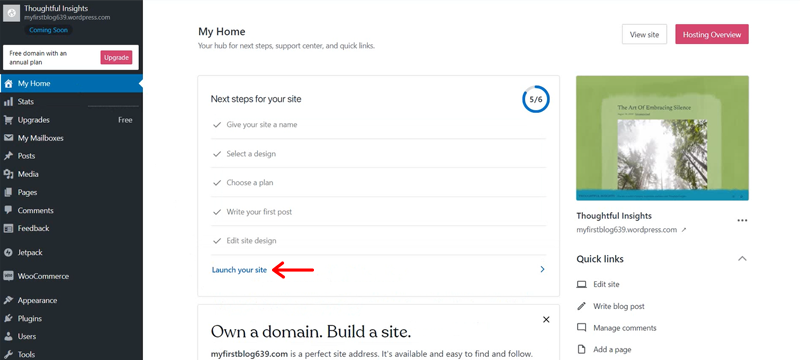
And HURRAY! Your WordPress.com blog website is finally LIVE.
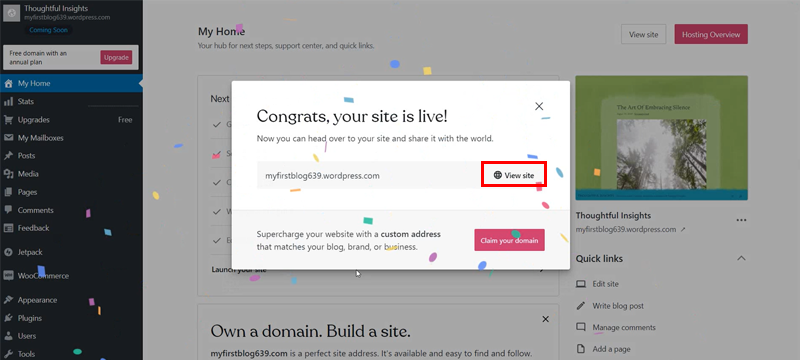
Now, all you’ve to do is click on the ‘View site’ option to have a preview of the freshly launched blog website. That too for FREE!
C) Optimizing Your Free WordPress Site
Hey, wait! Creating a WordPress site is just the stepping stone of your blogging journey.
The main key is to optimize it. So, that your blog website performs well and attracts the right kind of audience at the right time.
Having said that, let’s dive into how you can enhance your free WordPress site, focusing on performance and security. Shall we?
Overview of Free Plugins for Performance & Security
As mentioned earlier, the free version of WordPress.com definitely provides a solid foundation for your site. However, you need to upgrade to one of the premium plans to unlock its full potential in terms of performance and security.
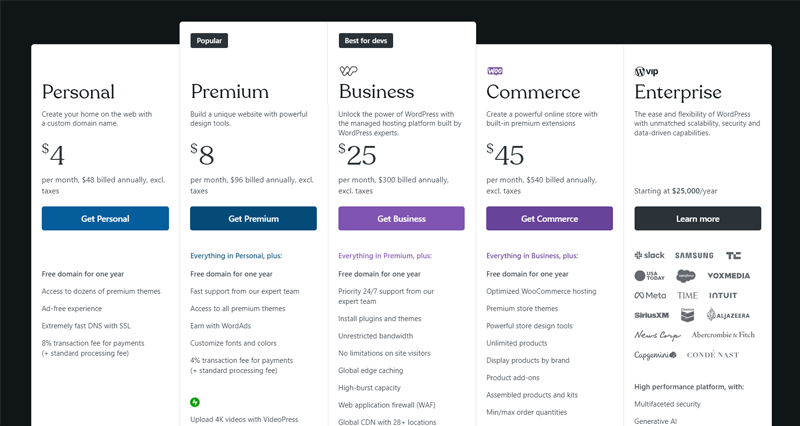
Most importantly, upgrading allows you to access the vast free WordPress plugins. In fact, the WordPress.com plan starts as low as $4 per month.
So, once you’re ready to take your site to the next level with a premium upgrade, here are some of the top plugins that you can access to:
| Plugins | Functionality | Benefits |
| Jetpack | Performance optimization, security, backups. | Enhances site speed, protects against attacks, and automated backups. |
| WP Super Cache | Generates static HTML files. | Improves site speed and reduces server loads. |
| Rank Math | On-page SEO optimization, content analysis, and performance insights. | Boosts your site’s visibility and performance in Search Engine Result Pages. |
| Wordfence Security | Firewall protection, malware scanning. | Provides robust security, and real-time threat defense. |
| Smush | Image compression and optimization | Reduces email file size, and speeds up site load times. |
| UpdraftPlus | Backup, restore, and migration | Schedule backups to remote storage options like Google Drive or Dropbox, to recover your site in case of any issues. |
Check out our article on the best WordPress plugins and tools to explore more. Also, browse our article on how to install WordPress plugin for guidance.
Are you feeling like upgrading isn’t just in your plan yet? Don’t worry!
- WordPress.com’s built-in features like fast DNS with SSL, free image compression, and basic site performance tools should be enough.
- Or, as mentioned earlier, you can go for free hosting options for targeted groups.
Having said that, let’s move on to the next section of our blog to explore the free hosting options for targeted groups.
D) Free Hosting Options for Targeted Groups
Did you know that if you’re a part of a specific group such as students or non-profits, then you may be eligible for free hosting?
Yes, you heard it right!
So, let’s explore some of the top free hosting providers who can provide you exactly that.
1. GoogieHost
GoogieHost is one of the most popular free hosting providers out there in the market with 14 years of experience. With 4,32,023 happy users, it guarantees 99.9% uptime. And offers you free web hosting features like cPanel access, a free subdomain with no ads on your website.
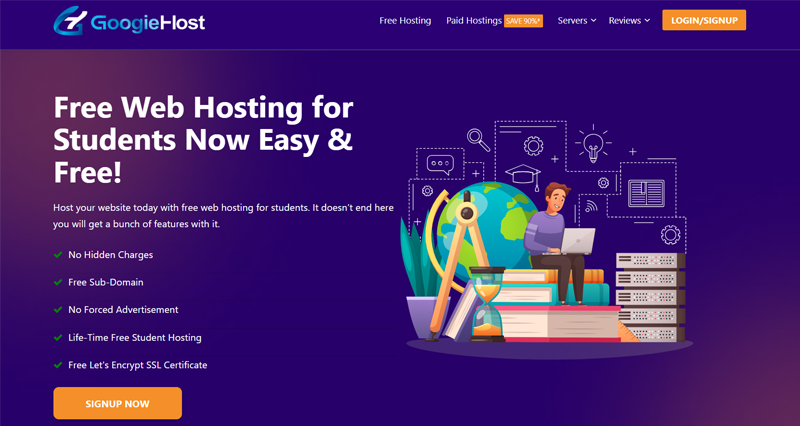
It’s particularly useful for students who are just exploring their hosting journey. And aiming to build their portfolio sites, educational projects, or even non-profits who want to spread their message without any cost.
Key Features:
- Offers free Site.pro website builder tool that lets you create your website without any technical knowledge.
- You get 1 GB SSD storage and 100 GB bandwidth.
- Includes free SSL certificate for secure connections.
- Provides you with a free subdomain like yourblog.googiehost.com.
How to Apply for Free Hosting?
Here’s a quick overview of the application process to GoogieHost:
Step 1: Go to the GoogieHost website and click on the ‘Signup Now’ option to proceed. Then scroll down and click on the ‘Proceed With Free’ button under Free Web Hosting plan.
Step 2: Next, go to the ‘Account’ option and then click ‘Register’. Following that you need to fill in the asked details including your name, email address, provide password, and click the ‘Register’ button at the end.
Step 3: After signing up, you need to verify your email address through the confirmation link sent to your email inbox.
Step 4: Next, your application will be reviewed which takes up to 24 hours. And if approved, your hosting account will be activated. Also, you’ll be sent the login credentials in your email to enter your control panel.
If you want further information, you can explore the Knowledge Base or reach out to them via their Contact page.
2. DreamHost
With over 20 years of hosting experience, DreamHost is still one of the most famous and well-established names in the hosting industry. And with guaranteed 100% uptime, it’s known for its robust and reliable hosting solutions.
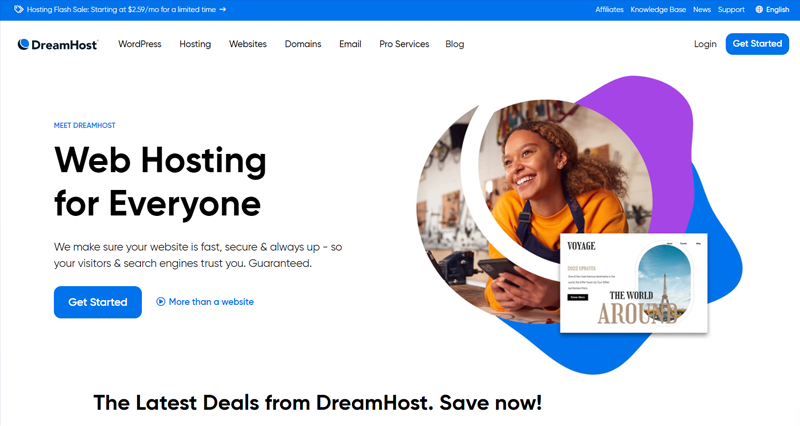
It offers free shared hosting exclusively for non-profit organizations, particularly those registered as 501(c)(3) in the United States. This is an excellent opportunity for non-profits to get high-quality hosting without any expense.
Key Features:
- You get unlimited storage and bandwidth.
- Also, free domain registration is available for .org domains.
- 50 GB site storage with 5 domains and 6 MySQL databases.
- Supports phone call-back along with 24/7 ticket support and live chat support.
- Pre-installed WordPress with one-click install functionality.
How to Apply for Free Hosting?
Here’s how you can apply for free hosting via DreamHost as a nonprofit organization.
Step 1: First of all, you’ll have to fill out this application form to sign up for the service.
Step 2: Secondly, on the Hosted Domains page, you need to add your domain as fully hosted. Or you can skip this step for later and move forward.
Step 3: Thirdly, enter the credit card billing address for identity verification purposes.Step 4: Finally, you’ll be asked to talk to a support agent, so create a support ticket by clicking the button ‘Talk to Support Agent’. After that, you’ll receive an email to verify.
After verifying, log in to your DreamHost dashboard. There you’ll see a message to wait until the DreamHost team approves your non-profit account.
Once approved, you can enjoy the free shared hosting service to host your non-profit website.
For more information on this, you can check the official detailed article on nonprofit discounts.
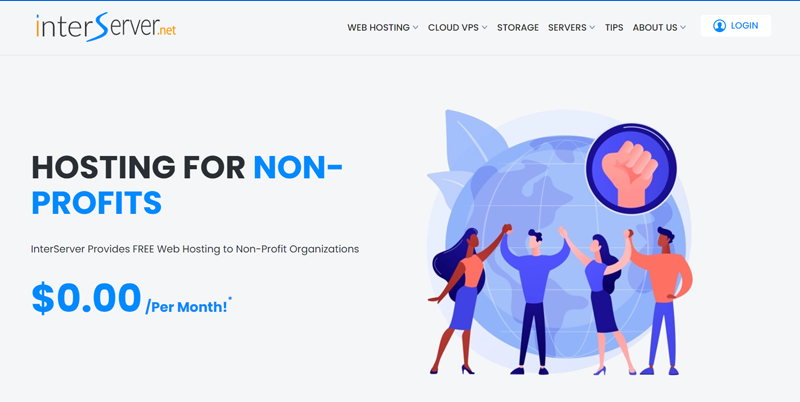
3. InterServer
InterServer also provides free shared hosting, particularly for students and non-profit organizations.
However, students must be accredited in United States universities. If you’re eligible, then all you’ve to do is sign up with your school email address or contact them directly. With that, you’ll credit free hosting for 1 year to your account.
Meanwhile, for non-profits, you’ve to be registered and verified as 501C3 and IRS to get the free hosting. Once you’re verified, you get the free hosting that is free forever.
Key Features:
- Easy-to-use control panel with significant storage and bandwidth.
- Comes with SSD-enhanced servers with SQL databases stored on Ultrafast SSD drives.
- You can easily scale your website to VPS or dedicated servers with no downtime migration process.
- Offers you with 100’s of apps available for quick installation via its control panel.
How to Apply for Free Hosting?
Here’s a quick overview of how you can apply to it.
Step 1: For non-profits, you need to create a free account on the Login page Alternatively, if you’re a student you can go to its Student page and sign up.
Step 2: Then, submit a copy of your IRS 501C3 tax identification letter to sales@interserver.net along with your email. For students, you need to upload a scanned copy of your college ID card.
Step 3: Once approved, include the domain name you want to have hosted with InterServer in that email.
Step 4: After the InterServer team will validate your details, and your account is easily set up.
For more information, check out their official page on InterServer Hosting for Nonprofits and InterServer Hosting for Students.
4. Hostinger
Hostinger another famous hosting provider recommended by WordPress.org is well known for its affordable hosting plans. Its pricing starts as low as $2.99 per month. On top of that, it offers specific student deals known as Student Beans whereby you get an additional 10% off on your hosting package.
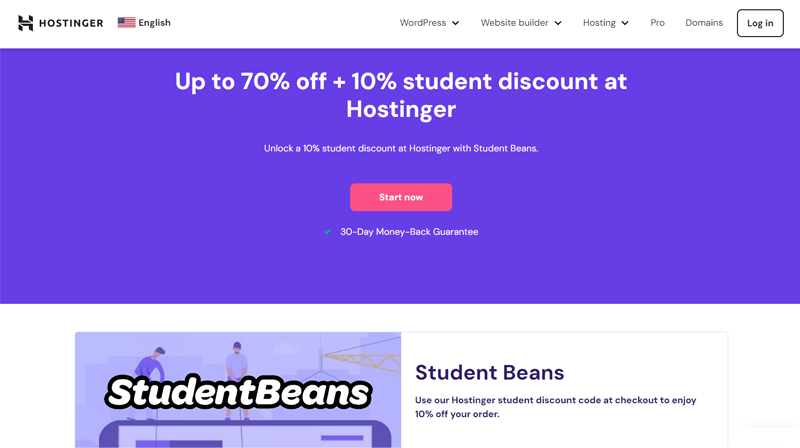
You need certain documents such as your college identity card, college email address, and letter of enrollment to be eligible for this scheme. Once you’re successfully verified, you get a Coupon code that you can apply at the checkout process for a discount.
This option is great for students working on academic projects or non-profits looking for reliable hosting.
Key Features:
- You can use the managed WordPress hosting for up to 100 websites.
- 100 GB SSD storage so you can have a remarkable website speed.
- Comes with Hostinger website builder features with AI for an easy site creation process.
- Unlimited free SSL to keep your blog website secured and safe from potential threats.
- Free domain, free automatic website migration, free email, free CDN, with priority support.
How to Apply for Discount?
Are you wondering how to apply for this discount? Here’s a quick overview of steps that you can follow to proceed forward:
Step 1: Go to its Student discount page and create a free Student Beans account.
Step 2: Then you need to fill in the required details along with the official student email, like, “sandygreen@school.edu,” your institution name & country, and identity card.
Step 3: After that you’ll get a verification email to verify your account for Student Brans.
Step 4: Once it’s verified, you’ll get the Coupon code that you can apply at the checkout process.
Need help? Then, you can reach out to its Help Center for any kind of issues and inconveniences.
Now, are you planning to use one of the above-mentioned hostings and create a blog website? Then, check out our article on how to start a WordPress blog. Also, you might want to explore the best WordPress blog themes where most are free.
E) Best Practices For Engaging Blog Content & Audience Growth
Finally, let’s talk a bit in the context of content. As it’s high time to focus on what really matters. And that is your blog CONTENT and your AUDIENCE.
So, let’s explore some of the best practices for engaging your visitors and also keep them coming back for more!
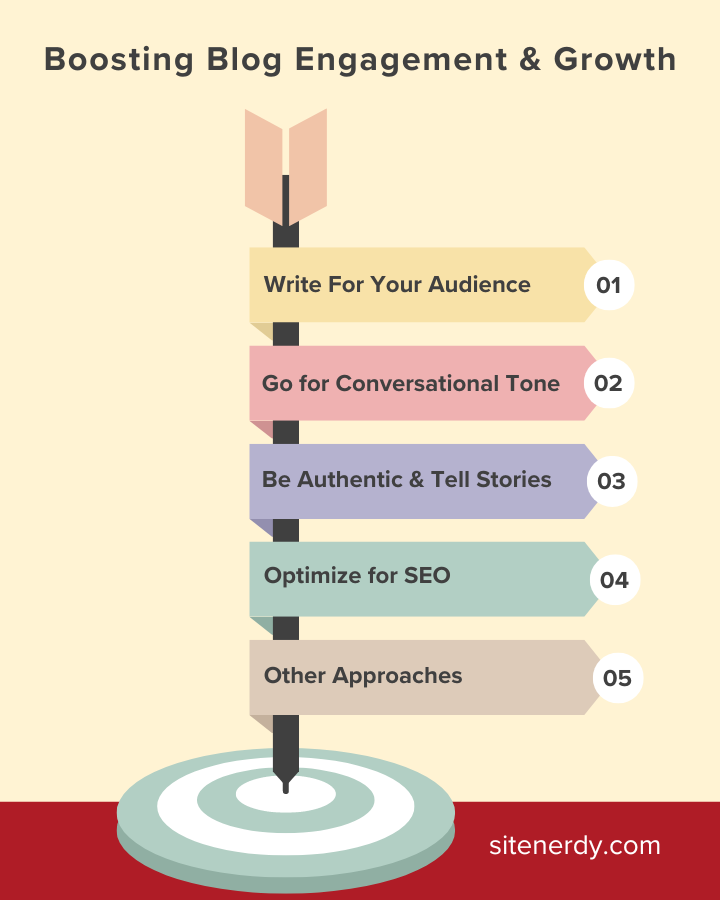
1. Write For Your Audience
First things first, writing with your audience in mind is crucial. Did you know, that 77% of internet users regularly read blogs?
That’s a massive potential audience, but only if you’re creating content that resonates with them.

So, you need to clearly understand who your readers are and what they’re interested in. And, always double-check if your blog can fulfill their needs, solve their concerns, or at least entertain them.
2. Go for the Conversational Tone
When writing a blog, here’s a simple yet effective mantra i.e. write as if you’re talking to a friend. When you do so, your content becomes more relatable and easier to digest for the audience.
On top of that, you need to avoid using jargon and complex sentences for the sake of a vague show-off. Meaning, always use simple and clear sentences so that your readers get the exact message that you are trying to convey.
3. Be Authentic and Tell Stories
Did you know, storytelling can boost your conversion rate by 30%? Nothing can beat personal experiences and insights and people love stories.
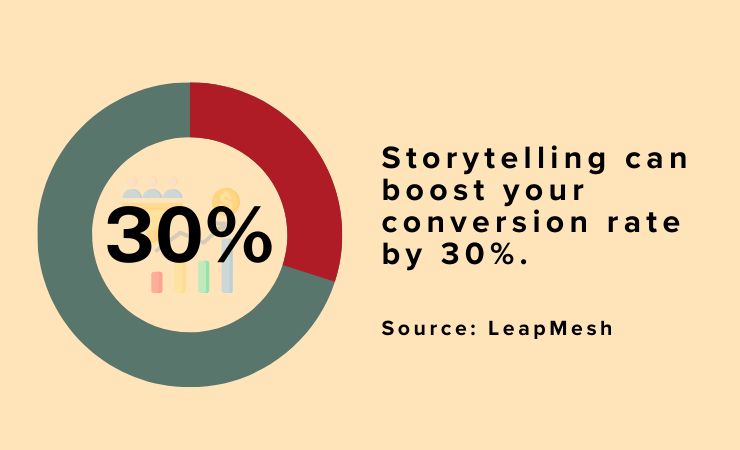
So what are you waiting for? Don’t hesitate to share them on your blogs so that the audience starts trusting you.
Best of all, good storytelling can evoke emotions and people remember your blog content for a longer period of time.
4. Optimize for SEO
Are you doing all of the above and still your blog website is not ranking in the search engine result pages?
Well, you need to enter the SEO (Search Engine Optimization) game and level up. As blogs that rank on Google’s first page capture 34% of the organic traffic for a given query.
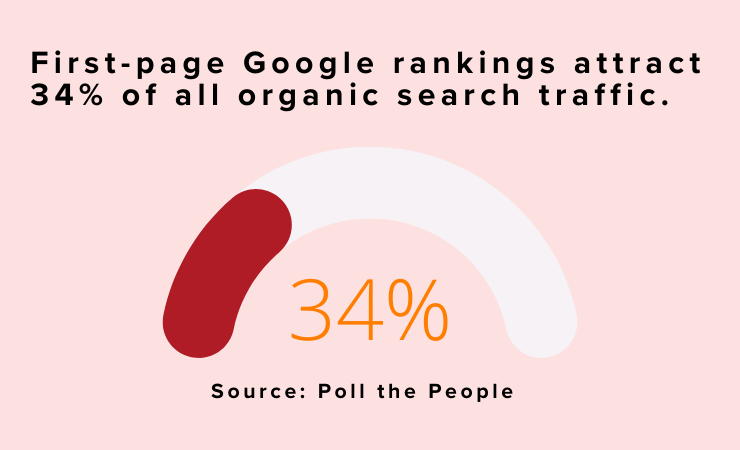
Thankfully, there are various techniques like on-page SEO, off-page SEO, technical SEO, keyword research, etc that you can learn and apply to rank your blog site.
5. Other Approaches
Besides, there are several approaches you can adopt for your audience growth. For instance, social media marketing, email marketing, guest posting, quality backlinks, etc can help you bring more traffic to your blog.
Not to add, you can use tools like Google Analytics to track your blog’s performance. Once you do that, you can know which posts are getting the most traffic and engagement. And then, you can create further blogs around those topics.
F) Frequently Asked Questions on How to Start a WordPress Blog for Free?
Now, we’ll answer some of the most frequently asked questions on how to start a WordPress blog for free.
1. Can I blog on WordPress for free?
Yes, you can blog on WordPress for free. One option is WordPress.com which comes with a subdomain (like yourblog.wordpress.com) and basic features. Another option is to use a free hosting service with limited resources.
Q.2 How do I start a 100% free blog?
There are 2 ways to start a 100% free blog. Either, you sign up for a free plan on WordPress.com where everything is managed for you. Or you can go for free web hosting and install WordPress independently. Both options allow you to create a WordPress blog at 0 (zero) cost.
Q.3 Can I monetize a free WordPress site?
Well, you can and you cannot. This means WordPress.com’s free plan doesn’t allow you to place traditional ad networks like Google AdSense. Yet, you can use affiliate links to promote products and services within your content to make money from your blog.
If you want more monetization options, then you may need to upgrade to a paid plan or use a self-hosted WordPress site.
Q.4 Do I own my blog on WordPress?
Yes, you do own and have full ownership of the blog content you create on a self-hosted WordPress with your own domain. However, on WordPress.com’s free plan, the platform places ads on your site.
Q.5 What are the limitations of a free WordPress blog?
A free WordPress blog comes with several limitations. For instance, free web hosting services come with restricted bandwidth and limited storage space. Meanwhile, you won’t have access to premium themes or plugins, and your blog will use a WordPress.com subdomain unless you upgrade.
Do you plan to create a proper WordPress website using premium hosting but unsure where to start? Then, check our comprehensive guidance article on how to create a website, complete with a step-by-step guide for beginners.
Conclusion
And that’s all, folks! We’ve come to the end of our tutorial article on how to start a WordPress blog for free.
Summing up, you’re free whether to use WordPress.com with its free plan or go for a self-hosted WordPress.org blog with a free hosting service.
No matter which option you take, both provide a solid foundation to get your blog up and running. And as you grow and your needs evolve, you can always explore premium options.
If you have any questions or confusion, then do let us know in the comment section below. We’re happy to help you out.
Also, explore our other reads such as popular types of blogs and free blogging platforms.
Like our content? Follow us on our social media handles Facebook and Twitter to stay updated with more content like this.
YOU MIGHT ALSO LIKE...
We've picked you some best articles that you might be looking for. Check them now!