Do you want to know how to install WordPress locally on your computer? Are you looking to install WordPress on Windows and give it a try? Then you’ve landed on the right page.
Whether you’re just starting out on WordPress or you’re confused about local installation, we’ve got you covered. Installing WordPress locally using XAMPP not only gives you a beginning ground, but it also helps you test your website on a local server.
Follow along as we show you every step you need to take in order to set up WordPress locally using XAMPP. The steps are very easy so let’s get started.
A) What is XAMPP and Why XAMPP?
Before we get started on the installation, you’ll need to know a few things. One of those is knowing what XAMPP is. XAMPP is software that helps you set up a local server with the help of your own computer.

Without XAMPP, you’d need a web server (Apache), PHP, and MySQL installed on your computer. This is very time-consuming and not very beginner-friendly.
Apache is a web server that lets you host a server that is your own computer. PHP is a programming language used to develop web applications. And MySQL is a database management software through which you can store data.
XAMPP eliminates this hassle by installing all three applications at once. Pretty convenient, isn’t it? Aside from express installing all three services at once, XAMPP also allows you to modify your database and create new ones directly from its interface.
It’s available for Windows, MAC, and Linux platforms. But for this guide, we’ll install it on Windows. The process is exactly the same for all three platforms.
B) Why You Need to Install WordPress Locally?

Installing WordPress on localhost has a lot of benefits. One major benefit is website testing. You can create a website and before you launch it on the internet, you can see for yourself how well it does on a server.
Having your website hosted locally has been a common practice for developers and website owners alike. You can try out different themes, plugins, or even add code to your website and look at its effects without harming your customers.
Of course, locally hosted websites will only be visible to you and the changes made will only be made locally, meaning that it won’t affect your customers if you have a local copy of your website.
If you wish to create a live website, you’ll need a web hosting platform and a domain name.
Now that you know all this information, let’s move on to the actual steps to install WordPress locally using XAMPP.
C) Steps to Install WordPress Locally using XAMPP
Go through all the steps one by one and you will get your WordPress installed. It is very simple and easy process. However, we suggest you not to skip any steps. Otherwise you may get confused.
Step 1: Download and Install XAMPP on your host computer
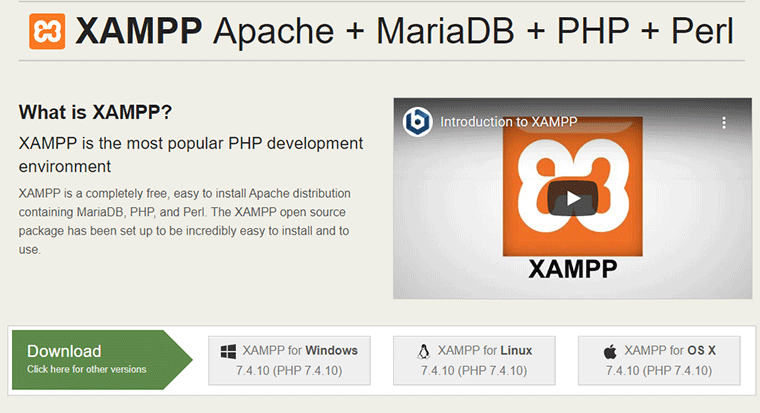
The first step to installing WordPress locally is to install XAMPP on your computer. To do that, simply head over to XAMPP’s official download page and select your operating system for installation.
After downloading the installer, click on it and a setup wizard will appear. Since this is a guide primarily focusing on the Windows platform, the setup wizard looks like this on windows.
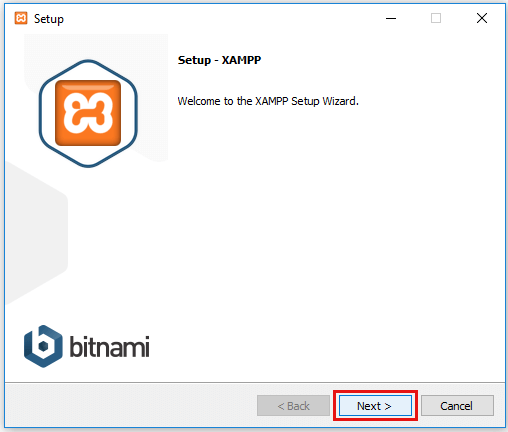
After that, just keep clicking next until it says “Setup is ready for installation.” Then click next one last time and the installation process will begin. It might take some time to install it on your computer.
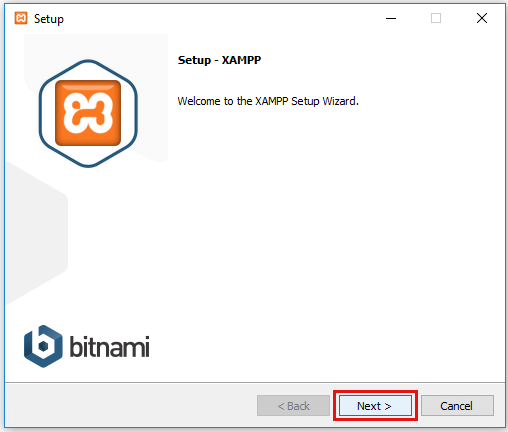
Finally, tick the “Run XAMPP Control Panel Now” option and click on “Finish”. This will run the XAMPP Control Panel.
Step 2: Start Modules to Test the Local Server
A module is a component of a program that is coded with the intent of running repeatedly. They are designed to run a single software over and over again because of the need for constant data.
With the help of XAMPP, you can run the Apache module as your local server and the MySQL module as your database server. Now, you’ll need to click on the “Start” button for both Apache and MySQL modules.
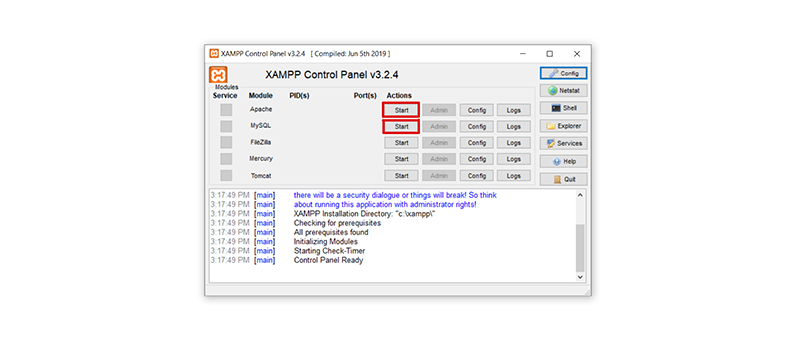
Windows Firewall might ask for permission to let the servers connect to your network so go ahead and click on “Allow Access”. After that, your XAMPP Control Panel should look like this.
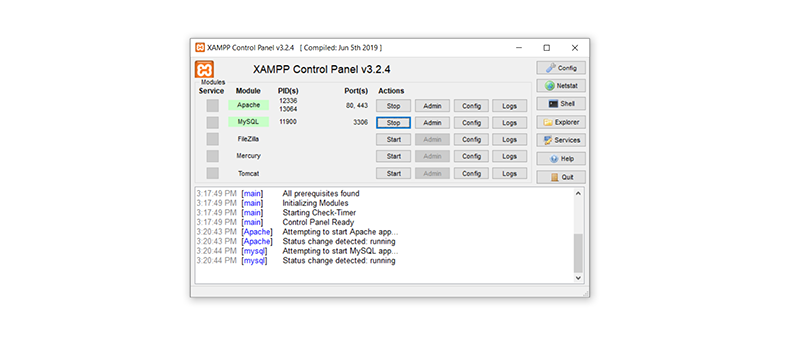
Now, we’ll head on to add WordPress files to your servers.
Step 3: Add WordPress Files
Without WordPress files, you won’t have a website to host locally. So, to add WordPress files to your local server, first, you’ll have to download them. So click on this link and it’ll redirect you to WordPress’s downloads page.
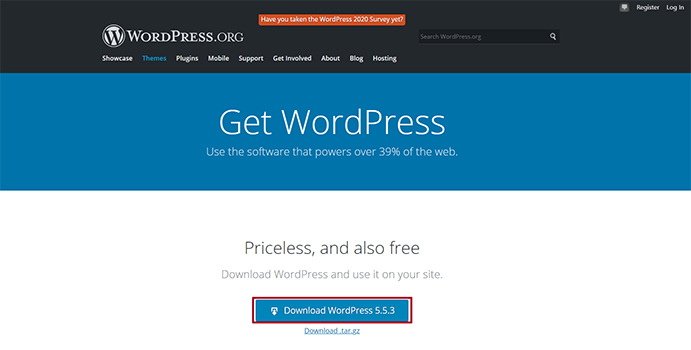
Here, click on the “Download WordPress” button. That will download a compressed file for WordPress. You’ll have to extract it to any location you want. After extracting, you’ll see a folder like this.
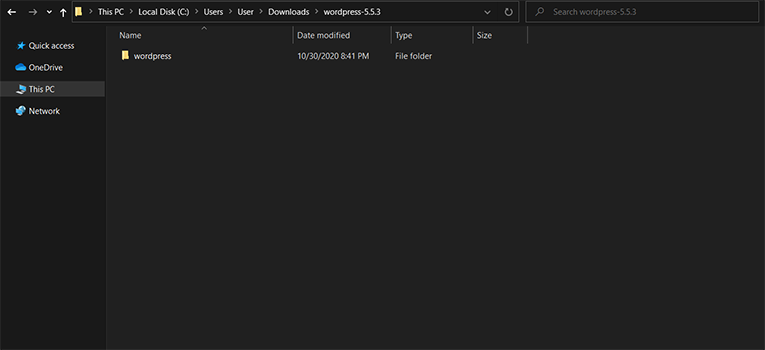
Copy this entire folder and then go to where you installed XAMPP. If you installed it on the default location, it should be inside C:/Program Files/XAMPP/htdocs or C:/xampp/htdocs folder. However, if you’re on MAC, it’ll be inside /Applications/XAMPP/htdocs.
Paste it there. The folder will now look like this with the “wordpress” folder in it.
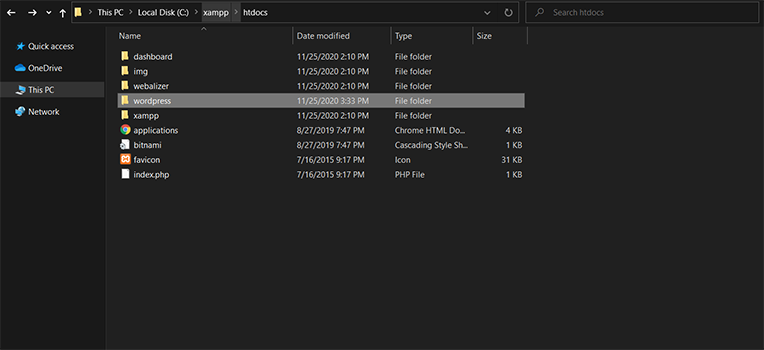
Let’s head on to the next step which is creating your database.
Step 4: Create a Database for WordPress
A database is a collection of data stored in a particular place. We’ll be using a database for local hosting because it allows the server for faster access of data. This database will be created on your local server.
Now, to create a database, go back to the XAMPP application and click on “Admin” under the “MySQL” module. You’ll be able to see a webpage like this.
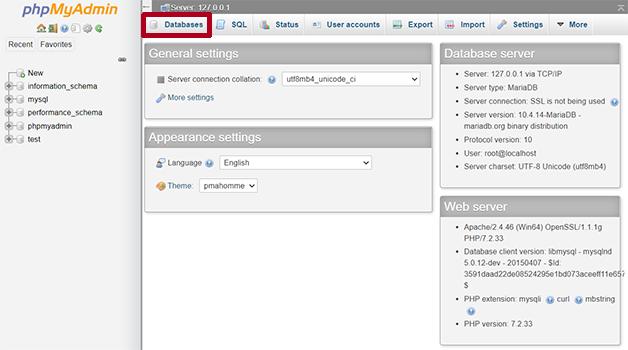
Click on “Databases” on the top. Then, enter a name for your database under “Database name” and click on the “Create” button. The database can be named anything. But we recommend naming it “testsite” for ease.
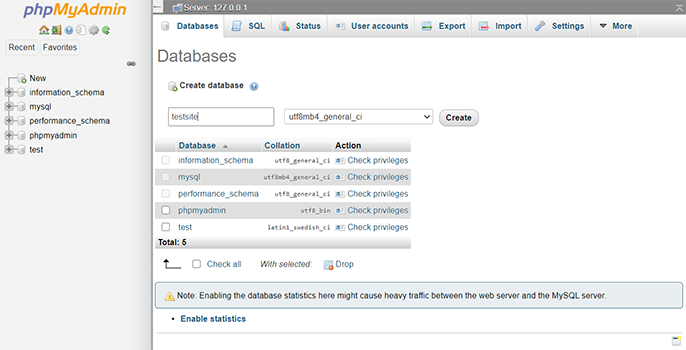
That’s it. You have a database for your website now. You can fill that with some information as you create your website.
Now, let’s look at the next step which is actually installing WordPress locally.
Step 5: Install WordPress Locally through the Installer
This is the main part. But it’s not very difficult. Go to your web browser and type in the following: http://localhost/wordpress/. You should be able to see a webpage that starts the installation of WordPress on your localhost. It looks something like this.
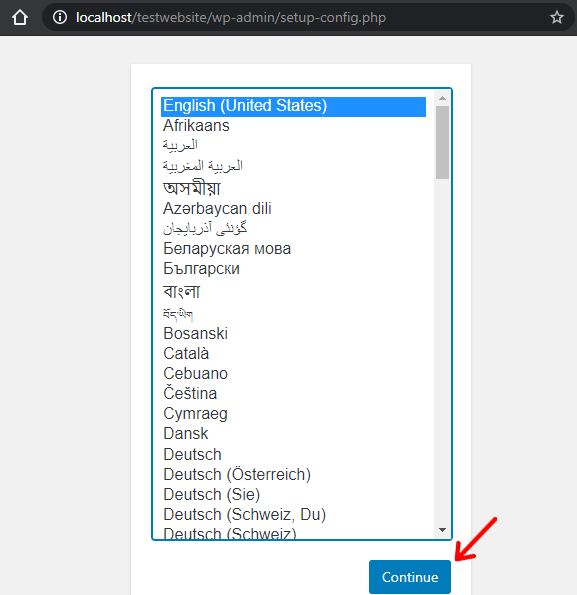
Just click on the “Continue” button and then the “Let’s Go” button on the page that follows. Then, you should be able to see a webpage that asks for your database connection details. It looks like this.
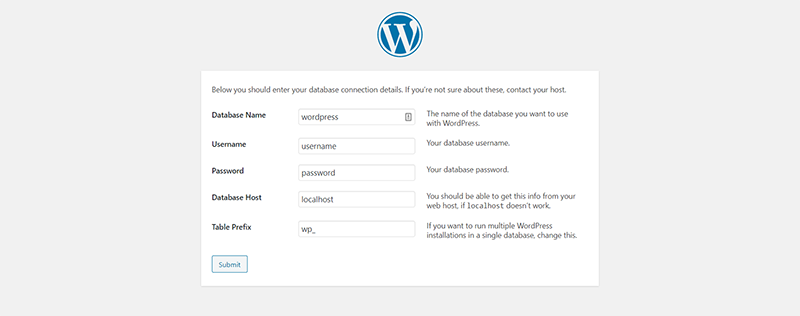
Simply click on the “Submit” button. Just keep in mind to type “root” as the username and leave the password field blank. Otherwise, the installation won’t happen as we don’t have a specific username or password saved in our database.
Then, on the next screen click on the “Run the installation” button.
You’ll then be taken to a page that looks like this.
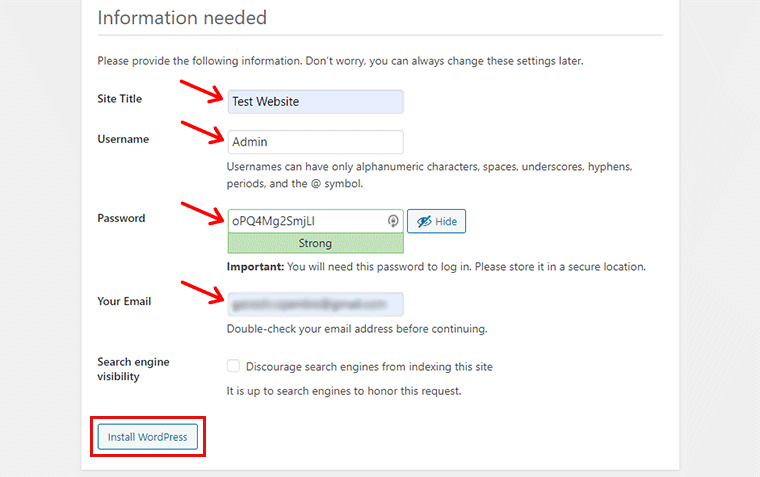
Fill in your information and click on the “Install WordPress” button.
That’s it! You’ve successfully installed WordPress locally on your computer. You’ll see a success message that confirms your installation.
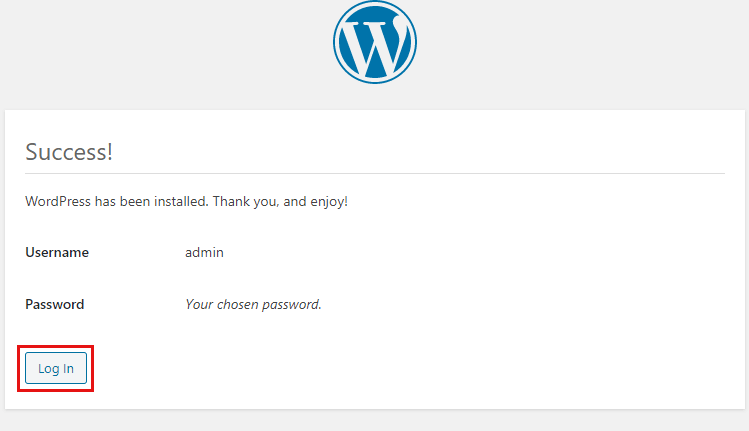
But there’s one last step left. And that is to verify if your website actually works on the local server or not.
Step 6: Log in to Your WordPress Dashboard
This step is crucial as it is a confirmation that everything went smooth and you can log in to your dashboard. To do this, go to your web browser and paste the following: http://localhost/wordpress/wp-login.php. Then, enter your credentials and click on the “Log In” button.
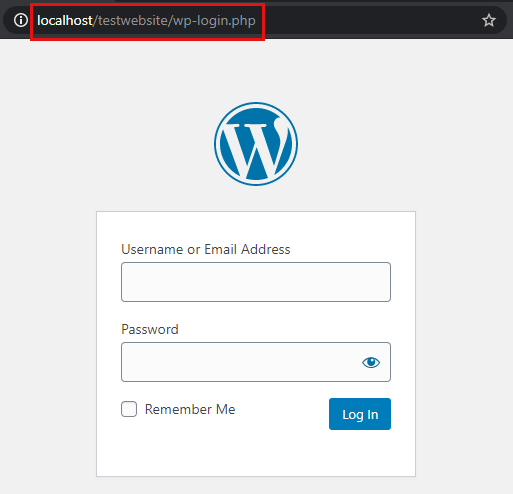
After clicking the button, if you get a page like this, everything is done.

Now that confirms your local website as functional. You can start building a website or testing things from here.
Conclusion
In this article, we went through the steps in order to install WordPress on your localhost. We hope this article helped you in installing WordPress locally. Even if this guide was primarily focused on the Windows platform, MAC users will not have any major differences during the steps.
Also, check out our article on How to Start a WordPress Blog and How to Choose a WordPress theme for your website. We would love to hear your thoughts on this article so feel free to comment on any queries or suggestions below. And if you liked this article, do share it with your friends and colleagues.
If you’d like to, follow us on Facebook and Twitter for more articles like these.
