Recently, we came across WP Cooper while scrolling through the WordPress theme repository. Its sleek and modern design instantly caught our attention. This curiosity led us to explore the theme further.
In fact, this simple test turned the experience into an honest, step-by-step review of the WP Cooper theme. The results are shockingly excellent.
The first thing that stood out was the design. WP Cooper delivers a polished, professional look without much editing required.
During testing, the speed was just as impressive. As a lightweight theme with Full Site Editing nature, your pages will load fast and interactions will remain smooth.
And the flexibility? That’s where WP Cooper’s FSE function shines the most. You can visually create each section of your website without touching a code.
Now, the big question is whether WP Cooper is a perfect block theme for your website. Let’s explore this theme in detail to find out!
IN THIS GUIDE
hide
What is WP Cooper? – An Overview
WP Cooper is a lightweight and performance-focused WordPress block theme. Its minimal design and optimized nature make it suitable for launching any kind of website. That can be a SaaS landing page, app site, business site, or portfolio site.
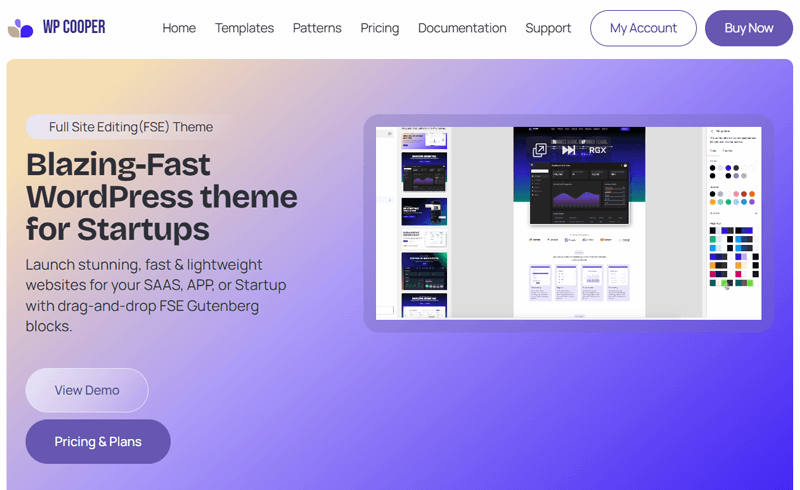
Moreover, it’s built entirely for the new era of Full Site Editing. The WordPress Site Editor lets you design and customize every part of your site. So, it transforms site creation into a smooth, visual process without coding or using a page builder.
In addition, you’ll get multiple clean starter templates, flexible block patterns, and numerous typography controls to quickly craft a polished website. Everything is optimized for your website speed and SEO to perform flawlessly.
In a nutshell, WP Cooper has both the simplicity starters love and the quality web developers admire. Overall, it’s an ideal theme for everyone in need of a beautiful and blazing-fast website.
After getting a quick overview at WP Cooper, now let’s get to know it in-depth!
Key Features and Highlights of WP Cooper
Now, let’s have a comprehensive look at the different features of WP Cooper. This will make it a lot easier for you to determine if it’s a suitable theme for your site.
Unquestionably, WP Cooper stands out when it comes to its functionality. So, let’s check those remarkable features now.
1. Beautiful Templates
WP Cooper provides a growing library of professionally built templates for building any type of website. Whether you’re planning to create SaaS landing pages, app websites, or startup business sites, WP Cooper has you covered.
In addition, you’ll also get ready-made templates for inner pages, such as pricing pages, blogs, etc. This makes it a lot easier for you to launch your website. Not to mention, each template is built to be fast, lightweight, and conversion-optimized.
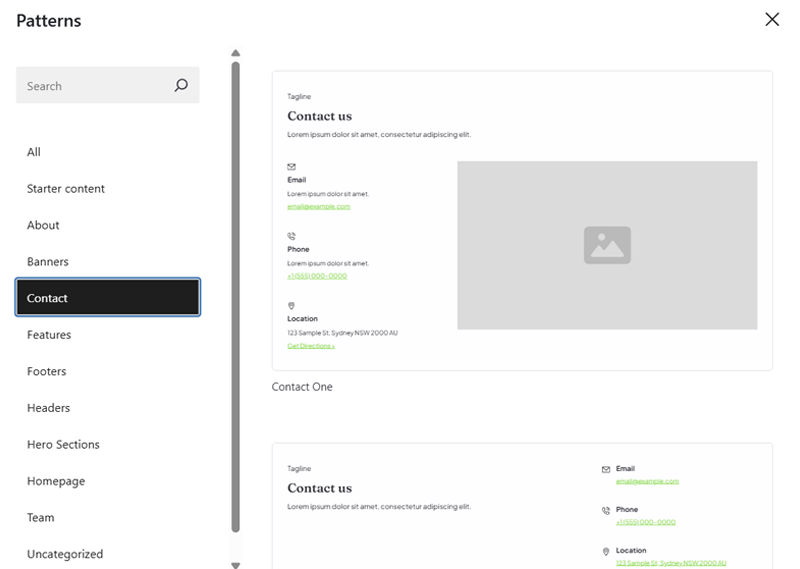
Just open the patterns library. Within that, you’ll find templates for your pages, including Homepage, About, Contact, etc.
Overall, there are 10+ templates available in the free version. Whereas WP Cooper Pro offers you 20+ premium templates. And many more to come soon.
2. Lightweight and Blazing-Fast Theme
We’ve been mentioning WP Cooper as a lightweight and blazing-fast theme a lot. But do you know why that is? The points below explain the reasons:
- WP Cooper is under 5MB, and everything is packed in a single .zip theme file. That’s why it’s lightweight and minimal.
- It uses completely optimized Vanilla JavaScript code and no other additional plugins. This makes your website light and fast with smooth interactions.
- It’s also optimized for Google’s Core Web Vitals by focusing on major metrics. This includes Largest Contentful Paint (LCP), First Input Delay (FID), and Cumulative Layout Shift (CLS). This also supports your site’s quick loading experience and smooth interactivity.
3. Ready-to-use Patterns
A template gives you a pre-built page layout on which you can just edit and customize the content and design. If you want to build your web pages by adding sections of your choice, then it’s best to use block patterns.
WP Cooper offers 100+ patterns in its free plan and 200+ patterns in its premium plans. You can use these 300+ ready-to-use patterns to design every section of your website.
If you open the pattern library, then you’ll find different patterns alongside templates. That involves:
- Hero section
- FAQs
- Logos
- Numbers
- Testimonials
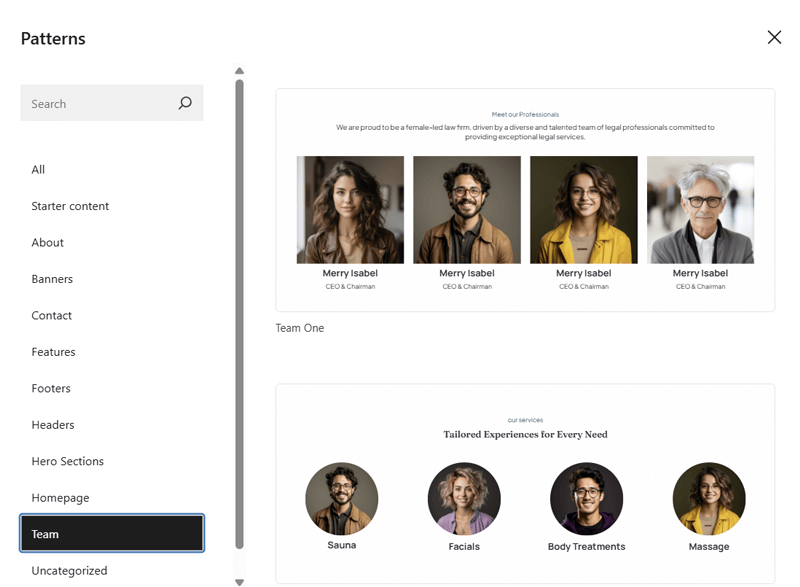
- Team
- Pricing, and many more.
Just like templates, patterns are also built to ensure they are lightweight and performance-optimized.
4. Full Site Editing (FSE) Capabilities
WP Cooper is built with the latest WordPress Full Site Editing (FSE) capabilities and features. This makes the website creation process way simpler.
Why? This is because you don’t need additional plugins or coding skills. Right from the WordPress site editor with a drag-and-drop interface, you can customize each part of your website. Overall, these are the FSE capabilities you’ll get:
- You can edit and customize your homepage, header, footer, pages, and posts from a single location.
- You can alter the colors, fonts, and layouts of each block’s content in real time and see how your website will look as you create it.
- With global styles, you can pick the colors, fonts, and layouts of your entire website at once for a consistent look. No need to customize each block.
- Easily pick and edit your preferred templates and patterns from the library in the editor.
- Get access to the core WordPress blocks to build sections of your website.
In short, WP Cooper offers a modern design with a fast and flexible experience for WordPress websites.
5. Several Customization Options
Moving forward, WP Cooper provides you complete control over your website’s look and feel with its customization options. You can edit and customize each part of your website right inside the WordPress Site Editor.
In fact, you’ll get flexible stylizing options for text, images, buttons, etc., like colors, fonts, and more. These help you match your site to your brand and style.
Have a look at some of them:
| Design Element | Customization Options |
| Text | – Customize font size, weight, alignment, etc. – Alter text color and background color. – Add links or highlight crucial words. |
| Image | – Resize or crop images. – Insert alt text for accessibility. – Add borders or rounded corners. |
| Buttons | – Adjust button text color, style, background color, etc. – Align and group buttons. – Edit the button text font size, weight, etc. |
In addition, WP Cooper also offers color palettes and font presets. So, you can simply choose these options or build your own custom palette. Plus, it lets you save your global style choices to be used across the entire website.
6. Compatible with Other Plugins
Another highlight of WP Cooper is that it’s built to work seamlessly with the WordPress ecosystem. First, it’s regularly tested and updated to ensure compatibility with other popular WordPress plugins.
In addition, its developer team also maintains the theme to keep it in sync with the latest WordPress core releases. So, you can safely update your website without hesitating about any design or functionality breaks.
More than compatibility, WP Cooper refines, improves stability, and adds new customization features. This makes it reliable for your website growth.
However, we recommend trying this theme with your used plugins in a staging website or a different trial environment beforehand.
7. Additional Features
Other than the above-explained features, these are some more features to know:
- Uses SEO-friendly, clean, and semantic code for better search visibility.
- Built with responsive design for your site to automatically adapt to all screen sizes.
- Accessibility-ready theme that lets you choose a suitable contrast design.
- Supports RTL languages and allows translation to different languages.
That’s all we’ve got for the features. But we’ve got a lot more to explore about WP Cooper. Keep reading to find its usage functionality.
How to Create a Beautiful Website with WP Cooper?
By now, you may have planned to try WP Cooper for your website. So, let us help you build it.
Here, we’re walking you through the process of creating a beautiful website with WP Cooper. Starting from its installation to your website launch.
Let’s take an example of a SaaS software-related website and check how amazing this theme really is. So, let’s start, shall we?
Step 1: Install and Activate WP Cooper
First, you must install WP Cooper in your WordPress site. The process depends on which plan you’re using. However, the steps are pretty simple if you just follow our guide.
I. Install and Activate WP Cooper Free
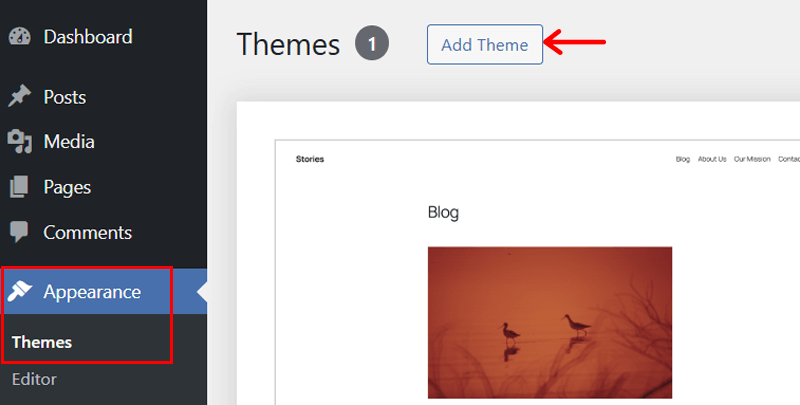
Let’s begin with the free version. Just log into your WordPress dashboard. There, navigate to ‘Appearance’ and then ‘Themes.’ Now, click the ‘Add New’ button.
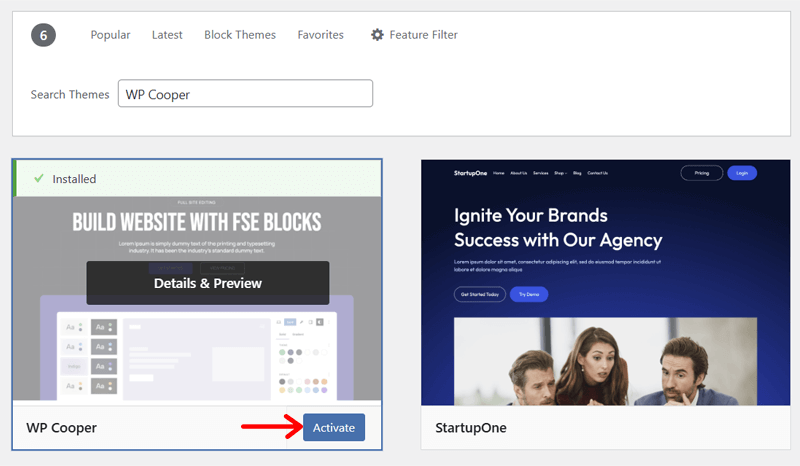
Following that, search for ‘WP Cooper.’ Once the theme shows up in the search results, hover over to it and click the ‘Install’ button.
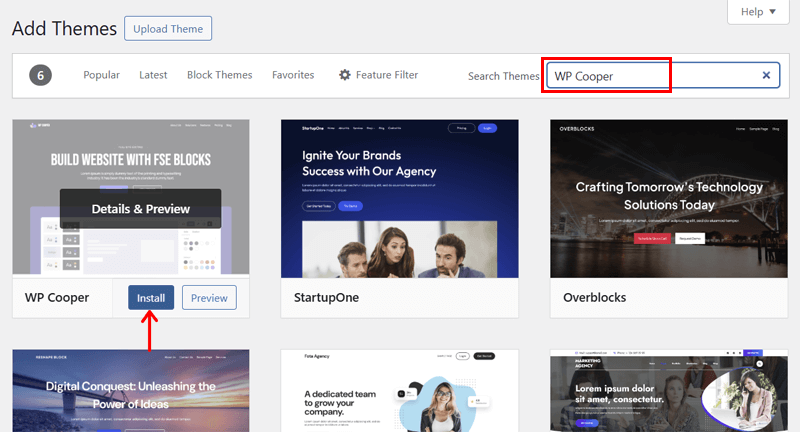
Afterward, press the ‘Activate’ button. That’s how you install the free theme.
II. Purchase, Install, and Activate WP Cooper Pro
If you’re planning to purchase a premium plan sooner or later, then here’s a quick guide on installing it on your website.
Just start by opening the ‘Pricing’ page of WP Cooper. There, you’ll find multiple pricing plans to choose from. Pick one and click the ‘Buy Now’ button.

This opens a pop-up to checkout from your purchase. So, enter your personal and billing information. Then, hit the ‘Review Order’ or ‘Continue to PayPal’ button.
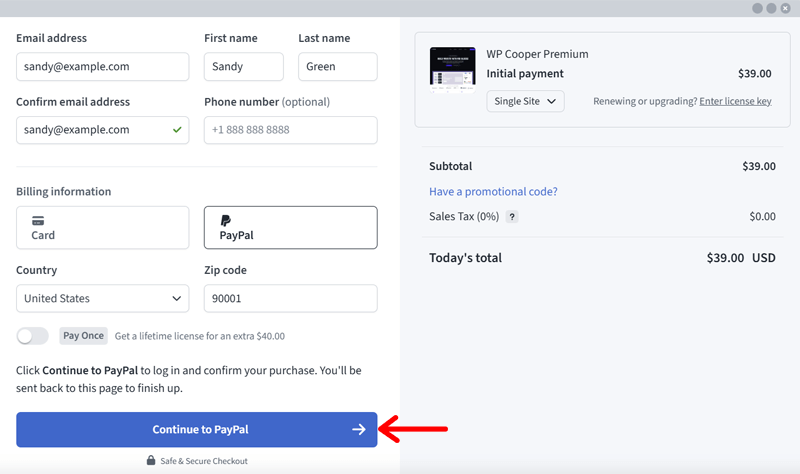
Once all the details are right, complete the purchase. Then, verify your email address to get access to your premium WP Cooper theme and its license.
Now, open your WordPress dashboard and navigate to ‘Appearance > Themes.’ Next, click the ‘Add New’ button, followed by the ‘Upload Theme’ button.
After that, choose the file to upload the theme. Then, press ‘Install Now.’ Moving forward, click the ‘Activate Theme’ button. Don’t forget to activate your license.

That’s it! Congratulations, now you have a beautiful theme ready to build your site.
If you want a more detailed look, then here’s how to install a WordPress theme.
Step 2: Add a New Static Homepage
By default, your website will currently use one of the major templates by your new WP Cooper theme. If it suits your choice, then you can move forward with it.
However, if you want a different template, then you must add new pages to your website. After that, select an ideal template for each page as you like.
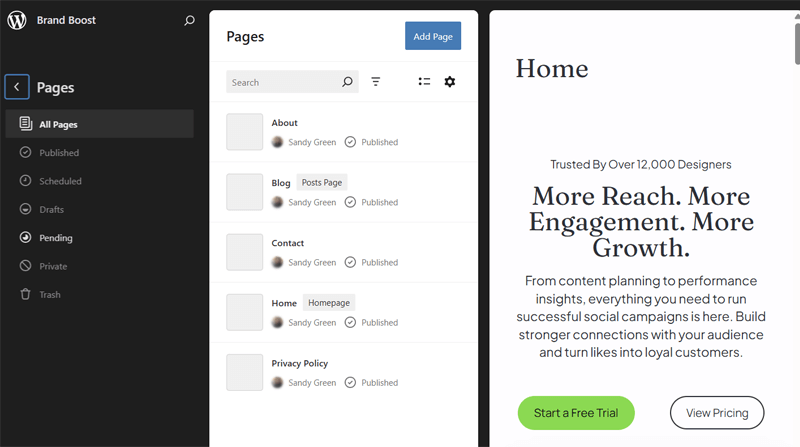
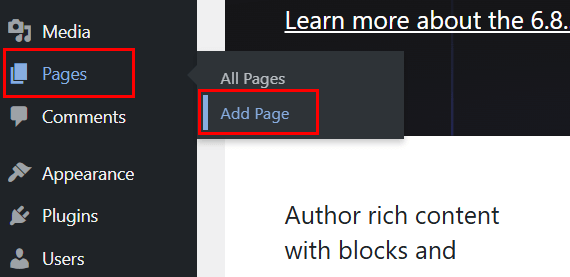
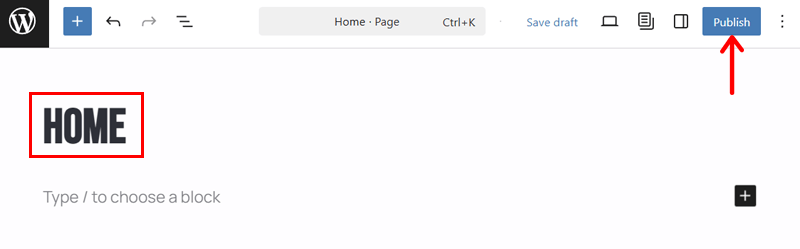
First, start by selecting a new static homepage. For that, add a new page to your website. Just navigate to ‘Pages > Add Page.’
There, add the page title as ‘Home’ and hit the ‘Publish’ button twice.
Similarly, you can add other pages you need for your website. Here, we’ve added pages, like About, Contact Us, Blog, etc.
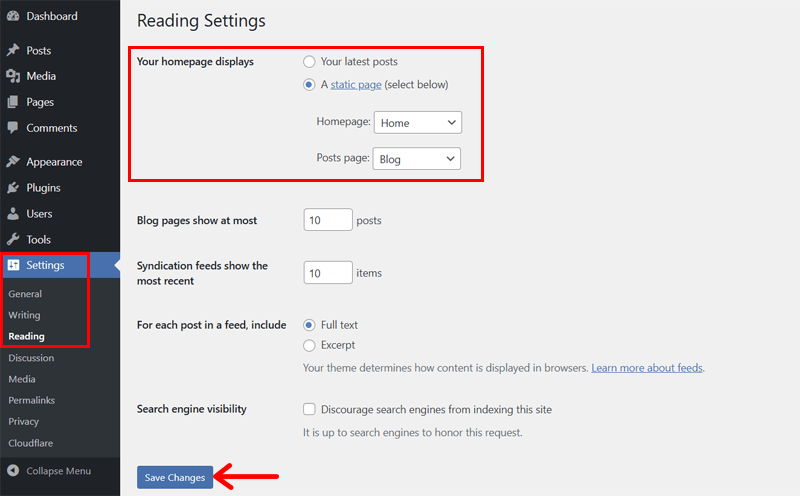
Now, move back to the dashboard. After that, go to ‘Settings > Reading.’ On the ‘Your homepage displays’ setting, pick the ‘A static page’ option.
Following that, select ‘Home’ as in your new page to be the ‘Homepage.’ Further, select the new ‘Blog’ page as the ‘Posts page.’ Lastly, click the ‘Save Changes’ button.
Step 3: Pick a Suitable Template
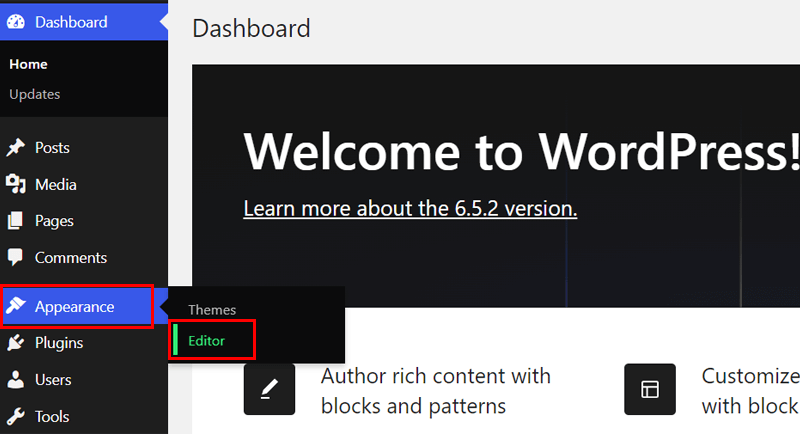
Moving forward, you can now select a suitable template for your web pages. For that, go to ‘Appearance > Editor.’
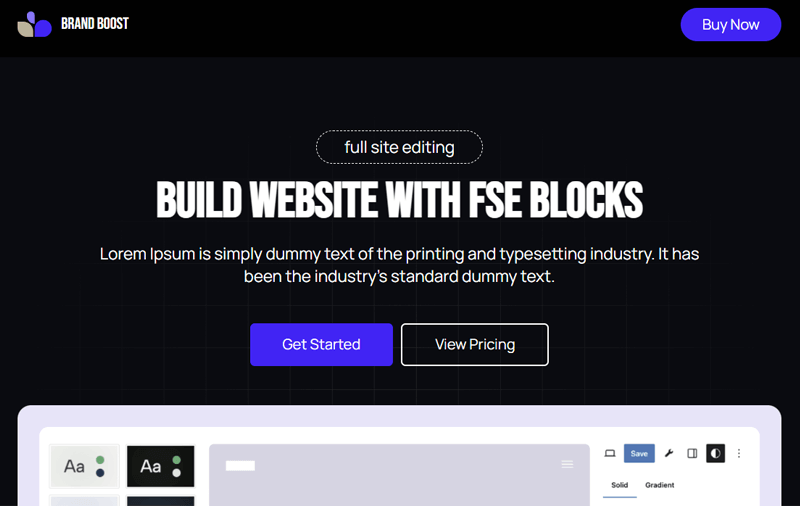
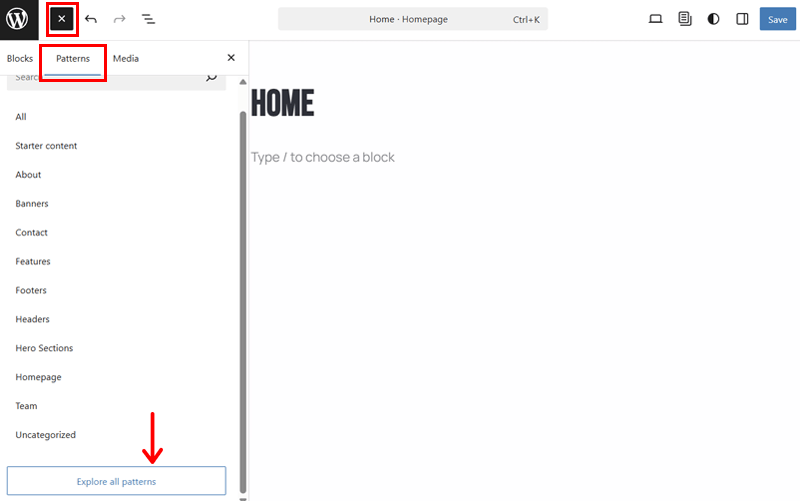
Now, click on the right-side blank website interface. This opens the homepage of your website in the site editor.
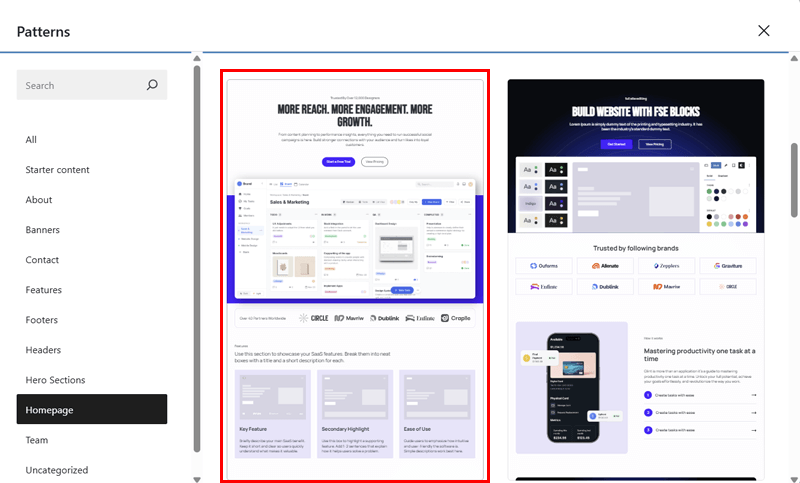
Unlike other themes, you’ll find pre-designed templates inside the patterns section in WP Cooper. So, click the ‘+’ option at the top and open the ‘Patterns’ tab. There, click the ‘Explore all patterns’ button, then the ‘Homepage’ option.
Now, you can find several templates for your possible homepage design. For now, pick a suitable one and click on it. Here, we’ve chosen a template that suits a website for a SaaS platform.
Later on, you can follow the same process to insert a template for other pages of your website. For example, you can open the ‘About’ option to insert a template for your About page.

Step 4: Insert Required Patterns
Are you not satisfied with some sections of your chosen template? Don’t worry! You can simply replace or remove them. Let’s see an example from the homepage.
I. Remove Unnecessary Sections
To remove an unnecessary section, click on the entire pattern for that section. For instance, we’re removing a features section. Then, click the three-dotted ‘Options’ and press the ‘Delete’ option.

II. Add a New Pattern
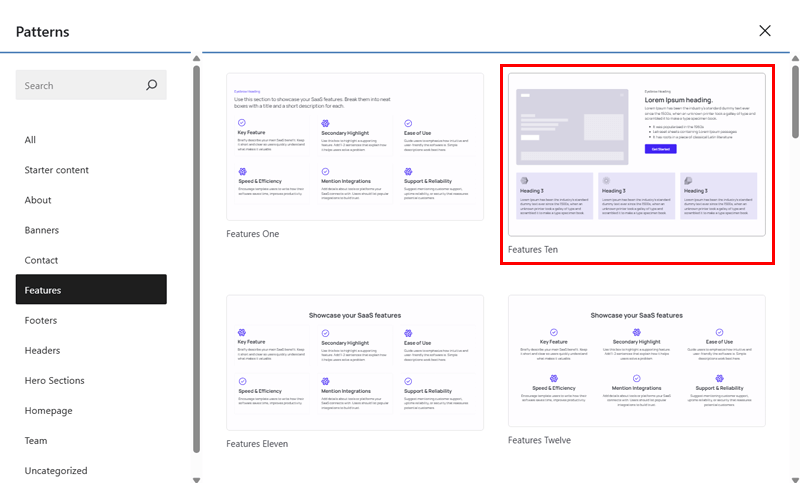
To add a new section, you have to add a pattern. So, click the ‘+’ icon and open the ‘Patterns’ tab, followed by ‘Explore all patterns.’
Now, let’s open the ‘Features’ option and insert a more suitable features pattern. Don’t forget to drag and drop the pattern to adjust its position on the page.
Similarly, you can remove and/or add new patterns to your web pages.
Step 5: Customize Your Website
Now, let’s explore the customization options by WP Cooper and use them to stylize your website. This can be in four different ways.
- The global styles to pick color and typography presets to alter the style across the site.
- Additional styling options like background and layout with more choices.
- Styles to change the design of all blocks of a similar type.
- Customization options to adjust the look of an individual website element.
Let’s go through them.
I. Presets for Global Styling
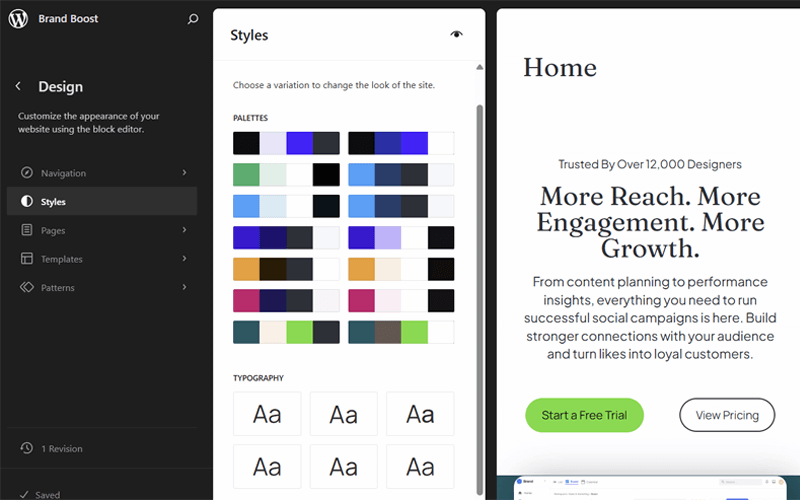
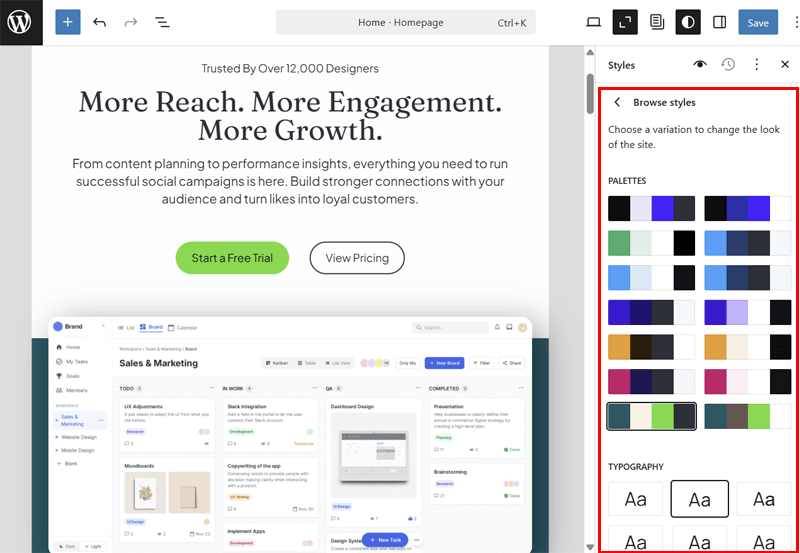
First, open the ‘Styles’ option at the top right navigation. There, click the ‘Browse styles’ option.
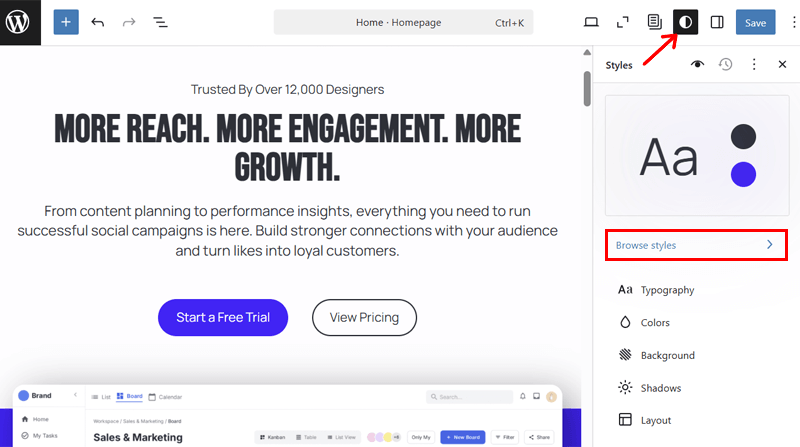
Here, you can find the color palettes and typography presets. So, pick one suitable for each that matches your brand. Once that’s done, press the ‘Back’ option.
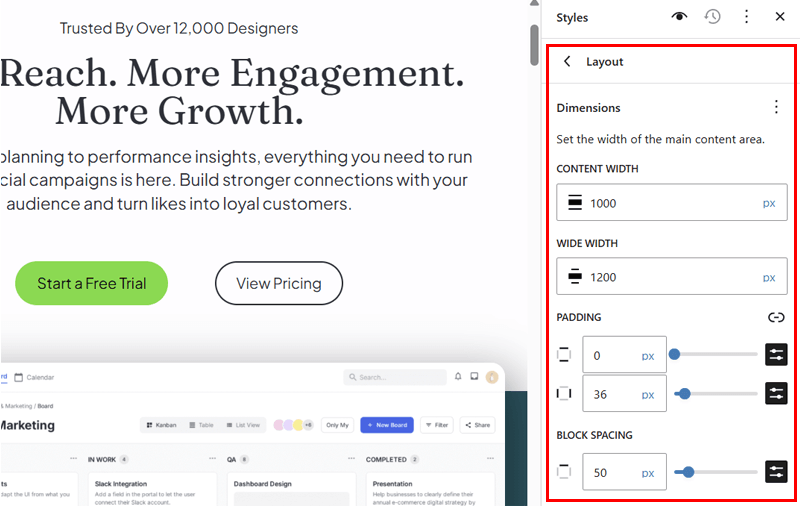
II. Additional Customization Options
Similarly, you can find customization options for typography, colors, background, shadows, and layouts. For instance, let’s open ‘Layouts.’
There, you can adjust your entire website in terms of:
- Dimensions, including the content width and wide width.
- Padding (space inside a block), like on the top, bottom, left, and right.
- Block spacing, which is the space between two blocks.
Once you’re done, go back.
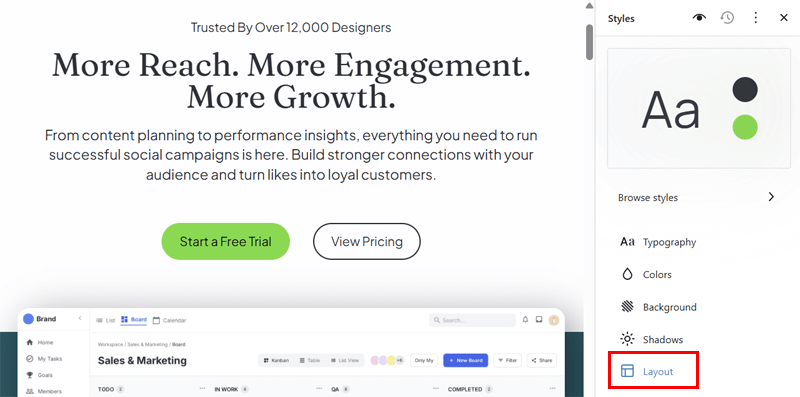
III. Block-Specific Options
In the end, you’ll also find options to alter the appearance of specific blocks. Just click the ‘Blocks’ option.
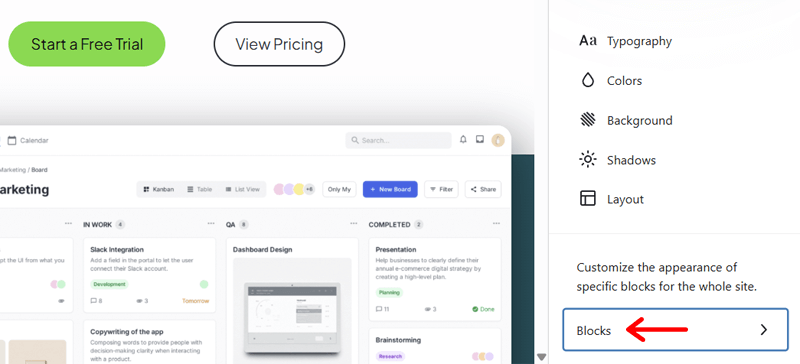
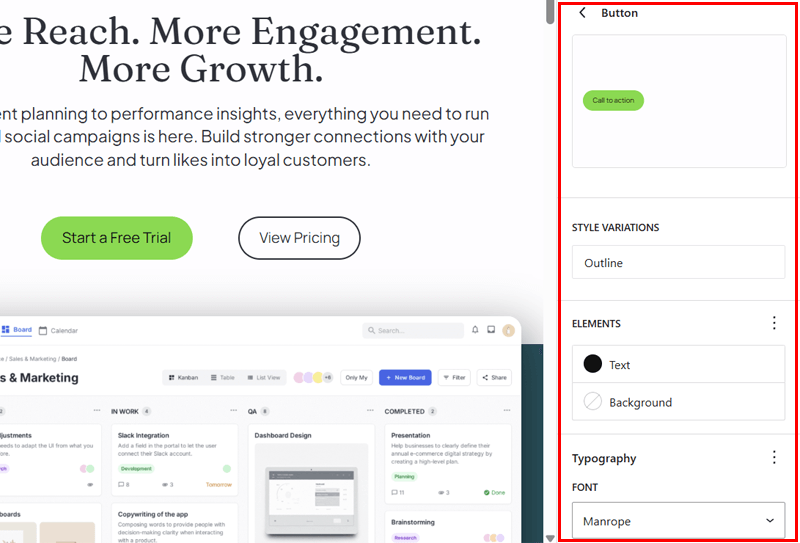
Now, select a block whose design you want to change. For example, open ‘Button’ and customize buttons using these options:
- Color for text and background
- Typography, including font family, size, appearance, spacing, etc.
- Dimensions, which involves padding
- Border color, border size, border radius, and shadow type.
IV. Customizing Individual Blocks
If the global styles aren’t enough, then you can start tweaking each individual component of your website. But first ensure you edit the content of your website.
This involves altering the text content from the template to be about your SaaS platform. Just select the text blocks, like headings and paragraphs, to remove the existing content and type in yours.
Similarly, replace the images. Just click the image block. And on the toolbar, click the ‘Replace’ button. Now, upload your image and use it on the page.

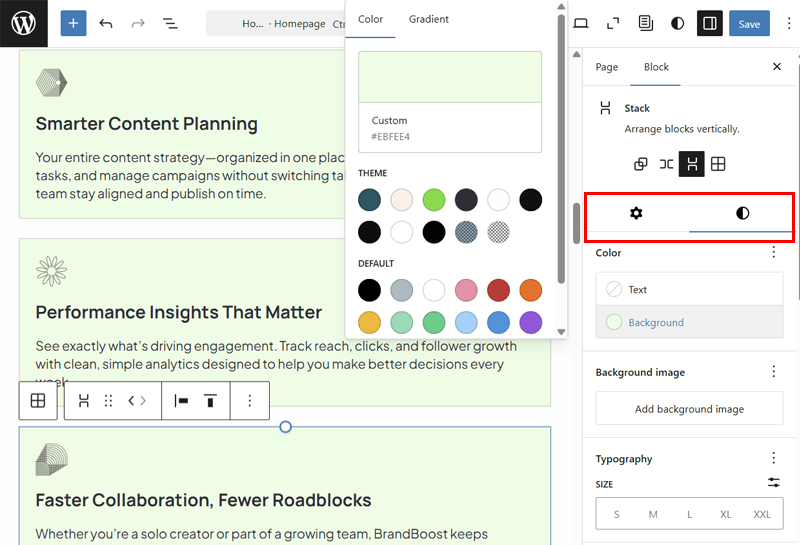
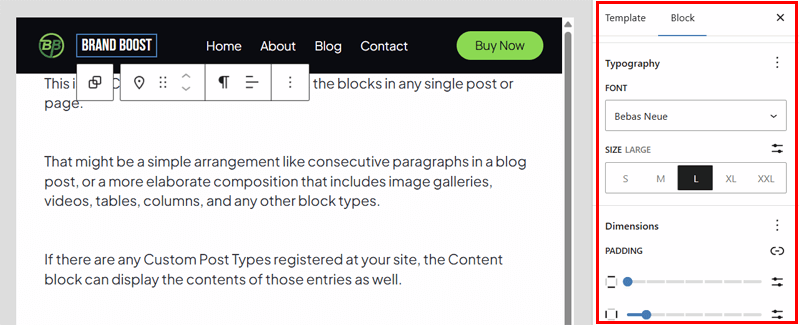
After completing the editing, let’s move to individual block customization. For example, select a text-related block and open the ‘Settings’ option at the top.
In the ‘Block’ tab, you can find customization options. This involves text and background color, typography, dimensions, borders, etc.
If you select a group or column with more than one block, then you’ll also find additional settings. That’s for adjusting the width, justification, and position. Alongside styling options for that group or column.
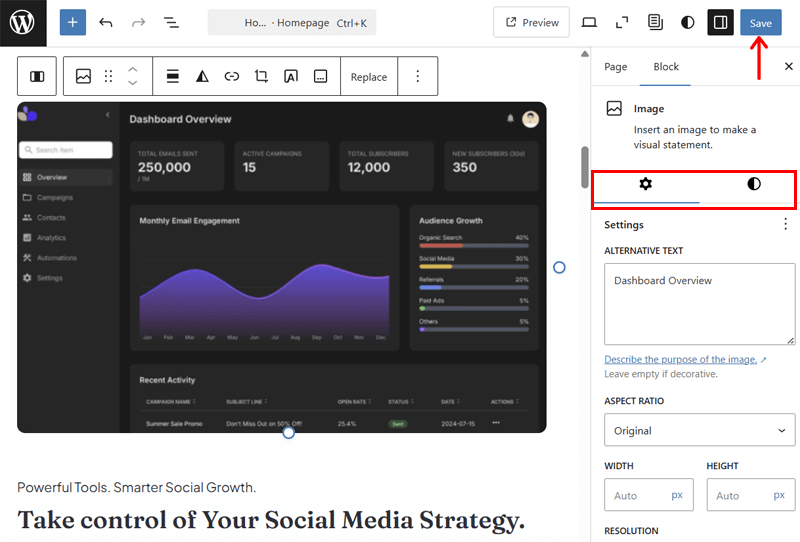
Similarly, if you select an image block and open the ‘Settings’ option. The ‘Block’ tab offers you these options:
- Settings for adding alt text, aspect ratio, width, and height.
- Styles for filters, dimensions, border, and shadows.
In the end, don’t forget to click the ‘Save’ button to save changes made.
By fine-tuning these individual elements through WP Cooper’s built-in controls, you can shape a website that feels genuinely tailored and distinctly your own.
Step 6: Add Navigation and Edit Site Settings
With the above steps, you’ll complete creating your web pages. Now, what’s left is editing the navigation, including the header and footer.
So, open the ‘Page’ tab in the ‘Settings’ option. On the ‘Template’ setting, click the ‘Pages’ option. There, press the ‘Edit template’ option.

Now, you’re on the page template with the default header and footer sections. You can either change their elements or use a completely different pattern.
I. Header Navigation
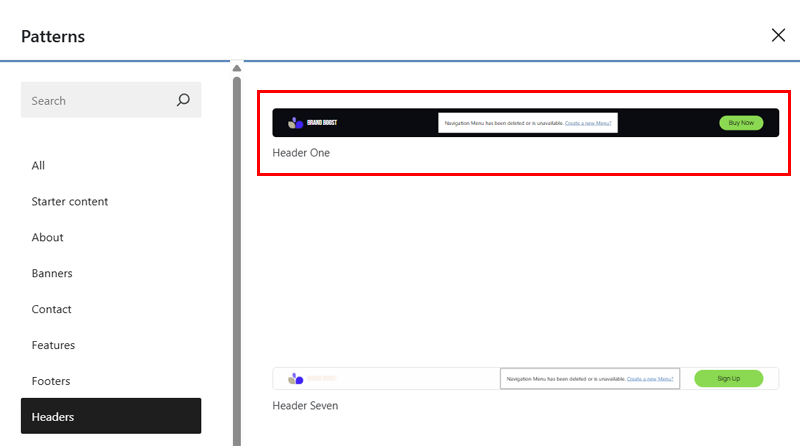
For here, let’s completely remove the header navigation group. Now, explore the patterns like before. Go to ‘Headers’ option and click the header pattern you want.
Begin editing the header content. Replace the site logo like how we did the image. After that, change the site title like editing a text block if needed. We’ve just used a demo site title and its details, which aren’t real in this scenario.
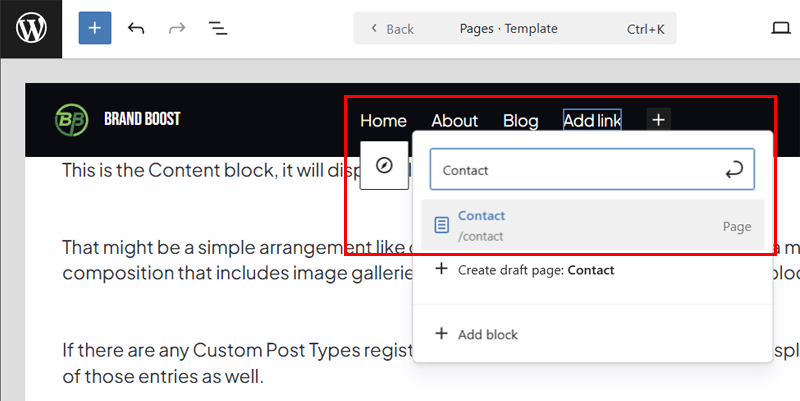
Following that, click the ‘Create a New Menu?’ option.
Now, click the ‘+’ block to search and add menu items. This involves adding the home, about, and contact pages.
Next, customize the header elements. For example, select the navigation block and open the ‘Blocks’ settings. There, you can:
- Configure the settings to adjust justification, orientation, and display.
- Customize the style options to alter the color, typography, and dimensions.
Similarly, customize the button, site title, and logo if you want.
Check out the best practices of website navigation.
II. Footer Navigation
Now, follow the same process for the footer navigation. Here’s a quick look at it.
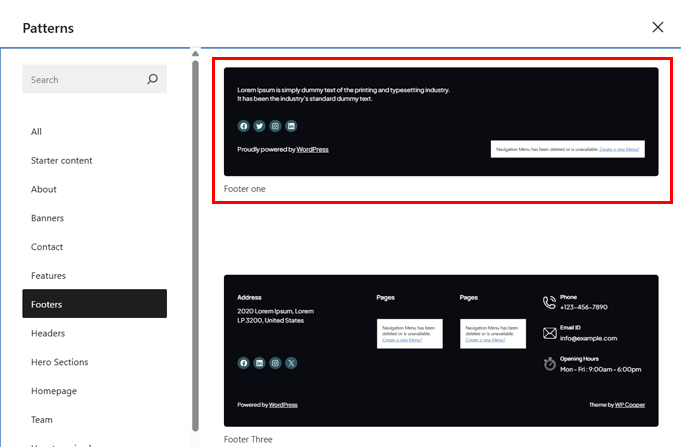
First, remove the existing footer section if you didn’t like it. Then, insert a new pattern from the ‘Footers’ section of the patterns library.
Next, you can perform several actions as you want. This involves:
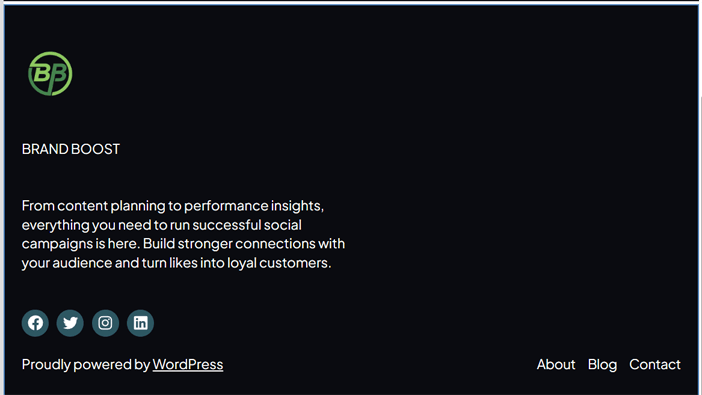
- Change the text, like short about or contact details, copyright text, etc.
- Add more elements if you want, for example, add social media icons.
- Insert the navigation with menu items to display in the footer.
The process is just how we added them to the header.
Check out the detailed guide to add pages to your menu here.
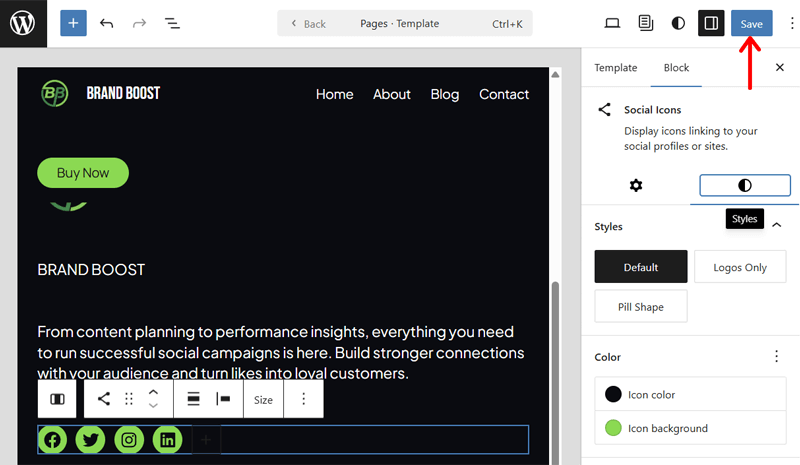
After that’s done, you can customize the elements of the footer navigation.
Once you’ve completed, click the ‘Save’ button. That’s how you adjust the basic site settings along with adding proper navigation.
III. More Site Settings
If you want to properly configure the website settings, then go back to the WordPress dashboard. On the ‘Settings’ menu, you’ll find several sub-menus to configure different settings.
Mainly, open the ‘General’ sub-menu. There, insert the Tagline and Site Icon that we had not configured yet.
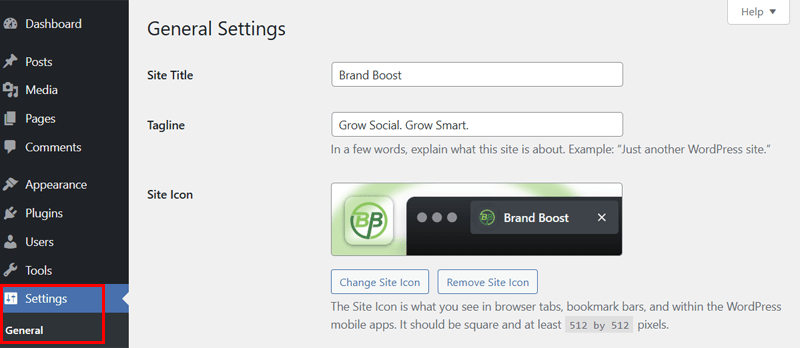
After doing so, hit the ‘Save Changes’ button.
Step 7: Preview Your Website
Once all your changes are in place, preview your website to see how everything looks in real time. Check the layout, colors, and content on both desktop and mobile views to ensure your site is polished and ready to go.

Super happy with the outcome, aren’t you? Congrats on launching your dream site.
WP Cooper Pricing Plans
WP Cooper is a freemium WordPress block theme. Precisely, it has both free and premium plans to let you build your website.
You can download the free theme from the WordPress.org theme repository or its official website and upload it to your website. Another way is to just search for the theme and install it right on your WordPress dashboard.
If you don’t want to limit the boundaries of the free theme, then you can purchase WP Cooper Pro. These are the premium plans mentioned on its official website:
- Premium: $39 for 1 website, access to all templates and patterns, 1 year of premium support, and more.
- Premium Plus: $59 for 10 websites and all features as in the Single Site plan.
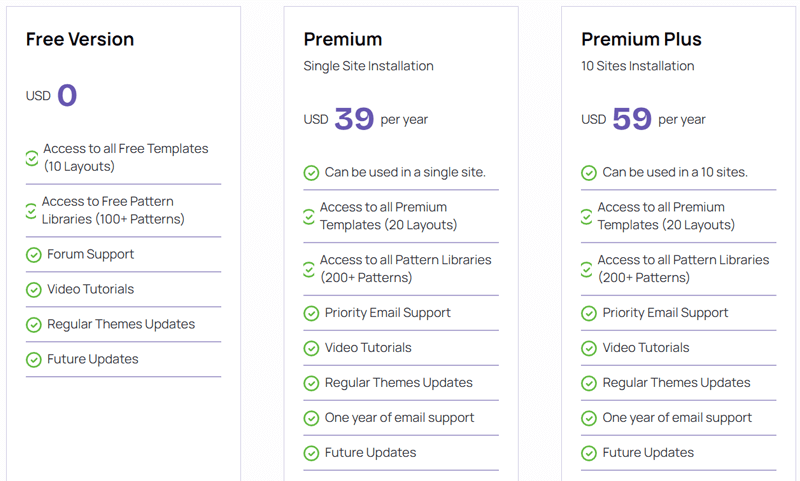
In fact, it offers a 14-day money-back guarantee policy to let you try and decide.
Customer Support of WP Cooper
As a new WordPress theme, we can’t completely judge WP Copper. But for the start, it already offers pretty awesome customer support options to its users.
If you’re using the free theme, then you can visit the Support Forum for WP Cooper. Just submit your queries and you’ll likely get the response to guide you.
Moreover, you can also visit its site and get access to more free and paid support options. They are:
- You’ll get priority email support and 1 year of premium support. These options are available for the paid plan users.
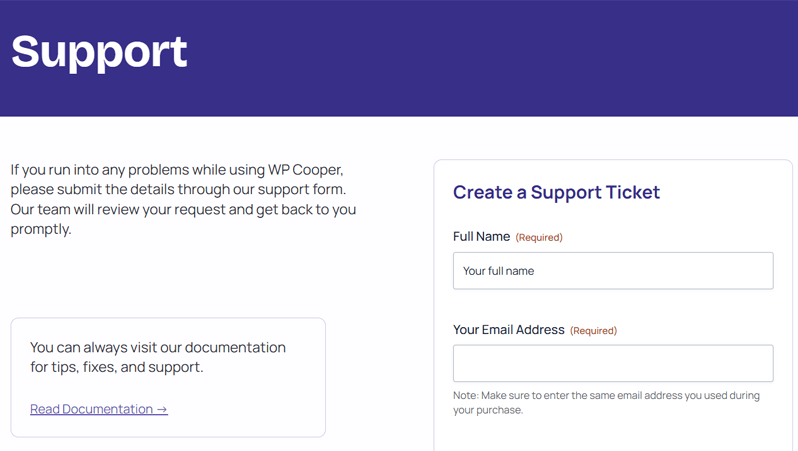
- You can open the Support page. There, you can submit a ticket by entering your personal details and queries related to the theme.
- In case you just need basic tips or guidance, then open the Documentation page. It includes complete tutorials on getting started, purchase, installation, configuration, and customization.
- There’s also a YouTube channel for you to easily watch the video tutorials.
Overall, it’s a great deal from a new WordPress block theme. So, we feel good about its customer support options and the dedicated support team.
With that in mind, let’s take a closer look at the pros and cons of WP Cooper.
Pros and Cons of WP Cooper
These are the pros and cons of the WP Cooper theme:
Pros of WP Cooper
The pros of WP Cooper include:
- Its Full Site Editing capabilities let you customize everything visually in the Site Editor.
- Lightweight and performance-optimized theme to load your website fast.
- Provides a clean and modern design for your site to look great on all devices.
- Offers regular updates to stay compatible with the latest WordPress versions.
- Contains 20+ templates and 200+ patterns, which are either free or paid.
- Includes single-site and multiple-site (10) licenses as per your plan choice.
- Gives global style options to customize the color and font of your entire site.
Cons of WP Cooper
The cons of WP Cooper include:
- It’s a new theme with limited tutorials and guides available.
- Comparatively, it provides fewer free templates and patterns.
- Currently, advanced customization options you want may not be present.
FAQs on WP Cooper
Before we end, let’s check out the answers to the FAQs on WP Cooper.
1. What difference does WP Cooper Pro offer compared to its free version?
WP Cooper Pro offers 20+ premium templates and 200+ premium patterns with additional options like priority support. That’s different from its free version, as you only get 10 free templates and around 100 free patterns.
2. Can I upgrade my WP Cooper plan later?
Indeed. You can begin with the free theme and upgrade to the premium plan later. It’s a marvelous way to try WP Cooper before committing to a paid plan.
3. Is there a refund on WP Cooper Pro?
Of course, WP Cooper Pro has a 14-day money-back guarantee policy. This means you can request a refund within 14 days of purchase if you decide to stop using it.
4. How do I get updates of WP Cooper?
After you activate your license, WP Cooper’s updates are automatically delivered on your WordPress dashboard. It’s just like any other theme or plugin.
5. Do I have to renew my license every year?
If you have the annual plan, then you have to renew your license each year to get updates and support. But the theme will still work. On the other hand, if you buy the lifetime plan, then you don’t have to do so even for updates and support.
Verdict – Is WP Cooper a Beautiful and Blazing-Fast Theme?
WP Cooper provides a near-perfect balance between aesthetics and performance. It gives a clean, minimal design that makes your website look elegant without clutter. Plus, it uses optimized code to ensure lightning-fast loading times.
Moreover, its full site editing nature gives you complete control over quickly customizing your website. Its performance-focused template and pattern options also make the website creation process more effortless.
There are several free, premium, and freemium WordPress themes with more templates and customization options. But WP Cooper is among those few built to value speed, simplicity, and a modern experience.
So, if you’re planning to use a block theme with beautiful design options and blazing-fast speed, then WP Cooper can be your choice.
Just start by using the free version. If you want expert support with premium options, then upgrade it to a premium plan. Within 14 days decide to continue using it or get a refund and move to another theme. It’s all up to you!
Wrapping Up – WP Cooper Review
And that’s all about WP Cooper!
Hopefully, this WP Cooper review helped you know everything you were finding about this new block theme. Moreover, it guided you to make the right decision about whether to use it for your website.
If you’re still confused, then don’t hesitate to comment down your queries. We’ll further guide you to remove the confusion.
Until then, you can check out our other blogs on how to create a reusable block in WordPress and the best WooCommerce block plugins.
Lastly, make sure to like and follow us on Facebook and X for new updates.
YOU MIGHT ALSO LIKE...
We've picked you some best articles that you might be looking for. Check them now!