Are you looking for a genuine comparison between Substack vs WordPress? If yes, then you’ve come to the right place.
WordPress has been around for over a decade and is known for its versatility and customization options. Whereas, Substack is new blogging and newsletter platform that enables you to create, publish, and monetize content.
Selecting the most suitable platform between Substack and WordPress can be challenging. Hence, it all comes down to what features you require for your website or blog.
In this article, we will compare Substack vs WordPress based on their key features. So, you can decide which CMS (Content Management System) is better suited for your needs.
Now, let’s start!
A. Substack vs WordPress- Brief Overview
First, let’s introduce Substack and WordPress.
What is Substack?
Substack is a subscription-based platform that allows you to create and send newsletters to your audience. It was founded in 2017 and has gained popularity recently as a way for writers to monetize their content directly.
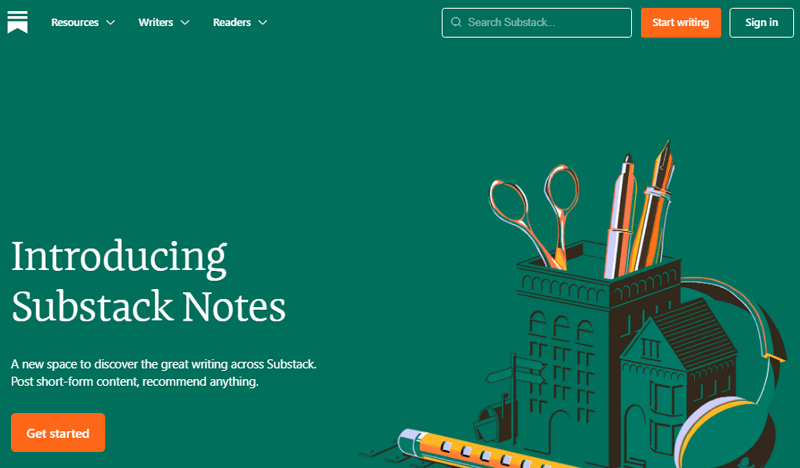
Moreover, a simple interface makes it easy for you to create and publish content without technical knowledge. The platform offers a range of customization options. Further, allowing you to personalize newsletters as per your brand.
Additionally, its monetization model allows you to earn money directly from the audience. You can choose to offer free newsletters or charge a subscription fee for access to content. However, Substack takes a percentage of the subscription revenue.
Key Features of Substack:
- You’ll have complete control over your content and can decide how to monetize it.
- Also allows you to share your podcast episodes with just one click.
- You can upload or record videos directly into a Substack post.
- Also, choose which posts you publish as free or only for paid subscribers.
- Easily import your content and mailing lists from other platforms like WordPress, Medium, Tumblr, MailChimp, etc.
What is WordPress?
WordPress is a well-known Content Management System. It also allows you to manage content on the back-end and preview changes in real-time on the front end.
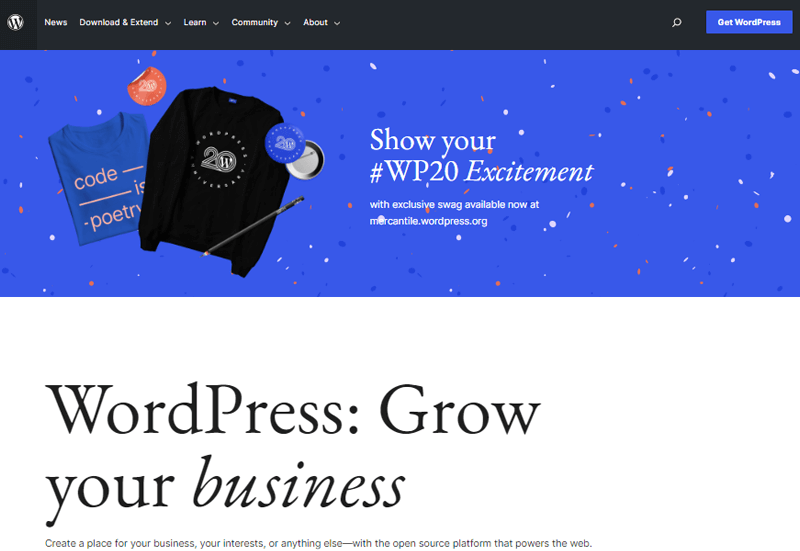
Moreover, it’s a popular choice for individuals and businesses who want to create a website without coding knowledge. In fact, it’s estimated that over 43% of all websites on the internet are built with WordPress.
It’s important to note that there are two versions of WordPress available: WordPress.org and WordPress.com. While WordPress.org allows users to create a website for free. However, you need to manage your domain and web hosting.
Learn their differences from this comparison article on WordPress.com vs WordPress.org.
For instance, popular web hosting platforms like Bluehost offer WordPress hosting solutions starting along with domain registration. The best part is, you’ll get the hosting solution at just $2.95/month.
On the other hand, WordPress.com is a fully hosted platform. Therefore you don’t need to worry about hosting and domain. All you need to do is create an account and choose your required resources.
Key Features of WordPress:
- It offers a plethora of themes and templates to choose from to help you create your website.
- Provides a wide range of plugins to add various functionality to the website.
- You can create, edit, and publish your content with ease. It lets you save your content as drafts, schedule posts, and track revisions.
- Also, you can assign different user roles like administrators, editors, authors, contributors, and subscribers.
- Upload images and videos to the media library, making it easy to manage your website’s multimedia content.
- Plus, it has an in-built comment system that lets your visitors and followers leave their feedback on your posts and pages.
Now, let’s start our comparison with their setup process.
B. Set Up Blog- Substack vs WordPress
Here is how you can set up your blog using these platforms. With that, you can compare Substack vs WordPress in terms of the configuration process.
Setting Up Blog With Substack
Setting up a blog with Substack is a fairly easy and straightforward process.
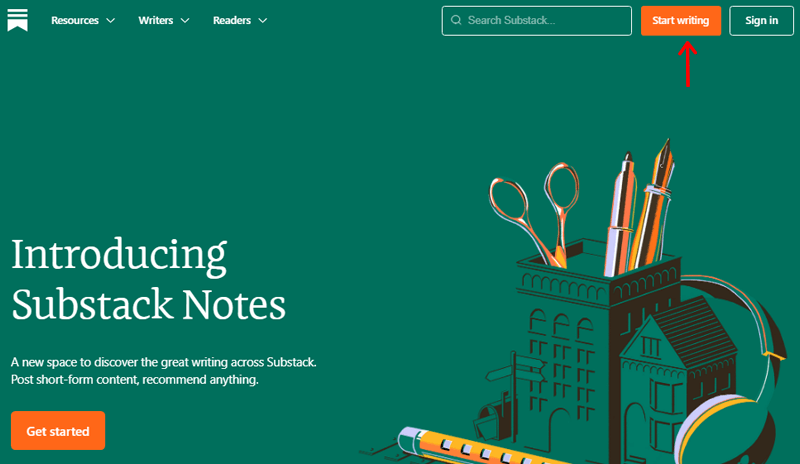
To get started, you need to go to the official website of Substack. Once you’re on the website, click on the “Start Writing” button to begin the process.
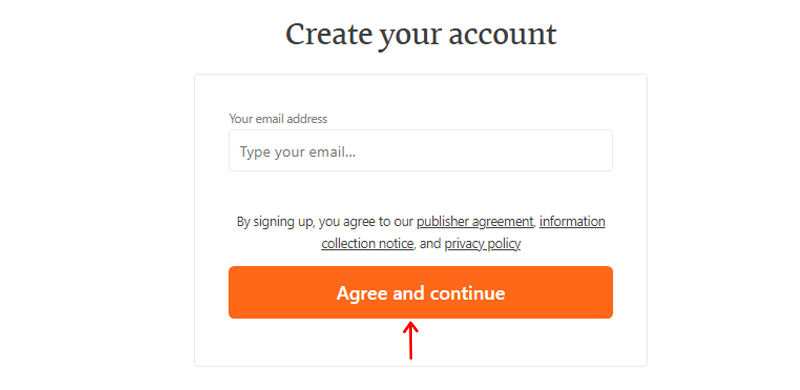
You’ll then be directed to a page where you must enter your email address. And click on the “Agree and Continue” button.
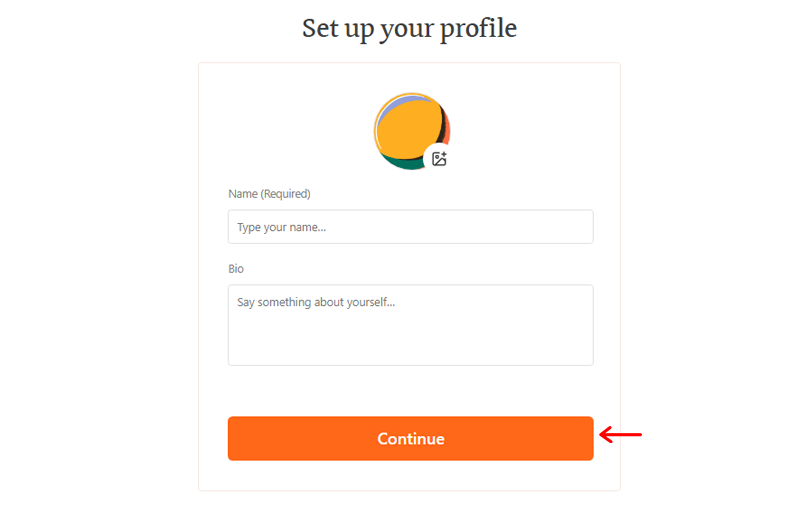
After that, you’ll be asked to set up your profile by providing your name and bio. Then click on the “Continue” button.
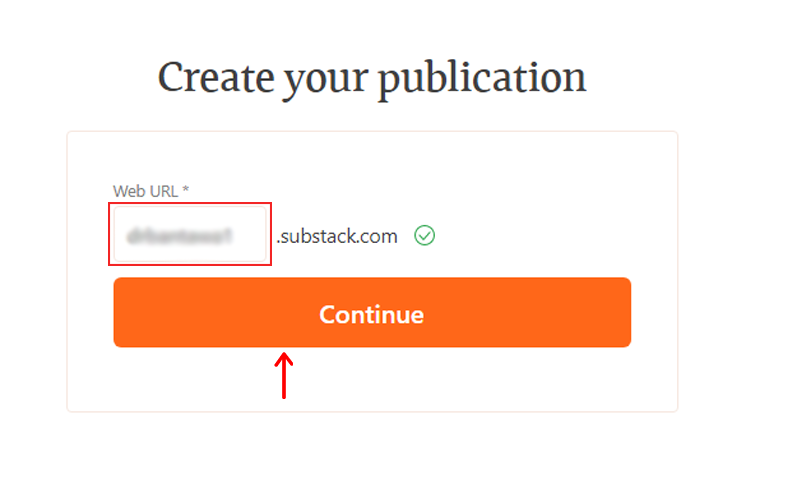
The next step is to create your publication URL. Substack will suggest a web URL for you, but you can customize it as you like.
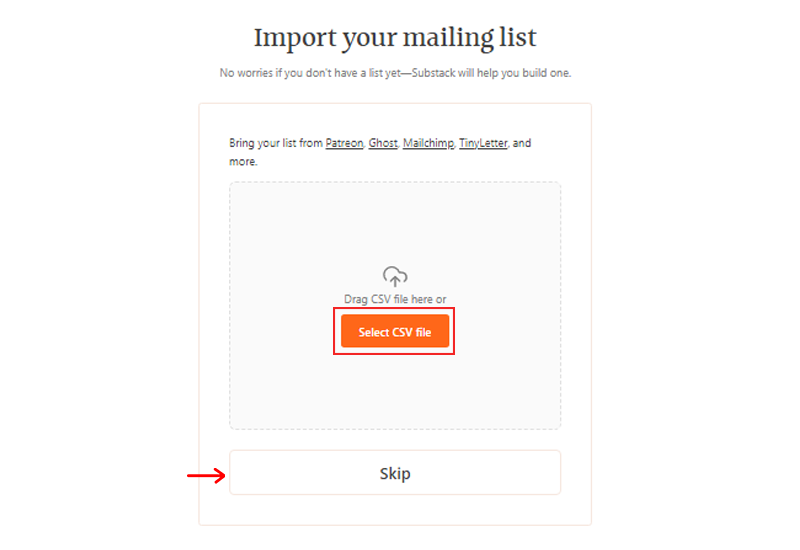
You can also import your mailing list from other platforms such as Patreon, Ghost, Mailchimp, or TinyLetter. Also, you can skip this step.
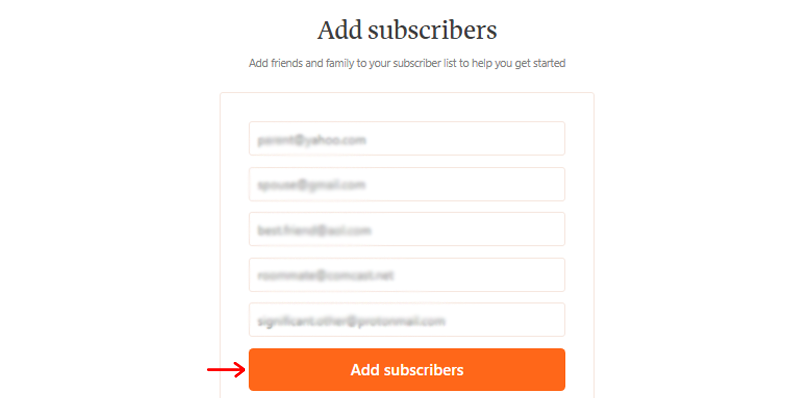
After that, you can add your daily and friends as your subscribers by adding their email IDs and clicking on the “Add Subscribers” button.
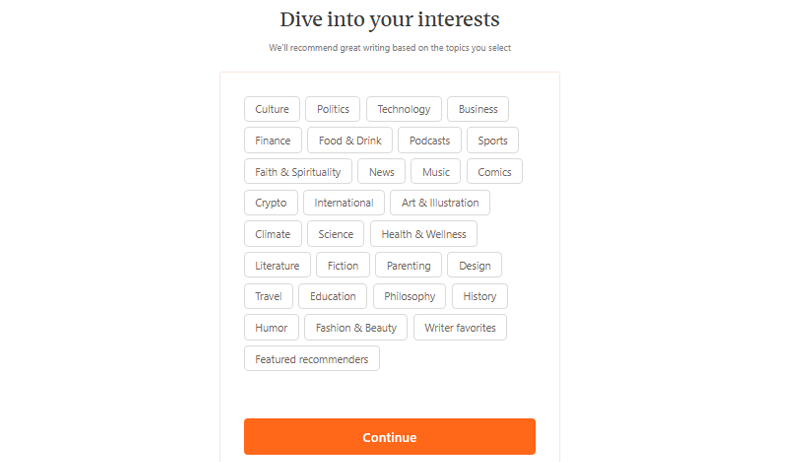
Once done, select your interests by clicking on the options provided such as culture, politics, tech, business, etc. After you have made your selection, click on the “Continue” button.
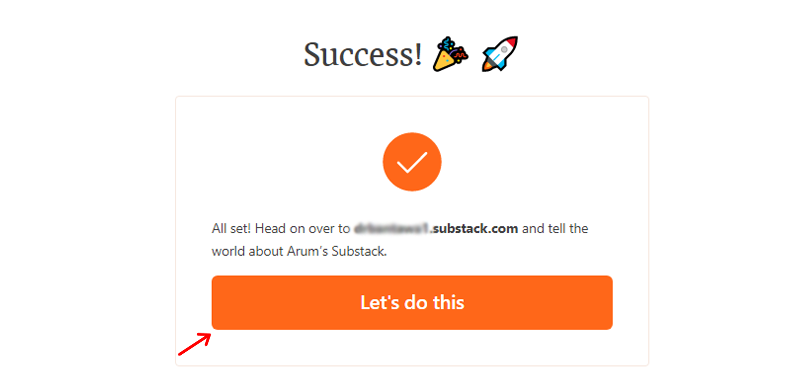
Once you have completed all the above steps correctly, you’ll be directed to a success page. Then, you can start writing by clicking on the “Let’s do this” button.
After that, it’ll take you to your dashboard. Where you can complete the setup process by turning on paid subscribers, importing emails, and so on.
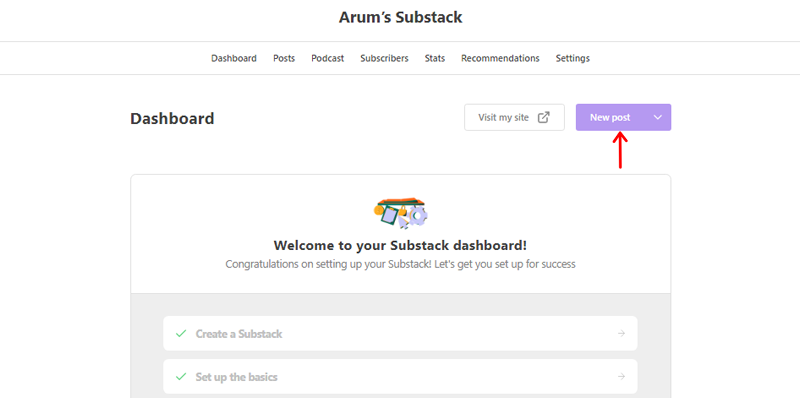
From your dashboard, click on the “New Post” option to start writing.
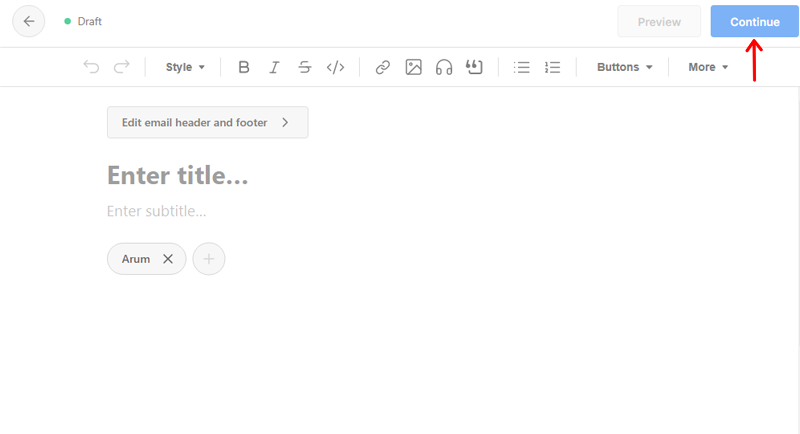
Once you have written your post, click on the “Continue” button located in the top right corner.
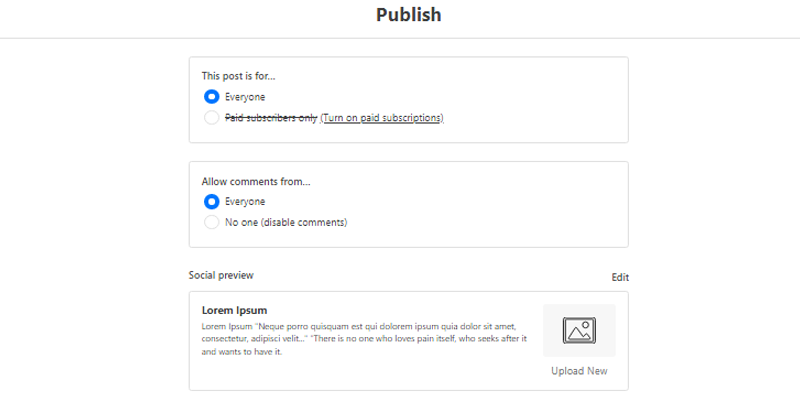
You’ll then be prompted to a settings page where you can choose who can see your post, who can comment, and other options.
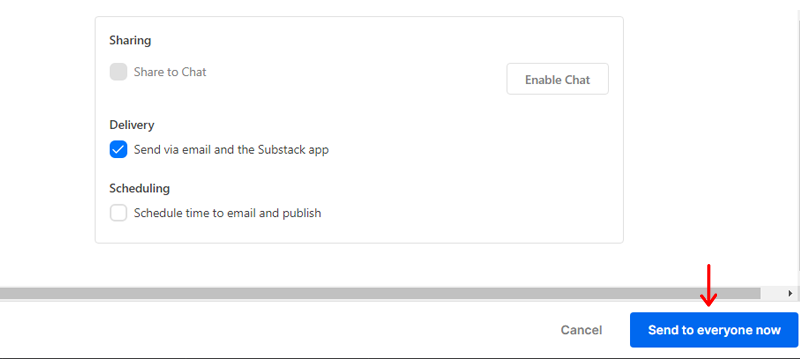
Moving on, you can click on the “Enable chat” option to share your post on chat or deliver your post via email. You can even choose to schedule a specific time to email and publish your content.
Once you’re done with the settings, click on the “Send to Everyone Now” button to publish your post.
The best part about Substack is that you get to choose whether or not to add subscribe buttons to your post.
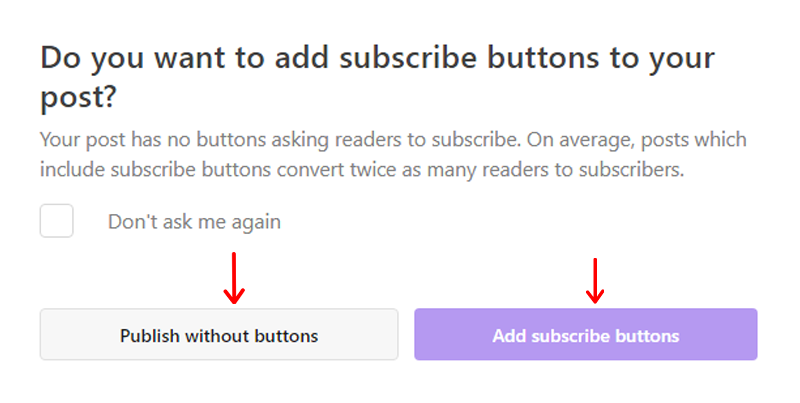
Once you have completed all the necessary steps, you’re done setting up your blog with Substack.
Setting Up Blog With WordPress
When setting up a blog with WordPress, you’ll first need to choose a domain name and select a hosting provider. For example Bluehost, it offers an affordable hosting service for bloggers starting from $2.95 per month.

Once you’ve got the hosting service, log in to your hosting account and install WordPress. When you’re done installing, you’ll land on your WordPress login page.
You can also find your WordPress login page with the URL. For example, your website URL followed by /wp-login.php or /wp-admin/.
After that, choose a theme for your blog. WordPress offers tons of free WordPress themes suitable for your blog. Get the free theme from the official theme repository and the premium theme from ThemeForest marketplace. Some of the best WordPress themes are Astra, Avada, etc.
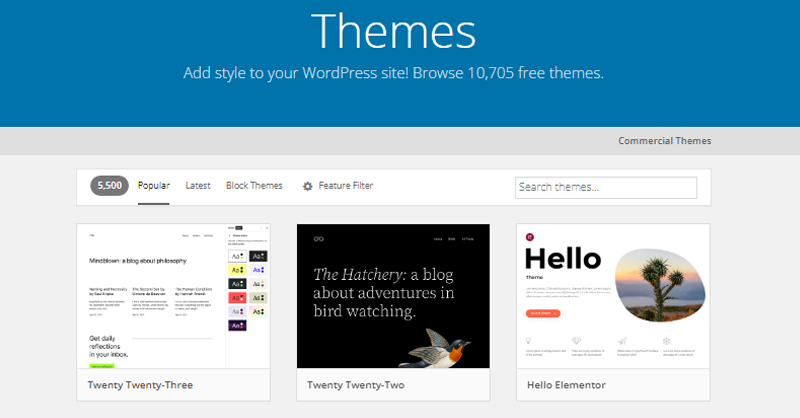
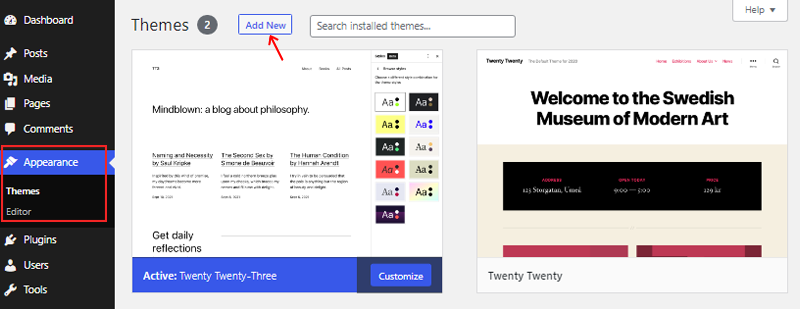
Next, install the theme, go to Appearance > Theme, then click on the “Add New” button.
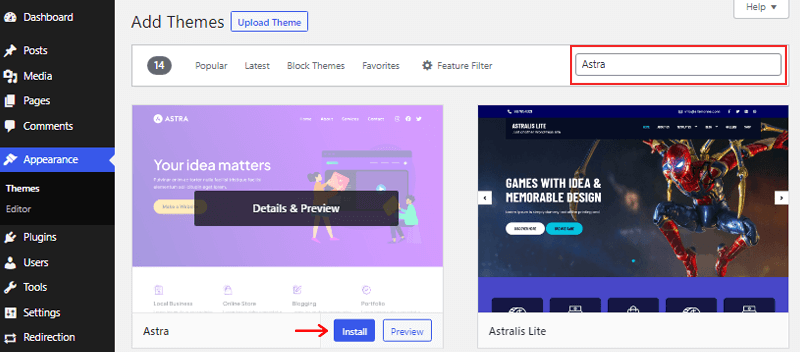
Search the Astra theme and install and activate it.
Now to customize your theme. Go to Appearance > Customize from your dashboard.
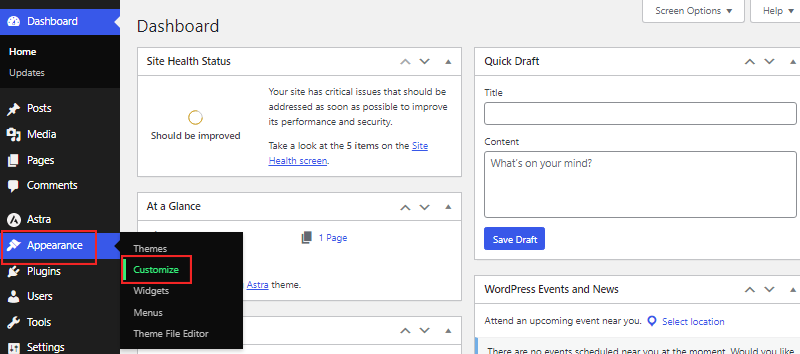
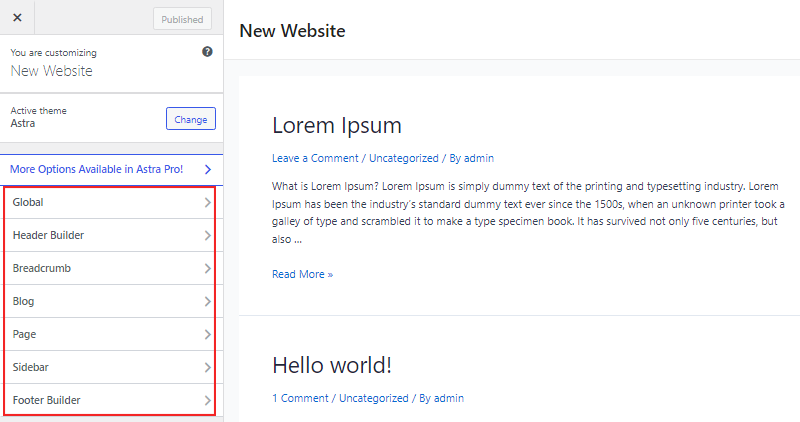
You’ll see a theme customizer page where you can tweak the sidebar, footer, etc. There you can make changes and get a live preview of your changes.
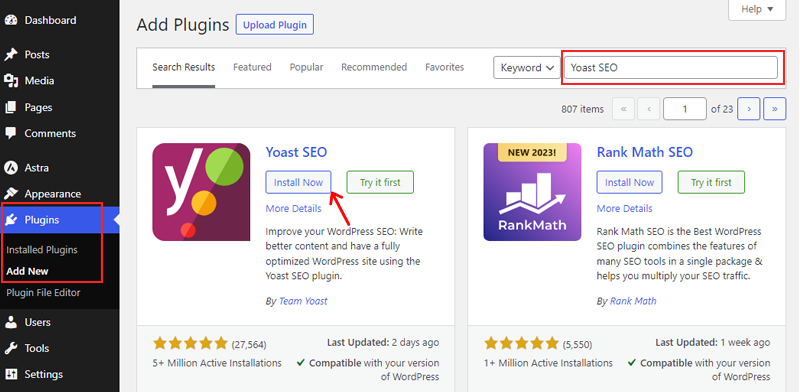
Now, you need to choose WordPress plugins and tools. This will help to add extra functionality to your site. Some important plugins for your blogging sites are Yoast SEO, WPForms, Akismet, etc.
It’s easy to install the plugin from your dashboard, go to Plugins > Add New. Then search for the plugin and install it. For example, we’ll install Yoast SEO.
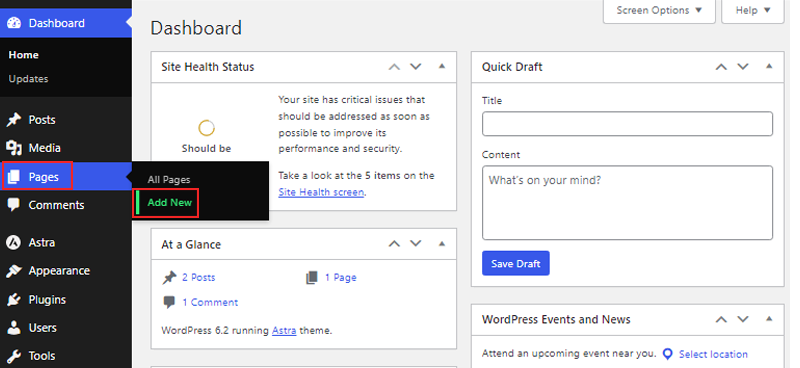
Now, customize your blog by adding pages, like About Me, Contact, Home, etc. To do so, go to Pages > Add New option. Once you’re done creating the page click “Publish” in the top right corner.
Then, you can start creating your blog posts. Click on the Posts option in your dashboard and select Add New.
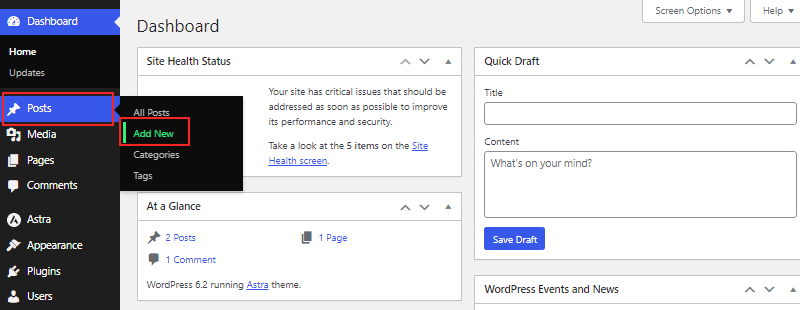
Here you can write your post, add images, and format your content.
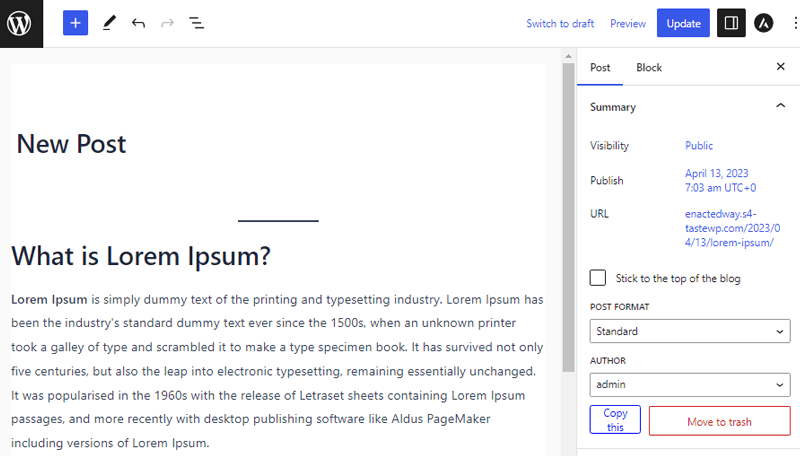
Once you have created a few blog posts, you can set up your blog’s homepage. You can either display your latest posts or set a static page as your homepage.
Winner – WordPress
Both Substack and WordPress are great options for creating a blog. And the choice ultimately depends on your specific needs and preferences.
However, we choose WordPress as the winner of this section. Because WordPress offers greater flexibility and customization options. Therefore, making it an ideal option if you want more control over your blog’s look and functionality
C. Set Up Newsletter – Substack vs WordPress
Moving on, let’s see how easy it’s to set up your newsletter using one of these platforms.
Setting Up a Newsletter with Substack
To get started, simply set up your profile like you did while setting up your blog previously. Once you reach your dashboard go to the “Subscribers” button on the main menu.
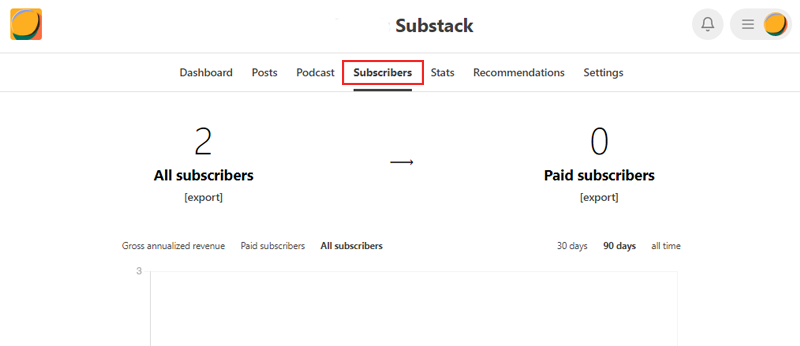
Then you’ll be directed to a page to add your subscriber’s email list. Click on the “Add Email” option.
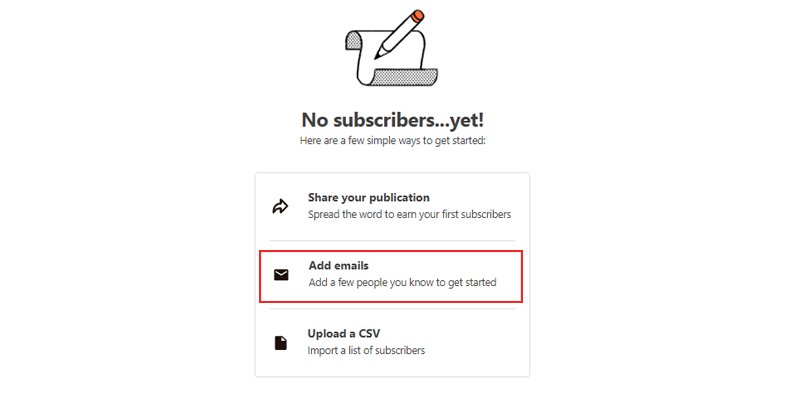
There you can add the email addresses of your subscribers. Once done click on the “Add” button.
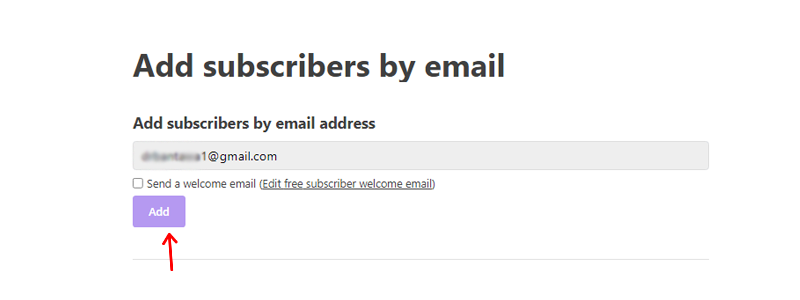
Now go to your dashboard and click on “New Post” and start creating a newsletter. You can design your newsletter by adding a poll, footnote, etc from the More section on the taskbar. It also allows you to add audio, either do a voiceover or upload one.
Once done click on the “Continue” button in the top right corner.
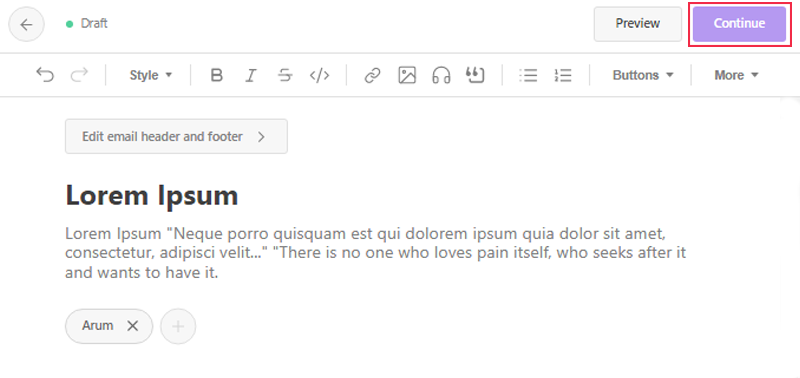
Here, you can choose who should receive your newsletter. You can select all your subscribers or choose specific groups. Also, you’ll be able to schedule when to send your newsletter.
And finally, you’ll be asked to share it on social media like Facebook and Twitter.
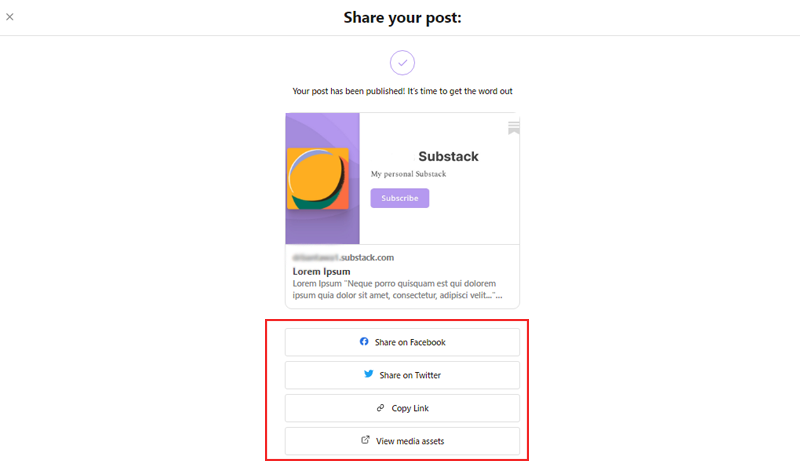
And that’s it! You’ve successfully set up your newsletter with Substack.
Besides, you can choose to add paid subscribers with premium plans. However, the cost depends on the number of subscribers you’ll have. We’ll talk about the prices in the cost comparison section.
Setting Up a Newsletter with WordPress
Let’s see how easy it is to set up a newsletter using WordPress.
Setting up a newsletter with WordPress involves a few steps that can be easily followed.
Firstly, you need to set up an account on an email marketing platform like Mailchimp.

You can do this by accessing the plugin’s dashboard on its official website. Then click on the Start Free Trial option.

After that, set up your account, here we’ll continue with the free version.
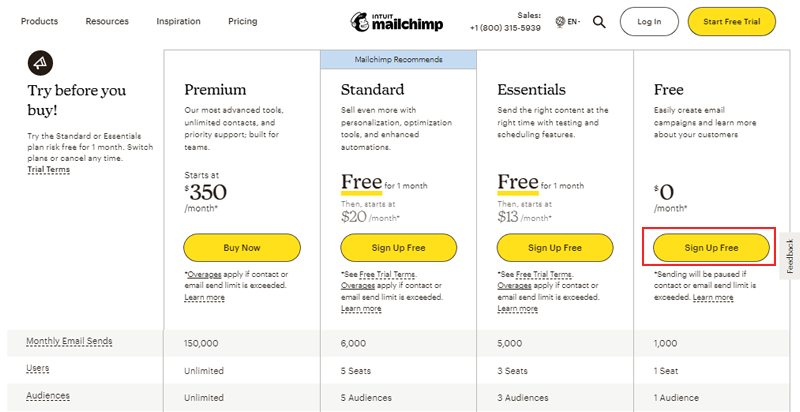
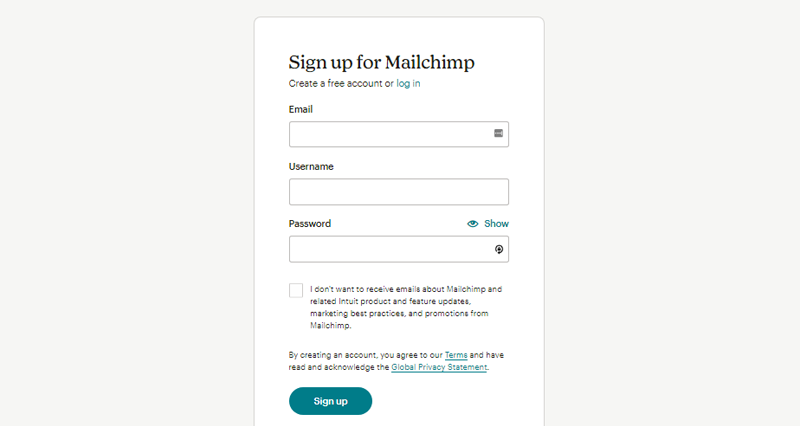
Now you need to answer a few questions about contacts and click Sign Up.
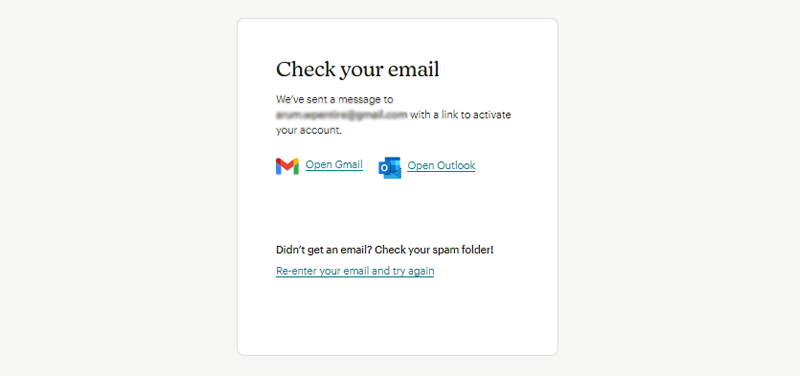
Then you’ll get an email to activate your Mailchimp account.
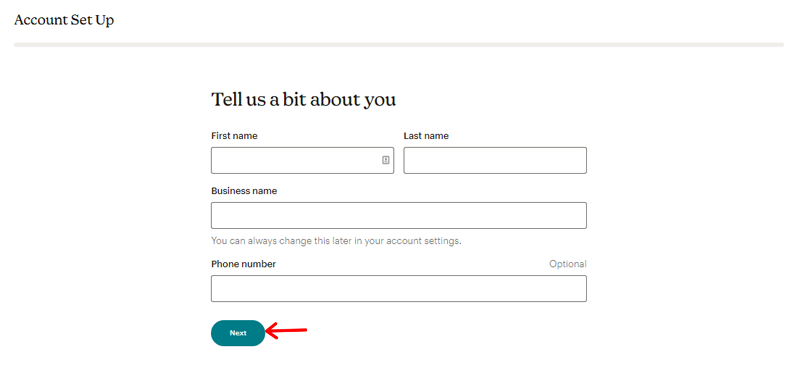
Once done activating, you need to set up your account by providing some personal details like name, business name, etc. And then click Next.
Once done correctly, you’ll get the success page. Then, click on the “Let’s Go” button.

Now, from your dashboard, click on the “Create” option on the left-hand side menu.
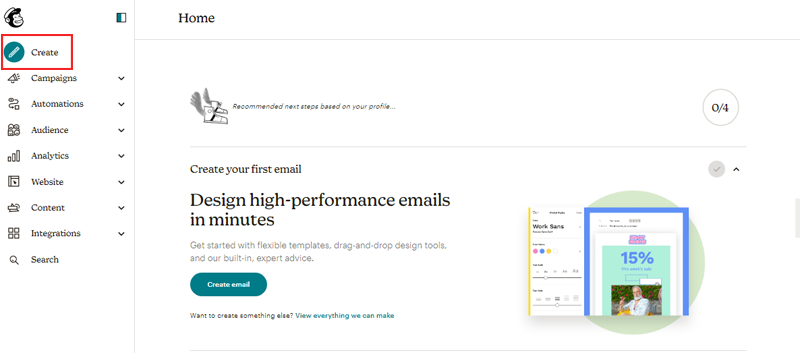
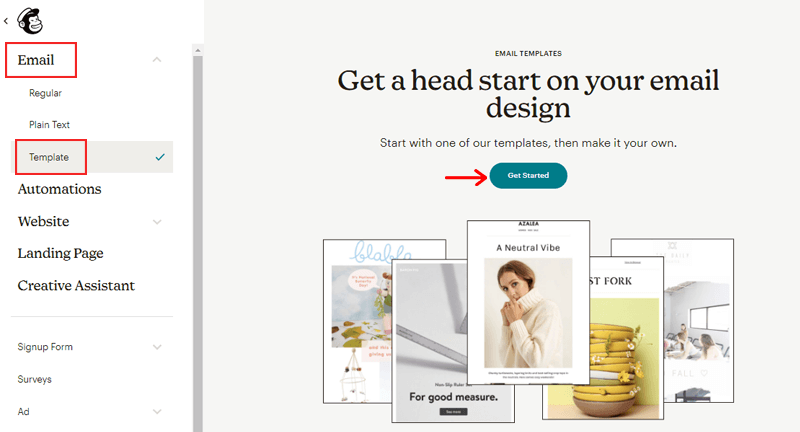
Now it’s time to choose a template for your newsletter. So, click on Email > Template > Get Started.
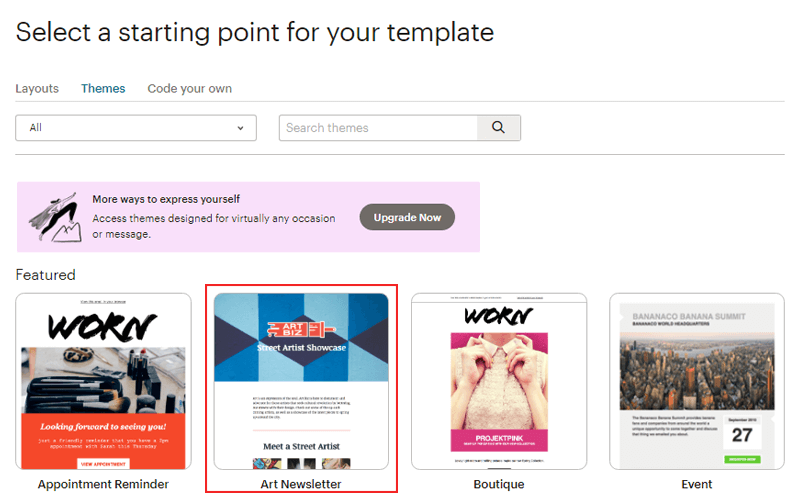
Here we’ll choose the Art Newsletter theme.
Then you can start customizing your newsletter. Add logo, colors, fonts, texts, etc. Also, you can preview your newsletter to see what it looks like. Once satisfied with your newsletter click on “Save and Exit” at the bottom.

Then a pop-up box opens where you need to give it a name. And you’re done
Now, let’s connect your WordPress site with your Mailchimp account.
First, you need to ensure that you have a WordPress website. If not, you can create one by signing up and setting up a domain and hosting.
Once you have your WordPress website ready, the next step is to install a newsletter plugin.
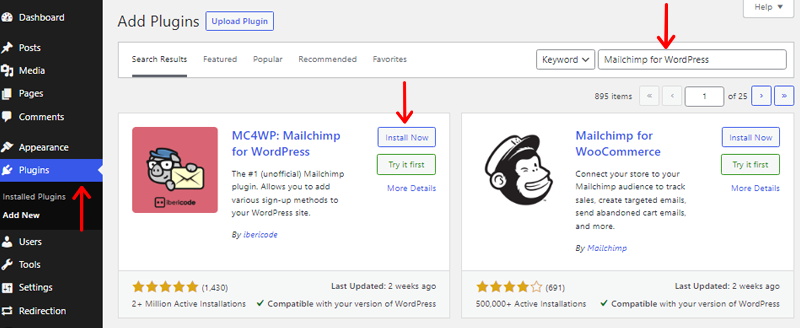
This can be done by accessing your WordPress dashboard and navigating to the “Plugins” tab. From there, you can search “Mailchimp for WordPress”, and install it.
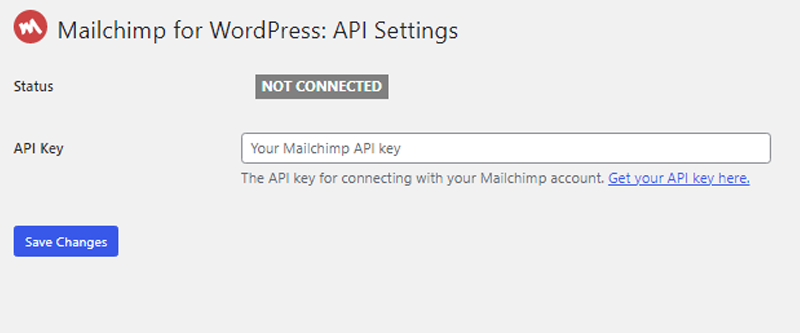
After installing the plugin, you’ll need to connect it to your email marketing services. This can be done by entering the API key code provided by the email marketing service.
Next, you’ll need to create a sign-up form for your newsletter. Go to the MC4WP > Form option on your dashboard menu.
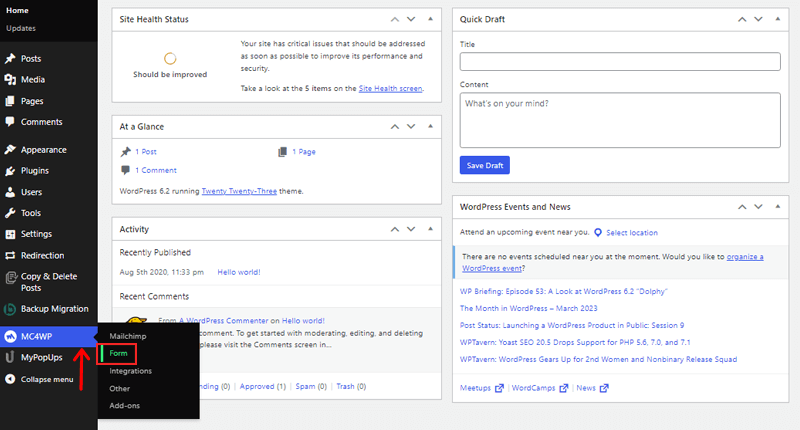
Now click on the “Add New Forms” option to create a sign-up form for your newsletter.
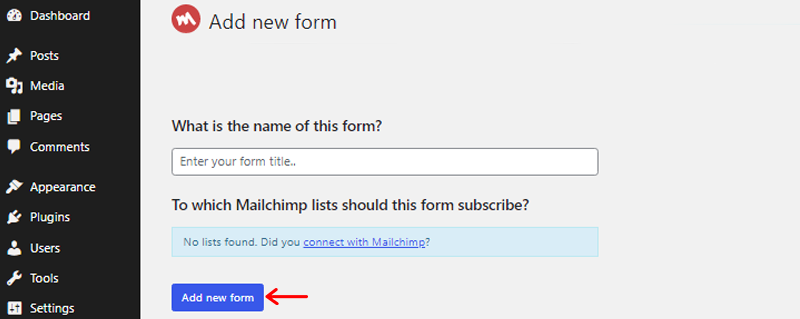
Here you can customize the title, message, appearance, etc. Also, design the form to match your website’s branding.
Once your sign-up form is ready, you can add it to your website by embedding it in a widget or a page.
Simply go to your post, click “+” and search from Mailchimp for WordPress and add it to your post.
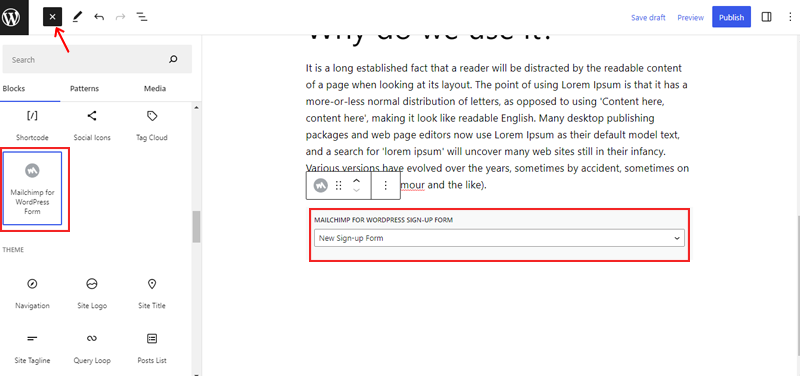
Below is an example of a sign-up form on your post. Using this form you can send the newsletter to your subscribers.
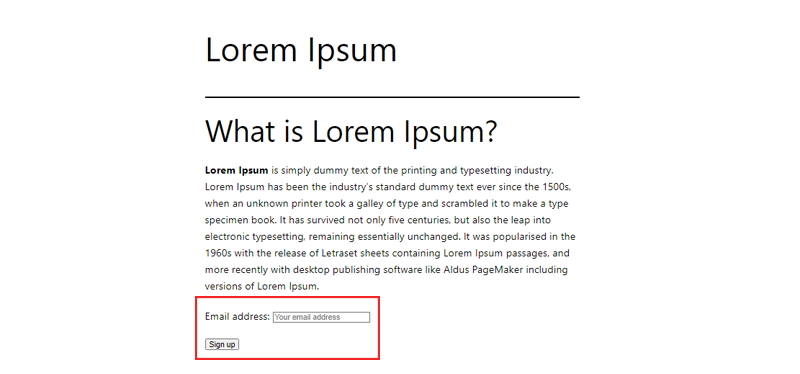
With these steps, you can easily set up a newsletter with WordPress and start engaging with your subscribers.
Winner – Substack
When it comes to setting up a newsletter, Substack has the upper hand. It offers an all-in-one solution that simplifies the process of creating and managing newsletters. Besides, its user-friendly interface and built-in mailing list make it easy to publish and send newsletters.
D. Integrations – Substack vs WordPress
Now you know how to set up a blog and newsletter using these platforms. Next, check if they provide you with enough integration options for your website.
So, let’s go!
Integrations of Substack
When it comes to integrations, Substack is known for being limited or having no integrations at all. This means that you may not be able to easily integrate third-party tools that you may need for your website.
Furthermore, Substack comes with limited SEO (Search Engine Optimization) features, which could potentially impact your website’s search engine ranking. On the other hand, Substack does allow you to connect your custom domain name, Google Analytics tracking ID, and social media profiles from the settings.
Integrations of WordPress
WordPress is a powerful platform that offers an abundance of integrations. The platform offers both free and paid plugins to add countless features to your website.
Besides, the official WordPress plugin library alone has over 60,000 plugins available for download. Moreover, you can easily install plugins from your WordPress dashboard.
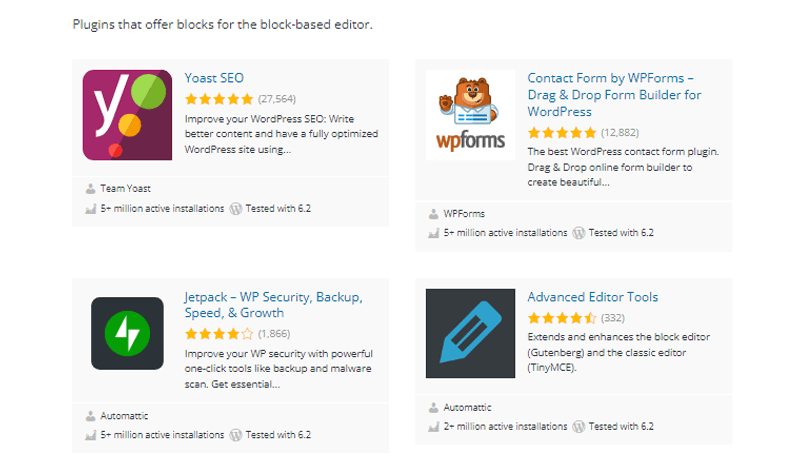
However, if you can’t find a plugin that fits your website’s needs, then you can create custom plugins. WordPress provides developers with the flexibility to create custom plugins.
Winner – WordPress
WordPress is the clear winner when it comes to integrations. With over 60,000 free and paid plugins. Additionally, custom plugins can be developed if a suitable plugin is not found. This flexibility in integrations makes WordPress the clear winner.
E. Customization – Substack vs WordPress
Customization in Substack
Substack’s customization functionality is relatively limited. While it provides a handful of customizable features, such as changing the logo and color scheme. Hence, it doesn’t offer the level of customization that WordPress provides.
Additionally, there are no built-in options for creating custom page layouts or adding custom code. Overall, Substack’s customization functionality is more geared towards small tweaks.
Customization in WordPress
Likewise, WordPress provides a high level of customization. It allows you to customize almost every aspect of your website, including the design and layout.
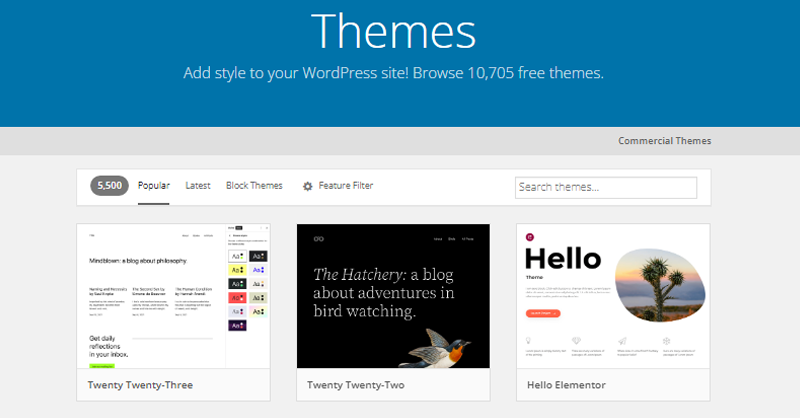
Besides, it comes with a wide range of WordPress themes that you can use to change the look of your website. Also, the themes range from simple and minimalist to complex and feature-rich. You can also create your own custom themes or modify existing themes to match your requirements.
Moreover, WordPress provides an easy-to-use editor that allows you to create and edit content without any coding. You can add text, images, videos, and other media to your website, and format your content. You can also create custom post types and custom fields.
If you have some coding skills, you can also use WordPress to build custom websites. Because WordPress provides a powerful API that allows developers to access and modify core WordPress functions. You can also create custom templates, shortcodes, and widgets.
Winner – WordPress
WordPress is the clear winner in terms of customization. Because it provides full control over every aspect of the website with a wide range of free and paid plugins. With WordPress, you can create a fully customized website as per your needs.
F. Customer Support – Substack vs WordPress
Customer support is crucial for website owners to handle complex issues and resolve queries. This brings us to the comparison of customer support options between Substack and WordPress.
Therefore, let’s understand how efficiently they cater to their users’ needs.
Customer Support Options in Substack
Regarding customer support, Substack provides a comprehensive support structure for independent writers. They have a dedicated Resource Center that offers inside tips and expert advice for writers.
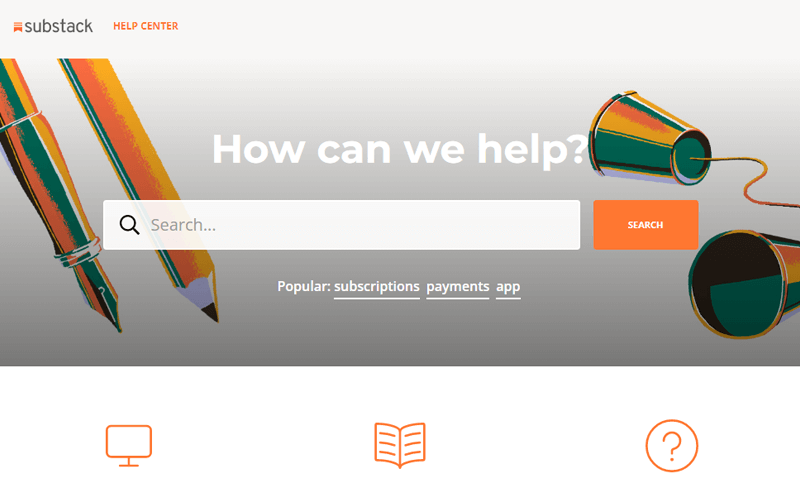
Additionally, Substack has a community and programs that offer support to writers. This community is a great place to connect with other writers, ask questions, and get advice. It’s a great way to help each other, collaborate, and learn together with like-minded people.
Furthermore, you’ll find a help center with a range of support resources. Their help center includes a searchable knowledge base with answers to common questions. You can also go through their FAQs.
Customer Support Options in WordPress
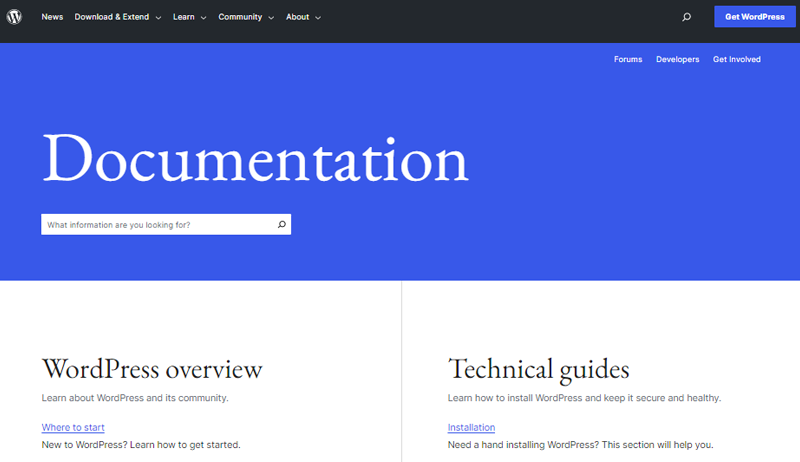
WordPress provides a range of resources for customer support. One of the best resources is WordPress documentation. This guide is constantly updated, which ensures that the information provided is up-to-date.
Additionally, WordPress has a vibrant community of users, contributors, and developers. It’s easy to find answers to common questions or issues on the official WordPress support forums.
For those looking to learn more about WordPress, there is also an official Learn WordPress website. Offering a range of courses and tutorials on WordPress, from beginner-level courses to advanced tutorials.
Winner – WordPress
After a thorough comparison, WordPress turns out to be the winner in this round. It’s no doubt that Substack has a range of support options. However, WordPress offers a comprehensive documentation guide, an official Learn WordPress website, a vibrant community, etc.
G. Cost Comparison – Substack vs WordPress
When it comes to choosing a platform, the cost is an important factor to consider. It’s crucial to select software that includes all the necessary features without exceeding your budget.
Therefore, let’s take a look at the pricing of Substack and WordPress. Here’s what you need to know!
What is the Cost of Creating a Newsletter in Substack?
If you’re looking to start writing with Substack, you can sign up for free. Simply, go to their homepage and click on the “Start Writing” button.
After that, all you need to do is provide your email address and click “Agree and Continue” on the next page. You can start publishing your newsletter for free right away!
However, if you want to generate revenue from the newsletters, then you can always opt for the subscription model. The subscription price for your website depends on the number of subscribers you have. And how much you want to charge for your content.
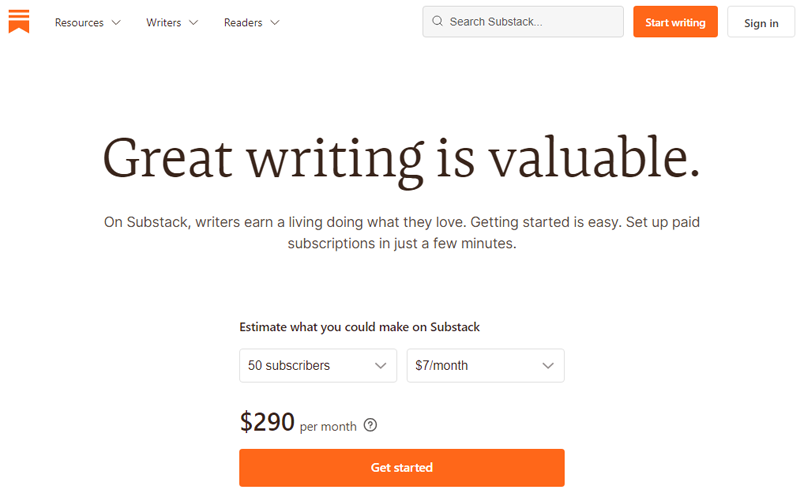
Some of the subscription plans for estimated monthly revenue of $7 are as below:
- 50 Subscribers Plan: Costs $290 per month.
- 100 Subscribers Plan: Costs $580 per month.
- 200 Subscribers Plan: Costs $1,159 per month.
Besides, if you start charging for subscriptions, then Substack takes a 10% fee in addition to credit card transaction fees.
What is the Cost of Creating a Website in WordPress?
WordPress is one of the most popular and widely used platforms for building websites. One of the most attractive features of WordPress is that it’s free to use.
However, if you want to build a self-hosted site using WordPress, you’ll need to purchase a hosting package and domain on your own. Luckily, there are several web hosting companies such as Bluehost, DreamHost, Nexcess, etc., that offer affordable hosting packages.
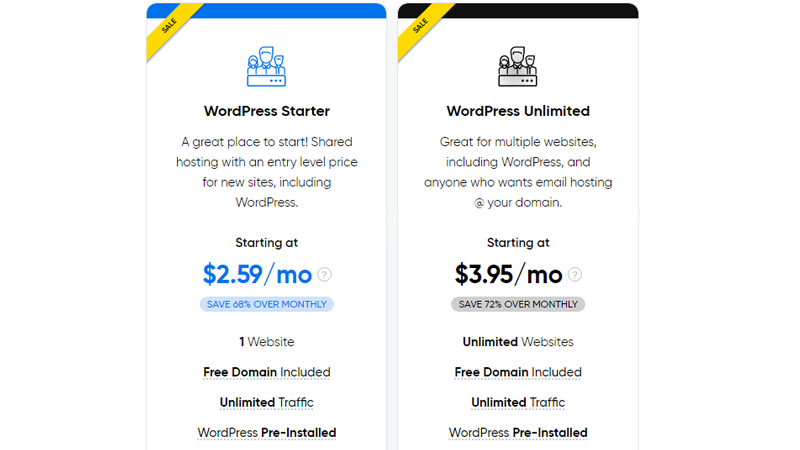
One of the most cost-effective hosting options is the Basic Plan offered by DreamHost, which costs $2.59 per month. You’ll also get unlimited traffic, a free SSL certificate, etc with this plan.
It’s important to note that there may be additional costs like premium plugins and themes that come with a price tag.
Winner – WordPress
WordPress emerges as the winner because it offers a free start-up option. Also, the cost of using the platform depends on the hosting plan and additional tools you use. Whereas, there are several budget-friendly hosting options available.
H. Pros and Cons of Substack vs WordPress
Now, let’s check out the pros and cons of WordPress and Substack.
Pros and Cons of Substack
Pros of Substack
- Has a user-friendly interface that is easy to navigate.
- Also comes with a built-in audience that subscribes to and reads content on the platform.
- Allows you to monetize content easily by offering paid subscriptions to their newsletters.
- Ability to connect with the audience through comments and discussion.
Cons of Substack
- Substack offers limited customization options for newsletters.
- This platform owns the audience data, so you can’t export or use it for other purposes.
- It also takes a 10% fee on all subscription revenue.
Pros and Cons of WordPress
Pros of WordPress
- It has a huge community of developers, designers, and users.
- Provides great flexibility and customization options.
- Easy for search engines to crawl and index your content.
- You own and control your website and all its content.
Cons of WordPress
- You need to keep your WordPress installation, plugins, and themes up to date.
- You’ll need to purchase a hosting plan and domain name separately.
With that, let’s sum up our comparison article in the next section.
Final Verdict – Which is the Better Content Management System?
Ultimately, the decision of which platform to choose comes down to what is best for you. It’s important to take into account various factors, like your business objectives and financial constraints.
There’s no one-size-fits-all solution when it comes to selecting the right platform. And it’s important to consider your unique needs and requirements. Hence, let’s have a quick overview of choosing between Substack vs WordPress.
Let’s look at the circumstances why you need to choose WordPress:
- You want complete control over your website content.
- When you need a highly customizable website.
- Suppose you want to only add the features to your website that you want.
- To get control over your website hosting solutions.
- Also, if you want to optimize your website for search engines.
On the other hand, these are the reasons why you should choose Substack:
- If you want to start a newsletter with a subscription-based model.
- To build and monetize your content without hassling for setting up a website.
- To get access to built-in email marketing tools.
- You want to use a platform that offers a simple user interface to create and distribute your content.
- Also if you want to focus on creating content rather than managing websites.
Hence, we believe that you’ve got a clear understanding of your business needs and requirements. Based on that, you can choose the platform that best aligns with your goals.
Overall, both platforms perform well in what they do!
If you’re thinking of creating a website on your own, then you should definitely check our article on how to make a website to get a more detailed idea.
Conclusion
That’s all, guys! We’ve come to the end of this article.
Hopefully, you’ve understood the differences between Substack vs WordPress after reading this
We hope that after reading this, you’ll have a clear idea of which platform suits your needs best. We value your opinion, so please don’t hesitate to leave a comment. Also, let us know which platform you chose.
If you’ve any more queries, then feel free to ask us. We’ll get back to you as soon as possible. Also, share this article with your friends and colleagues.
You may also like our article on the best blogging and content marketing online courses and headless CMS vs WordPress.
Do follow us on Facebook and Twitter for more helpful articles.

